

I used the smallest hexagon, but if you use the larger hexagon, the quilt will go together faster because of the bigger size.

I already had these squares cut in my scrap pile from past projects.

Cutting mat on top...

then just roll it through Accuquilt machine.


Fast and accurate!

Now we're going to make a Grandmother's Flower Garden using the hand piecing method called English Paper Piecing.

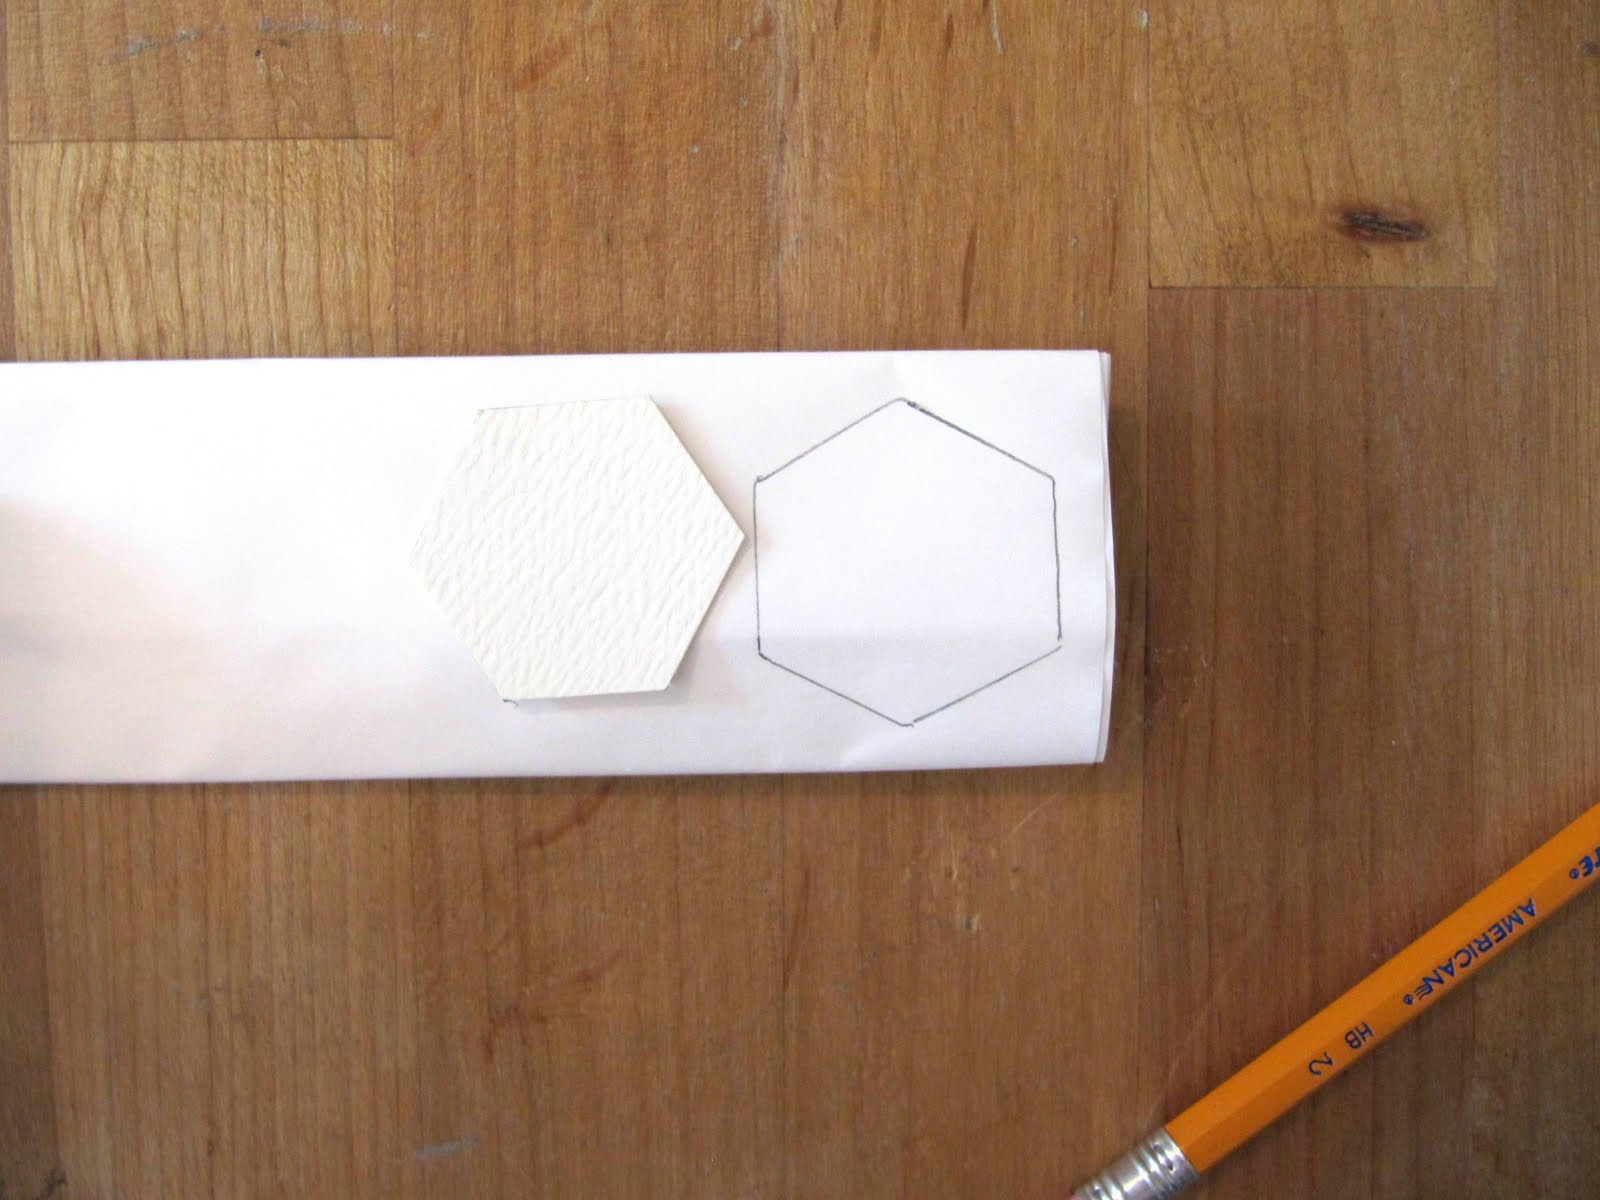
First you need a template to make the papers that you'll be using. Trace a hexagon on card stock.

Cut it out.

The paper pieces have to be 1/4 inch smaller all the way around, so place your quilt ruler on the edge and draw a pencil line.

Keep moving around the hexagon, drawing the pencil line a 1/4 inch from the edge.

until it looks like this.

Now trim all the edges away on the lines.

Here's the final template for the smaller hexagon.

You will need several papers to work with, so use this main template to cut all the rest.

There are so many papers you can use: old mail, magazine inserts, envelopes, but I love freezer paper.

Freezer paper can be found in the aisle where they sell aluminum foil. It is amazing for applique too. Freezer paper has a unique quality that it can be ironed on fabric (shiny side down on the fabric). It's used for stability, but just peels right off and can be re-used over and over again.

To make the hexie papers, just fold a piece of freezer paper like an accordion.

Trace the hexie shape.
Staple each hexie, so the papers don't move while cutting.

This next step with a hole punch is optional.

If you punch a hole in the papers, you can use a little pick or stick to pop out the papers at the end when you are done sewing.

Cut them apart and remove the staples.

See this shiny side...that has to be ironed shiny side down on the wrong side of your hexagon. If you iron it the other way...you'll hate me and so will your iron!!

Center it on the wrong side of hexagon and iron it down.

All set to sew.

Fold over one edge of the fabric.

then fold over the next edge over that to form a mitred fold.

Now take your needle, with knotted thread and take up the fabric at the corner where it over laps.

Here's the most IMPORTANT part. Do not let the needle go through to the right side of the fabric, just take up the fabric on the back side. If there is no thread on the front, you will save thousands of hours pulling the thread out like it's done in the original method.

Pull til knot is secure.

Now take up another little stitch in the same place...

to form a loop.

Pull slightly to secure.

Now move over to the next corner, fold over the edge and repeat the small stitch again.

Go through fabric again, but not to the front...

form the little loop...

and secure with a little tug.

See, all the threads are on the back.

Not the front. Nothing to pull out later. Yahoo!!!

Here's a mini flower all set to sew together.

Here's the back. Don't take the papers out until all side of the hexagon are sewn to another hexagon. You need the papers in there for support and stabilizing.


Here are the steps to sew the flower together: Take the middle hexie (yellow) and one of the petals right sides together.

and hand sew with a whip stitch across the edge, just taking up a little of both hexagon fabrics as you go. I used red thread so you could see, but use a thread that matches so it won't show through to the front. Knot, but don't cut the thread.

Open up the 2 that you just sewed together...

Add another purple hexie and sew up on the side where I'm pointing.

You'll need to place the new petal right sides together.

Now take the thread that is still attached and start whip stitching that side.

Stitch to the end , knot and cut the thread.

Open up that new petal.

Add the third petal and sew across that bottom and up to the right where I'm pointing.

Each line of stitching follows this pattern

and here's the last section.

Tah Dah...this process is alot faster than it looks in this tutorial. You know me...I love taking pictures of every step! Keep making hundreds of these in different fabrics and sew them together into an heirloom quilt.

This is a small one. Another version of the Grandmother's Flower garden can be seen here. It has another row of petals and then a path of green or another color.

Here's a picture of the back all stitched up.

If you're not into making a large quilt, you can take two of these flowers and place them right sides together...

I used one red flower and one off white flower here.

Whip stitch the outside egde all the way around. Leave on opening to turn it right side out.

Stuff it for a reversible pin cushion.


Add a ribbon for an ornament or loop a key ring on the ribbon for a cute little key chain for a sewing friend.

I hope you'll give paper piecing a chance. It's great to keep little baggies or small sewing kits of these petals and flowers in the car, in your purse or any where you'll have a few extra minutes to do a little hand sewing. How about your child's dance practice or sporting game, how about in the car on a long trip ( I have to take motion sickness pills to sew in the car, but it works for me!) I also sew in the doctor's waiting room...any where you can steal a few minutes.
This is such a wonderful, relaxing hobby. You really should give it a try. Do a google search for images of Grandmother's Flower Garden and get inspired to start one of your own.
See you soon,
~Karen~

very nice tutorial I'll have to try that way, I did some years ago , but I cut the pattern with paper and placed it on top of the fabric and cut the fabric larger abouat one 2cm or so I just drew lines with a pencil and cut it out It works either way ,but your tutorial is so neat and easy to follow.I invite you to my blog.
ReplyDeleteThat's such a terrific and detailed tutorial, thanks for taking the time.
ReplyDeleteThank you very much for taking time to edit this tutorial. The part where you secure the paper with the fabric is tremendously helpful for me. I'll bookmark this tutorial. Great job!!
ReplyDeleteWow , you did a great tutorial , I love it !! So clear. Thanks so much from Spain
ReplyDeleteEXCELLENT tutorial, Karen!!!
ReplyDeleteI do my english paper piecing that way too ! But I don't use freezer paper. I recycle those office documents!
ReplyDeletehttp://pennyshands.blogspot.com/
Very nice tutorial! I do it the same way. However I can see my whip stitches from the outside. Any tips on how to make them as hidden as yours? :-)
ReplyDeleteThank you. I was wondering how all that worked!
ReplyDeleteWhat a wonderful tutorial, thank you for taking the time to do this! I've been reluctant to do a hexagon quilt because it looks a bit intimidating but I think i will give it a go! I only hope my husband picks up on my Accuquilt Go clues and buys me one for Christmas! :)
ReplyDeleteLove Your tutorial, It was very helpful. Thank you.
ReplyDeleteWOW! Now that is what I call a tutorial!!!!
ReplyDeleteThank you!
I am off to buy a hexagon die! Thank you!
Great tutorial, it makes me feel like I can do it, thanks!
ReplyDeleteHi, I have to thank you so much for your fantastic tutorial because now even I can make these beauties! Thank you, thank you, thank you! Hope you day is a wonderful one.
ReplyDeleteHugs...
Bobbi
Great tut, guess I need to dig out those hexies I cut out long ago and get started!
ReplyDeleteThat is a great tutorial, those always confuse me, lol.
ReplyDeleteGreat idea for using up scraps too.
Debbie
Great tutorial. I have always loved the hexagon quilts.
ReplyDeleteKaren you naughty girl, your're going to make me start another
ReplyDeletequilt. That is a great tutorial.
Thanks, I have grandmothers flower
garden cut out but it's been cut
out for about 15yr. so I guess I
will have to sew it up now.LOL.
That is what I use too freezer
paper because you can iron it on
and it stays. ":O)
Hi Karen, I love a good tutorial with such details, I'm going to be linking back to this one for sure!
ReplyDeleteThanks so much for putting the time and effort into it you've inspired me:
Valerie
http://www.PastimesOnline.ca/Vals-Quilting/
Hi Karen!
ReplyDeleteI was just wondering if Carolyn (from GO!) contacted you about starting your tutorials and your give away? I am wondering if I can start mine or if I need to contact her or if I should just GO! for it!! Thanks!! (isn't the GO! great!!)
Paulette
Great tutorial! Thank you.
ReplyDeleteDarlis
Hi Karen, I emailed you privately with another option of producing the FP templates...it was too long for here- not sure if it will end up in your spam or not...but it's me! am enjoying your blogs!!! Sandy
ReplyDeleteGreat Tutorial, Karen ! ! !
ReplyDeleteLove your method of basting, such a simple modification that results in hours of time saved.
Now, all I have to do is win a GO! in one of the wonderful giveaway.
Hugs,
Gerry
Karen, I love this. I have never done these but have always wanted to do them. Now I am going to have to sit down and try this! Thanks, I have bookmarked this post! STeph
ReplyDeleteWonderful tutorial again Karen! Thank you!
ReplyDeleteGreat tutorial! Thank you!
ReplyDeleteGreat tutorial and just in time for when I win my GO. ;-)
ReplyDeleteLove the tutorial....I am doing a bunch for when I travel but I am using cardboard from cereal boxes and then I just use maskin tape to tape the fabric to the cardboard...
ReplyDeleteThis tutorial is exactly what I have been looking for! I just started making hexies a few days ago, but was stumped on how to get them together. Thank you so much!!
ReplyDeleteThanks so much for all the pics and the wonderful explanation!! I don't have an accuwhatchamacallit, but I do think I could print a template from the computer. I am needing some relaxation. I think I may make a couple of these. Thanks!!
ReplyDeleteGreat tutorial. Man, that gadget sure would be good to have since I have tendonitis in my elbow.
ReplyDeleteI love this tutorial! I just started on some hexies and I'm going to try your method on the next set! Thanks for taking so many great pictures and sharing them!
ReplyDeleteWHAT A WONDERFUL TUTORIAL!!! It's so clear!
ReplyDeleteIt's a very good idea only sewing the corners, it will save me a lot of time.
I love to have something to do by hand qhile I'm waiting, but my children are ashamed if I tale it to the doctor's. I do what you say while I'm waiting for them to finish their boating or English lessons.
Thank you very much and greetings from Spain
Thank you very much
I pack a little bag of hexies every where I go! Thanks for all the helpful ideas. I never thought about putting a hole to help pop them out. I have really enjoyed reading your blog.
ReplyDeleteUgh! I cant believe this tutorial wasnt around when I started MY grandmother's flower garden quilt 6 years ago!!
ReplyDeleteExcellent tutorial! I've just made my first hexie, and this was such an easy-to-follow resource. Thank you so much. :)
ReplyDeleteI noticed on the Die-cut template that there are two sizes...the bigger is for fabric, and the small is for the paper... but Thanks for showing how to cut out our own template and reminder of 1/4" size reduction!
ReplyDeleteI really like this freezer paper idea. Could you take it a step further and place the hexagon upside down on the fabric and press over the edges? I'm going to try that at least once! Dawne
ReplyDelete