Showing posts with label before and afters. Show all posts

Monday, November 10, 2014

Spray Painting Christmas Ornaments…Old to New

I know it's only the beginning of November, but I have been working on Christmas for the past few weeks. I have learned over the years that I need to do things early and not wait to the last minute. I decorate 12 trees for every room in the house and it's a labor of love.

I love using all my decorations over and over in different ways each year. If you use something in a new way or in a different room, it seems like you have a whole new look. I also like creating a new themed tree by using things I already have, but buy a few new things to add to it and make it spectacular!!

I've always wanted to have a red and aqua colored tree. I have a ton of different red ornaments, but no aqua, so here's what I've come up with! I already had that fabric too, so maybe a tree skirt will be in the making.

spray painting Christmas ornaments

A box of old plastic ornaments and a $3.59 can of spray paint!!

spray painting Christmas ornaments

Let the spray painting begin…

Thursday, May 15, 2014

Commencement Gown Transformation…Grandma to Gorgeous

Our youngest daughter Kelsie graduates from college this coming Saturday!! We just can't believe how fast time flies. Courtney graduated last year and it seems like yesterday.

This past Saturday was Kelsie's commencement ball. She searched forever for "that" certain dress that she had in her head, but couldn't find it. We looked online and found some, but they were either too far away to be shipped in time or way too expensive!

Kelsie went to a small seamstress/dress shop in the town where her university is and found this dress that was the right color and lacy fabric, but not the halter, backless, mermaid style she wanted. She sent me this picture of her in the dressing room and asked what could be done. I told her to ask the seamstress, who was also the owner of the shop, if she could take the lace off the sleeves and use it to lengthen the dress. They would also need to narrow the bottom to give it a mermaid look. The back was open, but Kelsie wanted it altered more.

Here's the "before" in the dressing room…(love the black socks she had on!!)

before and after gown alteration

You are not going to believe the fabulous transformation the seamstress did!!

Tuesday, May 6, 2014

Spray Painting Before and Afters…Lots of Ideas

Hi everyone! I've been collecting a box full of things that needed to be spray painted to give them a whole new life. Some things we've had for years and others are newly purchased.

It's amazing what a little spray paint and a few minutes of your time can do!! Here are some of the things I worked on this past weekend.

The before pictures!!

spray painting before and afters


spray painting before and afters


spray painting before and afters


spray painting before and afters

I just love the transformations…

Monday, June 17, 2013

Our Kitchen Remodel...Cabinet Refacing

Hi everyone!! I know that all of us who are home owners go through different stages of remodeling over the years. The one common factor among all of us is...MONEY!! Our home was built in 1975 and remodeled by the second owner in the 80's. We bought it in 1993. We loved the layout and flow of the floor plan, but we knew it needed work.  Changing it to our own design style would take time and money. Courtney was 2 years old and Kelsie was just 6 months, so not only was money a factor, time was the biggest with 2 little ones.

Unless you build your own home, buying an older home is never exactly what you want. You can change it to suit your own design style, but it will either take "money" to pay someone to do it or "time" to do it yourself. We changed the colors, removed wallpaper in every room, bathroom remodels and flooring ourselves over the first few years, slowly but surely.  The kitchen, however, was always my top priority.

Then life goes on...and on, and on. That chuck of money was just never there for the kitchen. In 2004, we added 2 big additions to our home so my parents could move in with us. We took care of my mom for just 3 years before she passed away from Parkinson's Disease. My dad is still with us. The kitchen needed to wait again.

Twenty years after moving in, Courtney has graduated from college and Kelsie has one more year to go. The reality is we will never have a chunk of money to do the kitchen, but if we ever want to down size in the future, the house will not sell with a 1985 kitchen.

We bit the bullet and finally did something this past February. It was NOT a total gut of the kitchen, because that was just beyond our means. We elected to do cabinet refacing and are SO HAPPY we did. It's not a DIY project, but I wanted to share.

Here is the AFTER of our kitchen...

kitchen remodel

Here's the BEFORE, the night before the contractors came in to do the demolition.

kitchen remodel

Saturday, May 11, 2013

Courtney's Room..Spray Painting Ideas

Hi everyone. Today I want to share some spray painting ideas. I painted Courtney's room gray before Christmas and made the lined drapes with the duvet covers You can click HERE to see that post if you missed it.

This weekend, I'm trying to finish up a few more projects before Courtney graduates Saturday, May 18th and comes home. I have a few sewing projects left which I'll share with you this week too.

Here's the corner I worked on yesterday.  We had everything, just tweaked them with spray paint. (as a side note, the gray on the walls is all the same throughout the whole room...it just looks like 2 colors with the sunlight)

spray painting ideas

This is the before picture I found from Christmas 2011 of the pink paint. Great color when she was in middle school through high school, but the gray is much better for a 22 year old. Lol


I have a few painting ideas and one quick craft project for the cork board...so pop in for a visit.

Saturday, October 6, 2012

Raising Your Curtain Rods...Unhemming Too

Hello everyone...

Thought I would share a little project that I have wanted to do for years and finally made it happen. We moved into this house over 19 years ago. When you're moving in, your goal is to just get your life organized and functional..."where" I hung my curtain rods was not high on my "to do" list, so they just went up.

Well, for years I thought the rods were hung too low. We had valances at first then these drapes. There never seemed to be a good time, money wise, to change all of them or even afford the fabric (I really wanted, $40.00 per yard) to make them, because they would need to be longer, the windows are wide and they needed to be lined!! Our 2 daughters are in college now and there still isn't extra money to go out and change the drapes. I desperately wanted to move the rods higher, so here's my solution.

I forgot to take a before picture of the curtain rods, but this is a picture of one room on the left not done and the finished room on the right, where the curtain rods is raised up where I wanted it.


Here is the after, where both rods are higher.

See the drapes in the room on the right...perfect length right?


Here's how I did it.

First measure the existing hem on your drapes. Mine is 4 inches...that's how I knew I could raise my curtain rod 4 inches higher.


Up go the rods 4 inches and a little paint job to patch that spot.


Now this is what I was left...drapes that are 4 inches too short.


Ahh, but not for long!


This is what normal store bought drapes look like.


The lining isn't attached at the bottom, so just lift it up and start picking the hem apart.

You can use a seam ripper ...


or the point of your scissors to snip the threads.


Open up the hem and you will see a narrow fold of about a half inch. This is your new hem. Not ideal, but it will do to hold me over until I can buy or make new drapes.


You also have to pick out the corner folds.


This will release the whole hem.


Done. New hem four inches lower.


I used Stitch Witchery to iron down the new hem and side seams. It is a fusible web to iron things together.


Just open seam and place a piece of the Stitch Witchery, fold fabric over and iron.


Done!!


Perfect length and no one will ever know I have a very tiny hem behind there. Lol


Having the rods higher might not look like much in the pictures, but it made a huge difference in person.


Don't be afraid of change in your home. If you don't like something, think of a way to make it happen...for me, not using money was a kick in the pants to get my brain working for a solution!

Now to paint that tv stand black and repair the holes in the walls!

Have a great day,
~Karen~

Pin It

Saturday, September 29, 2012

Another Waiting Room Before and After...

Hi everyone!! A few weeks ago, I shared a waiting room I decorated for the dental office I work in. Click HERE to see that post. Well, I wanted to share the second waiting room I did for our new office. I had so much fun doing both...different styles in each office, because of the style and ages of the buildings.

Here is the before of the room...


and here's the after...


View from inside the room.


This is the same wall on the right above.


Leather club chairs from Target just like the other office.


Dining room chairs from Marshall's.


Table from TJ Maxx and lamps from Marshall's $30 with the shades!!


Little desk from Ikea and thrift store chair. Rug is from Target...I think $80


The windows in this older home are just beautiful. They were hidden behind vertical blinds. The wood trim, crown molding and details are the reason for the different feel than the other office.


This is the kid's corner.


All the accessories are from Marshall's. The wire baskets were all different colors, so I spray painted them a galvanized metal. Aren't the little club chairs so cute.


All the lamps from Marshall's have pretty burlap fabric shades. Love them!!


Great new chandelier to replace an ugly round ball light. This is from Home Depot $80. Just need to turn the seams on the shades, now that I look at it!!


I have a tutorial for these lined drapes coming up.


Double rods and for drapes and sheers. Sheers are from Ikea...$5.00 for a pair!!


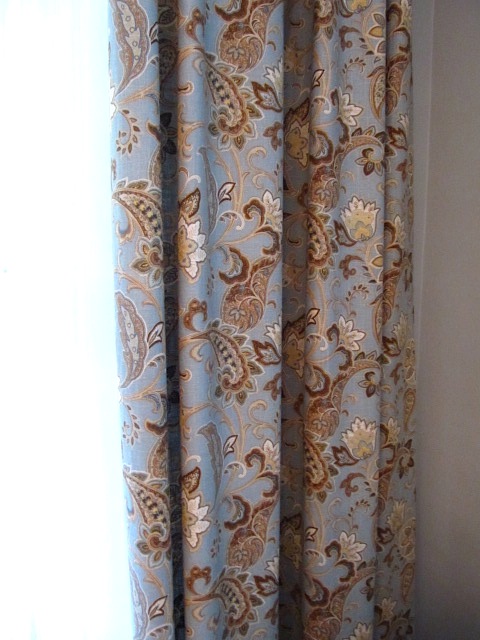
Fabric is from Joann's. Needed the coupon, but it came to about $22.00 per yard. I was sick cutting it! LOL


Lined drapes were easier than I thought.


Hope you enjoyed the tour.


I know this is a waiting room, but maybe you can use some of these ideas in your own home.

Have a great day,
~Karen~

Pin It
Related Posts Plugin for WordPress, Blogger...

LinkWithin

Related Posts with Thumbnails