Showing posts with label Accuquilt Go. Show all posts

Monday, July 13, 2015

Accuquilt Orange Peel Die...Love it!!

Hi everyone! I'm back to share another Accuquilt Die and it's a great one! It's called the Orange Peel. It is now my favorite die from Accuquilt. Actually the hexagon dies are my favorite, but this new one is tied for first place!!

The Orange Peel die is an appliqué die, so the quilts or projects go together very quickly. Today, I am showing a couple ideas and placements, but I also have a few "unconventional" ideas using the die up my sleeve. I was trying to complete the unconventional project for this post, but you know how life gets in the way! I'll definitely share that one soon.

Here's what I made for today's post...a table runner. I also need your help at the end with how to finish the edges.

accuquilt orange peel die

accuquilt orange peel die

Come on in to see a few tips using the die and making projects of your own...

Tuesday, March 3, 2015

Accuquilt Go Big Blog Hop...Double Wedding Ring Block

Hi everyone! I am SEW excited to share this blog post with you today. I have been asked by the Accuquilt Go company to be part of the Go Big! Blog Hop. There are 10 other bloggers in this hop, so I hope you can "hop" over to their blogs too and see the wonderful projects that they've shared. Links to their blogs are at the end of this tutorial.


I know some of you are familiar with the AccuQuilt Go and all the fabulous dies they have to go with it, but AccuQuilt has rocked the quilting world with 2 new features...a larger size unit that cuts up to a 12 inch die and...wait for it...IT'S ELECTRIC!!!!! The machine does all the work, so it's easy on your arm!!

Accuquilt Go Big Electric!!!

AccuQuilt Go Big

The unit packs a punch, but it's still streamline and small enough to store away if you don't leave it out full time in your sewing room.

AccuQuilt Go Big

It folds up to just 5 1/2 inches wide and has a handle to carry it to a friend's house, retreat or quilting class.

AccuQuilt Go Big

When you're ready to use it, it lays down on the table...

AccuQuilt Go Big

and with one hinged section...

AccuQuilt Go Big

lays flat and you are ready to GO!!!

AccuQuilt Go Big

Easy access on the front for the on/off switch and has a safety light too. When it thinks fingers are in the way, it won't run.

AccuQuilt Go Big

The opening for the die to roll through is very large.

AccuQuilt Go Big

It's over 14 inches across. Perfect for all the new 12 inch dies and for other size dies you may already own.

AccuQuilt Go Big

Here is the new large 12 inch double wedding ring die that I've chose to demonstrate for you.

AccuQuilt Go Big

but all other dies work great too...like this 10 inch clam shell.

AccuQuilt Go Big

or even 2 different 6 inch dies at once.

Talk about a time saver, cutting 2 different quilts at the same time!

AccuQuilt Go Big

Now that I've shown you the actual unit, let's get started with the die that I've chosen and some tips and tricks with using it. NOTE: I was given the unit and the die from AccuQuilt and the fabric from Andover, but the opinions about everything in this post are my own, honest words.

AccuQuilt Go Big

Here is the Double Wedding Ring die that I selected. I've never sewn a Double Wedding ring block before, because I was always intimidated with cutting all the parts and pieces with a template.

This die cuts all those curves and different sized pieces in seconds.

AccuQuilt Go Big

Here is the beautiful fabric sent from Andover from their Downton Abbey line. I just love it!! The fabric that is...I love the show too, but I'm so far behind watching it, I have to catch up!!

AccuQuilt Go Big

I only added the white for the contrast fabric.

AccuQuilt Go Big

I measured all the pieces on the die to see how wide I needed to cut the fabric.

AccuQuilt Go Big

Lay fabric over the die shapes that are clearly marked in a light gray color.

The unit can take up to SIX layers of fabric!!

AccuQuilt Go Big

Cover with cutting mat...

AccuQuilt Go Big

and just send it through the opening on the unit.

AccuQuilt Go Big

It automatically goes through the rollers itself, pressing the blades through the fabric up against the cutting mat.

AccuQuilt Go Big

Just catch it on the other side.

AccuQuilt Go Big

Cuts in just seconds!!

AccuQuilt Go Big

Here are the shapes you need for the block...

AccuQuilt Go Big

but here are the scraps that you can use to cut more shapes.

AccuQuilt Go Big

One of those elongated football shapes can fit in the extra side pieces.

AccuQuilt Go Big

Just cut up the scraps and lay them over the shape you need.

AccuQuilt Go Big

When I'm just cutting one of the smaller shapes on a bigger die (not every shape on the die), I place one of my smaller cutting mats over the area to be cut.  I'll explain why in a different photo in the post.

AccuQuilt Go Big

Now I have more shapes cut from just scraps.

AccuQuilt Go Big

Now for the other shapes on the die that make up the ring. I cut my fabric strips at 3 1/2 inches wide to cover all the shapes.

AccuQuilt Go Big

I'm using a scrappy look to my block, so I layered different fabrics at the same time.

Here's another fabric saving tip.

Keep the selvedge edges at the top and...

AccuQuilt Go Big

and the folded edges at the bottom where the fold will NOT be cut by another shape.

AccuQuilt Go Big

Layered on, ready to be cut.

AccuQuilt Go Big

Here's why I use a smaller cutting mat for smaller areas on a big die.

I am just cutting those few shapes and I'm thinking it might save the blades on the other shapes when I'm not using them. I know there wouldn't be any fabric in there with the large cutting mat, but it's just a thought!

Accuquilt Go Big

Here are all the cut shapes for the rings of the block.

AccuQuilt Go Big

This is the excess folded fabric.

AccuQuilt Go Big

Cut the folded edge away...

AccuQuilt Go Big

Open it up, iron flat and lay it on your desired shape to be cut. You'll get 6 more pieces from scraps!

AccuQuilt Go Big

Here is the wedding ring block laid out, waiting to be sewn...

double wedding ring block

This is the finished block!! My first one. I know it's not perfect and the iron was my best friend, but I LOVE IT!!  I will share a separate post on how to assemble a block in a day or two. There were lots of pictures and would have made this post too long.

I was going to just quilt this one block, bind it and use it as a place mat or a decorative mat under a candle, tray or on a side table. However, I love the fabric from Andover and the Downton Abbey line,  so I'm thinking I might make more rings and see how big I can get this!!

If you click HERE, you can sew your own Double Wedding Ring Table Runner with AccuQuilts free pattern!!

double wedding ring block


This is the list for the other Blog Hoppers. Please stop by and visit all the different blocks and projects they are sharing!! So many wonderful women sharing their talents.

Monday Feb. 23rd: Bea Lee - http://www.beaquilter.com/ - GO! Big Snails Trail – 12” Finished
Tuesday Feb. 24th – Haley Pierson Cox – The Zen of Making - http://www.thezenofmaking.com/ - GO! Big Circle – 4”, 6”, 7”, 8”
Wednesday Feb. 25th – Lee Monroe - http://www.maychappell.com/ - GO! Big Double Wedding Ring – 12 ½” Finished
Thursday Feb. 26th – Angela Pingel – Cut To Pieces - http://cuttopieces.blogspot.com/ - GO! Big Churn Dash – 12” Finished
Friday Feb. 27th – Jodi Nelson – Pleasant Home - http://www.pleasant-home.com/ - GO! Big Square – 10” (9 ½” Finished)
Saturday Feb. 28th – Connie Campbell – Free Motion by the River - http://www.conniekresin.com/ - GO! Big Snails Trail – 12” Finished
Sunday March 1st – Sherri McConnell – A Quilting Life - http://www.aquiltinglife.com/ - GO! Big Churn Dash – 12” Finished
Monday March 2nd – Belinda Karls-Nace – Blue Ribbon Designs - http://blueribbondesigns.blogspot.com/ - GO! Big Square – 10” (9 ½” Finished)
Tuesday March 3rd - Karen Way – Sew Many Ways - http://sewmanyways.blogspot.com/ - GO! Big Double Wedding Ring – 12 ½” Finished
Wednesday March 4th – Elizabeth Evans – Simple Simon and Co. - http://www.simplesimonandco.com/ - GO! Big Churn Dash – 12” Finished


Thank you to Kate from Accuquilt for letting me be part of this wonderful project and a big thanks to all of you for stopping by my blog and all the other blogs for a visit!!

Have a great day and happy sewing,
~Karen~

Pin It

Friday, February 14, 2014

Machine Sewing Apple Core Quilt…With I Spy Fabric

Hi everyone! I sewed this I Spy quilt last month and wanted to share the tutorial on how to machine sew the apple core block. First, if you are new to quilting, I Spy fabric is novelty fabric that has cute little things on it that kids love to look for or spy for…"I spy a kitty", "I spy a raspberry".

The apple core block is an old pattern (I think from the 1930's) that was traced, cut out by hand, then hand sewn! However, with the invention of rotary cutting and the plastic templates or the Accuquilt Die Cutter, it is very easy to cut them out and machine sew them together! The apple core is a one-patch quilt, meaning one shape used throughout the whole quilt. A charm quilt is a one patch quilt, but sewn with many different fabrics without using the same fabric twice.

Here is the baby or children's nap time quilt I started…it's just a quilt top right now, because I will add to it as I buy more fabrics.

apple core quilt

Easy to put together and makes a great baby gift…

Saturday, January 25, 2014

Get The Most From Your Fabric When Using Accuquilt Go...

Hi everyone. Last week I shared a post with the Accuquilt Go cutter, their new dies and an English paper piecing project...click HERE if you missed it. Today, I don't have a tutorial for a specific project, but more of a helpful tip to get the most out of all your fabric when using any of the Accuquilt Go Dies and cutters.

If you sew or quit, you know fabric is expensive and we don't want to waste a single square inch of it. This post will not only show you how to get the most out of your fabric, but you can potentially be cutting shapes and patterns for several different quilts at the same time.

Money saving, fast and efficient…our sewing time is precious, so let's not waste it!!

In this post, I will be using the 8 inch clamshell die, the 4 inch clamshell die and the hexagon die for paper piecing.

I will be using fabric that is 10 inches by 10 inches square and 4 layers thick.

You can get all this cut in a matter of minutes!

save fabric with accuquilt go

Come on in and see how easy…

Wednesday, January 15, 2014

New Accuquilt Go Dies…Hexagon English Paper Piecing Tutorial

Hi everyone! Over 4 years ago, I received an Accuquilt Go Fabric Cutter and die sets from the wonderful people at the Accuquilt Company to try and see how I liked it. Well, I just didn't like it…I LOVED it and still do. It's fast, accurate and so easy to use. It is a permanent fixture in my sewing room and I have bought several new dies for it my self over the years.

If you are not familiar with the Accuquilt Go! Fabric Cutting system, it is a portable unit with rollers and manual handle. The dies are shapes set in foam with the blades or cutters hidden in the foam. You place the fabric on top of the die, cover with a cutting mat and send it throughout the rollers. In a matter of seconds, your fabric shapes, strips or patterns are cut for you. Fast and easy.

Well, a few months ago Ellen, from Accuquilt, contacted me again to try their new set of dies. They are amazing...so many new shapes and sets that every quilter will love. They are familiar, traditional shapes and patterns that would normally take so much time to cut, even with a rotary cutter. At the time I received all the dies, my schedule was crazy and then the holidays came in full force, so I haven't had the time until now to play with them. I'd love to share them with you today!

Here are all fabulous new dies…


The half hexagon, hexagon and the equilateral triangle all have 4 1/2 inch on the sides, so they will all coordinated and go together to form more patterns and quilt designs!


Come on in to see all the dies and today's tutorial for the English Paper Piecing...

Wednesday, September 1, 2010

We Have a GO!!! Winner...

First, I would like to thank everyone who entered this give away. There were so many wonderful comments and new followers. That was my favorite part...meeting so many new people. I would also like to thank the Accuquilt Go Cutter company for giving me my own Go cutter and for generously giving me another to give away. I said this before in other give aways that I've had...I wish I were rich so everyone can receive one, but unfortunately there can only be one winner. So with out further ado...the winning number is 372 who is Norma from...

space
This is a new to me blog and it's wonderful...so pop over there and visit this great blog. Give her a big congrats too!!
Thanks again to all,
~Karen~


Wednesday, August 18, 2010

English Paper Piecing Tutorial...

I have "HA"...Hexagon Addiction, so I thought I would get you hooked too!! I know I've done an English Paper Piecing tutorial before, but it's even easier with the Accuquilt Go cutter because it cuts all the fabric for you.


I used the smallest hexagon, but if you use the larger hexagon, the quilt will go together faster because of the bigger size.


I already had these squares cut in my scrap pile from past projects.


Cutting mat on top...


then just roll it through Accuquilt machine.


Fast and accurate!


Now we're going to make a Grandmother's Flower Garden using the hand piecing method called English Paper Piecing.


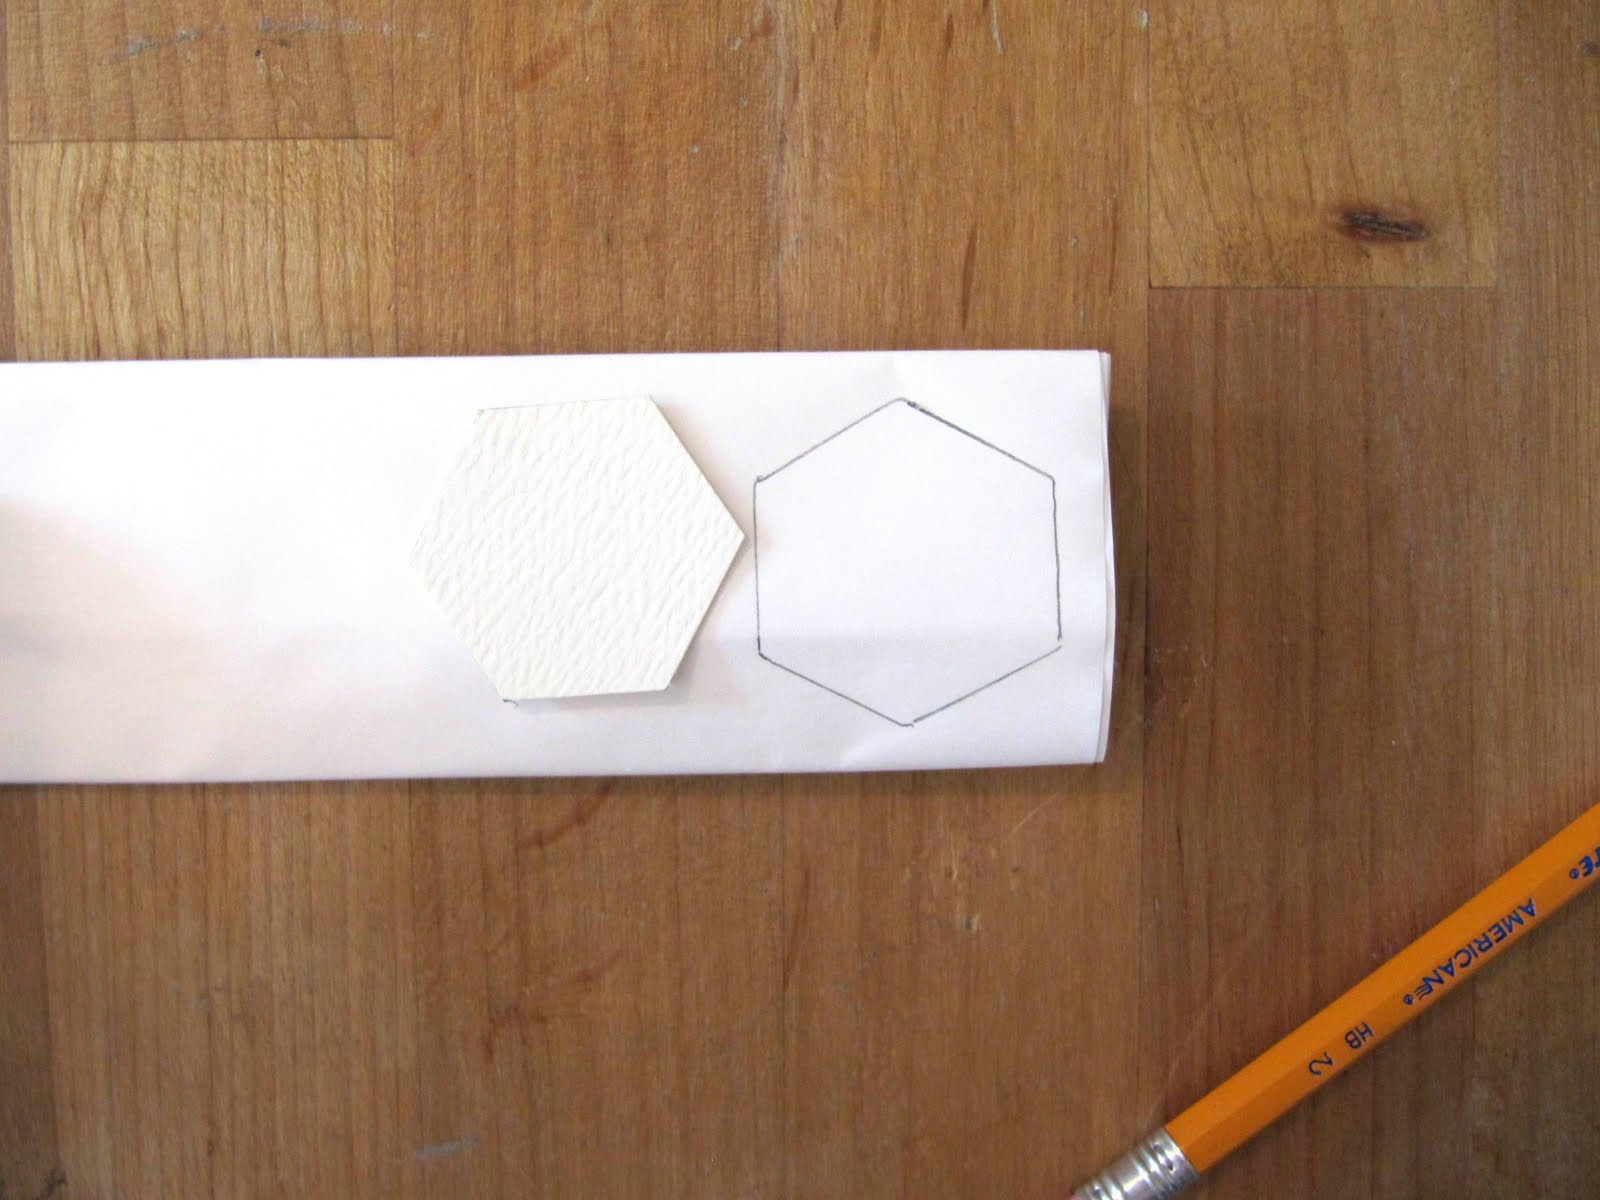
First you need a template to make the papers that you'll be using. Trace a hexagon on card stock.


Cut it out.


The paper pieces have to be 1/4 inch smaller all the way around, so place your quilt ruler on the edge and draw a pencil line.


Keep moving around the hexagon, drawing the pencil line a 1/4 inch from the edge.


until it looks like this.


Now trim all the edges away on the lines.


Here's the final template for the smaller hexagon.


You will need several papers to work with, so use this main template to cut all the rest.


There are so many papers you can use: old mail, magazine inserts, envelopes, but I love freezer paper.


Freezer paper can be found in the aisle where they sell aluminum foil. It is amazing for applique too. Freezer paper has a unique quality that it can be ironed on fabric (shiny side down on the fabric). It's used for stability, but just peels right off and can be re-used over and over again.


To make the hexie papers, just fold a piece of freezer paper like an accordion.


Trace the hexie shape.


Staple each hexie, so the papers don't move while cutting.


This next step with a hole punch is optional.


If you punch a hole in the papers, you can use a little pick or stick to pop out the papers at the end when you are done sewing.


Cut them apart and remove the staples.


See this shiny side...that has to be ironed shiny side down on the wrong side of your hexagon. If you iron it the other way...you'll hate me and so will your iron!!


Center it on the wrong side of hexagon and iron it down.


All set to sew.


Fold over one edge of the fabric.


then fold over the next edge over that to form a mitred fold.


Now take your needle, with knotted thread and take up the fabric at the corner where it over laps.


Here's the most IMPORTANT part. Do not let the needle go through to the right side of the fabric, just take up the fabric on the back side. If there is no thread on the front, you will save thousands of hours pulling the thread out like it's done in the original method.


Pull til knot is secure.


Now take up another little stitch in the same place...


to form a loop.


Pull slightly to secure.


Now move over to the next corner, fold over the edge and repeat the small stitch again.


Go through fabric again, but not to the front...


form the little loop...


and secure with a little tug.


See, all the threads are on the back.


Not the front. Nothing to pull out later. Yahoo!!!


Here's a mini flower all set to sew together.


Here's the back. Don't take the papers out until all side of the hexagon are sewn to another hexagon. You need the papers in there for support and stabilizing.


Here are the steps to sew the flower together: Take the middle hexie (yellow) and one of the petals right sides together.


and hand sew with a whip stitch across the edge, just taking up a little of both hexagon fabrics as you go. I used red thread so you could see, but use a thread that matches so it won't show through to the front. Knot, but don't cut the thread.


Open up the 2 that you just sewed together...


Add another purple hexie and sew up on the side where I'm pointing.


You'll need to place the new petal right sides together.


Now take the thread that is still attached and start whip stitching that side.


Stitch to the end , knot and cut the thread.


Open up that new petal.


Add the third petal and sew across that bottom and up to the right where I'm pointing.


Each line of stitching follows this pattern


and here's the last section.


Tah Dah...this process is alot faster than it looks in this tutorial. You know me...I love taking pictures of every step! Keep making hundreds of these in different fabrics and sew them together into an heirloom quilt.


This is a small one. Another version of the Grandmother's Flower garden can be seen here. It has another row of petals and then a path of green or another color.


Here's a picture of the back all stitched up.


If you're not into making a large quilt, you can take two of these flowers and place them right sides together...


I used one red flower and one off white flower here.


Whip stitch the outside egde all the way around. Leave on opening to turn it right side out.


Stuff it for a reversible pin cushion.


Add a ribbon for an ornament or loop a key ring on the ribbon for a cute little key chain for a sewing friend.


I hope you'll give paper piecing a chance. It's great to keep little baggies or small sewing kits of these petals and flowers in the car, in your purse or any where you'll have a few extra minutes to do a little hand sewing. How about your child's dance practice or sporting game, how about in the car on a long trip ( I have to take motion sickness pills to sew in the car, but it works for me!) I also sew in the doctor's waiting room...any where you can steal a few minutes.

This is such a wonderful, relaxing hobby. You really should give it a try. Do a google search for images of Grandmother's Flower Garden and get inspired to start one of your own.

See you soon,
~Karen~

Pin It
Related Posts Plugin for WordPress, Blogger...

LinkWithin

Related Posts with Thumbnails