Hi everyone! Our daughter Courtney and her fiancĂ© Courtland moved into their new apartment a few months ago. It's a great apartment, but with rentals there are certain things you can't change…one being vertical blinds.
We bought pre-made curtains and sheers at Ikea and used curtain rods I already had from my house, so the transformation only cost $30.00. The drapes were $25 and the sheers were $5.00
The pictures aren't great in some shots, because the sun was so bright coming through the window it made things dark in the photos, but you'll get the idea.
Here's the before…
The vertical blinds open and close from the right side. We could have just put up the curtain rod and hid the blinds behind the right panel, but Courtney also wanted the sheers up along with the fabric panels.
We could have done that, but that would have required a double rod system and mine was only a single rod. Her window is long and the double rod styles are pricey.
Here's the after…sorry this is a dark picture
Sheers on the vertical blind rod and the cotton panels on the black rod. The black rod is just above and in front of the vertical blind rod, so it hides it a little.
Come on in to see how easy this is to do…
Showing posts with label curtains. Show all posts
Thursday, August 21, 2014
Monday, November 11, 2013
How to Turn Tab Top Curtains to Back Tab Curtains...
Hi everyone. We're just finishing up on 2 rooms that have new floors, baseboard trim and new paint on the walls. The final step is window treatments and I've been on the hunt for new curtains for 3 large windows for a while. I would love to sew them myself, but with 3 windows, that's over 18 yards of fabric and 18 yards of lining...that would be hundreds of dollars. Financially not possible right now.
Sometimes when you can't find exactly what you're looking for, a little transformation of one thing can lead to just what you need! I found tab top curtains at Ikea for $19.00 for TWO panels!! Yes, you read that correctly. Two panels per package for $19…unheard of these days.
I wasn't looking for tab top curtains, but the color was perfect and the 98 inch length was the yardage I needed. So, this is what I turned them into with just 2 straight lines of stitching…
Pop in to see how easy…
Sometimes when you can't find exactly what you're looking for, a little transformation of one thing can lead to just what you need! I found tab top curtains at Ikea for $19.00 for TWO panels!! Yes, you read that correctly. Two panels per package for $19…unheard of these days.
I wasn't looking for tab top curtains, but the color was perfect and the 98 inch length was the yardage I needed. So, this is what I turned them into with just 2 straight lines of stitching…
Pop in to see how easy…
Saturday, March 16, 2013
Easy Lined Curtains from a Duvet Cover...Just Two Lines of Sewing
Hi everyone! I had mentioned before Christmas that I was painting my daughter Courtney's room gray. Well, I painted the gray primer coat and there it sat all through Christmas. I finally finished the final coat, but not all of the sewing for the room.
She wanted yellow accents for pillows and things. I did find some cute yellow chevron fabric for pillows, but didn't want to spend a lot of money on fabric for curtains...there are 2 windows in her room and I like the curtains long. I would need 12 yards of fabric (3 yards per panel) and 12 yards of lining. At $10-$12 per yard for decorator fabric plus the cost of the lining, I definitely did not want to spending $150 for curtains that I was going to sew myself.
Here is my super duper cheap...easy to sew lined curtain idea.
Duvet Covers...I bought these at Target a couple months ago for $30 for each set. The duvet set comes with 2 pillow shams too!! Woo Hoo. So for $60.00 I have 2 windows dressed with lined curtains and 4 pillow shams that match.
She wanted yellow accents for pillows and things. I did find some cute yellow chevron fabric for pillows, but didn't want to spend a lot of money on fabric for curtains...there are 2 windows in her room and I like the curtains long. I would need 12 yards of fabric (3 yards per panel) and 12 yards of lining. At $10-$12 per yard for decorator fabric plus the cost of the lining, I definitely did not want to spending $150 for curtains that I was going to sew myself.
Here is my super duper cheap...easy to sew lined curtain idea.
Duvet Covers...I bought these at Target a couple months ago for $30 for each set. The duvet set comes with 2 pillow shams too!! Woo Hoo. So for $60.00 I have 2 windows dressed with lined curtains and 4 pillow shams that match.
This is the easiest project for you to sew. It just takes 2 lines of straight stitching!!
Monday, December 10, 2012
Quick and Easy Lined Drapes...Half Pre-Made
Hi everyone! In the past I've shared a tutorial post on how to make lined drapes from start to finish. If you'd like to see that tutorial...click HERE.
Today, I want to share a faster version of lined drapes...using pre-made cheaper drapes first!! The cheaper drapes become your lining.
I wanted new drapes in my daughter Kelsie's room, but didn't want the full project. I needed quick and easy and to use what I already had hanging in her room. I used what she had as the lining for the new.
Here's the new look...
Today, I want to share a faster version of lined drapes...using pre-made cheaper drapes first!! The cheaper drapes become your lining.
I wanted new drapes in my daughter Kelsie's room, but didn't want the full project. I needed quick and easy and to use what I already had hanging in her room. I used what she had as the lining for the new.
Here's the new look...
Saturday, October 6, 2012
Raising Your Curtain Rods...Unhemming Too
Hello everyone...
Thought I would share a little project that I have wanted to do for years and finally made it happen. We moved into this house over 19 years ago. When you're moving in, your goal is to just get your life organized and functional..."where" I hung my curtain rods was not high on my "to do" list, so they just went up.
Well, for years I thought the rods were hung too low. We had valances at first then these drapes. There never seemed to be a good time, money wise, to change all of them or even afford the fabric (I really wanted, $40.00 per yard) to make them, because they would need to be longer, the windows are wide and they needed to be lined!! Our 2 daughters are in college now and there still isn't extra money to go out and change the drapes. I desperately wanted to move the rods higher, so here's my solution.
I forgot to take a before picture of the curtain rods, but this is a picture of one room on the left not done and the finished room on the right, where the curtain rods is raised up where I wanted it.
Here is the after, where both rods are higher.
See the drapes in the room on the right...perfect length right?
Here's how I did it.
First measure the existing hem on your drapes. Mine is 4 inches...that's how I knew I could raise my curtain rod 4 inches higher.
Up go the rods 4 inches and a little paint job to patch that spot.
Now this is what I was left...drapes that are 4 inches too short.
Ahh, but not for long!
This is what normal store bought drapes look like.
The lining isn't attached at the bottom, so just lift it up and start picking the hem apart.
You can use a seam ripper ...
or the point of your scissors to snip the threads.
Open up the hem and you will see a narrow fold of about a half inch. This is your new hem. Not ideal, but it will do to hold me over until I can buy or make new drapes.
You also have to pick out the corner folds.
This will release the whole hem.
Done. New hem four inches lower.
I used Stitch Witchery to iron down the new hem and side seams. It is a fusible web to iron things together.
Just open seam and place a piece of the Stitch Witchery, fold fabric over and iron.
Done!!
Perfect length and no one will ever know I have a very tiny hem behind there. Lol
Having the rods higher might not look like much in the pictures, but it made a huge difference in person.
Don't be afraid of change in your home. If you don't like something, think of a way to make it happen...for me, not using money was a kick in the pants to get my brain working for a solution!
Now to paint that tv stand black and repair the holes in the walls!
Have a great day,
~Karen~
Thought I would share a little project that I have wanted to do for years and finally made it happen. We moved into this house over 19 years ago. When you're moving in, your goal is to just get your life organized and functional..."where" I hung my curtain rods was not high on my "to do" list, so they just went up.
Well, for years I thought the rods were hung too low. We had valances at first then these drapes. There never seemed to be a good time, money wise, to change all of them or even afford the fabric (I really wanted, $40.00 per yard) to make them, because they would need to be longer, the windows are wide and they needed to be lined!! Our 2 daughters are in college now and there still isn't extra money to go out and change the drapes. I desperately wanted to move the rods higher, so here's my solution.
I forgot to take a before picture of the curtain rods, but this is a picture of one room on the left not done and the finished room on the right, where the curtain rods is raised up where I wanted it.
Here is the after, where both rods are higher.
See the drapes in the room on the right...perfect length right?
Here's how I did it.
First measure the existing hem on your drapes. Mine is 4 inches...that's how I knew I could raise my curtain rod 4 inches higher.
Up go the rods 4 inches and a little paint job to patch that spot.
Now this is what I was left...drapes that are 4 inches too short.
Ahh, but not for long!
This is what normal store bought drapes look like.
The lining isn't attached at the bottom, so just lift it up and start picking the hem apart.
You can use a seam ripper ...
or the point of your scissors to snip the threads.
Open up the hem and you will see a narrow fold of about a half inch. This is your new hem. Not ideal, but it will do to hold me over until I can buy or make new drapes.
You also have to pick out the corner folds.
This will release the whole hem.
Done. New hem four inches lower.
I used Stitch Witchery to iron down the new hem and side seams. It is a fusible web to iron things together.
Just open seam and place a piece of the Stitch Witchery, fold fabric over and iron.
Done!!
Perfect length and no one will ever know I have a very tiny hem behind there. Lol
Having the rods higher might not look like much in the pictures, but it made a huge difference in person.
Don't be afraid of change in your home. If you don't like something, think of a way to make it happen...for me, not using money was a kick in the pants to get my brain working for a solution!
Now to paint that tv stand black and repair the holes in the walls!
Have a great day,
~Karen~
Monday, October 1, 2012
How To Make Lined Drapes...Picture Tutorial
Hello everyone! I promised last week to share the tutorial for the lined drapes I made for the waiting room I redecorated at work. Click HERE if you missed that post.
This post is picture HEAVY to make it easier for you to see the step by step instructions. I always thinks it's much better to "see" the directions than "read" them. There are also little tips and tricks along the way.
To start, we all have different window widths and lengths, so adjust for your own drapes. The drapes for my project were just for "looks"on the sides of the windows, not function. The drapes will never be closed in the office waiting room, so I only needed the 54 inch width of the home decor fabric. (54 inches is the standard width for decorator fabric on the large bolts at the fabric store.) If your windows are wider, you will need to sew panels together to get the width you need.
For the height or length of the drapes, measure the length from the rod (if using a pocket) or from the bottom of the clip ring (whatever system you are using). Take that measurement and add 12 inches.
For example, my windows finished at 90 inches...so 90" plus 12" is 102".
3 yards of fabric is 108 inches, so I purchased 3 yards for each side panel...always leave room for mistakes or mis-measures.
They are not necessary, but some items will make the job a little easier.
Here's the fabric I used in case anyone wanted to know the name. I bought it at Joann's...here's the link
Just to worn you, you will be on the floor and on your knees a lot!! Lol.
To cut each panel or to straighten the edge, fold fabric in half lengthwise.
Line the sides and the part you are cutting with lines on the cutting mat and then trim with ruler and rotary cutter.
TIP...if you have tile floors, use the lines in the floor as a cutting guide.
If you have quilt rulers, you know they are only 24 inches long. In the picture below, I used 2 rulers to cut the longer length I needed. See the yellow one on the bottom and the red one towards the top?
Find the line on the bottom of cutting mat...
Add the second ruler to the top to extend the first ruler...
then line up the second ruler with the same number at the top of the mat.
Trim with rotary cutter all the way up, holding the second ruler when needed.
I also trimmed the selvage edge on both sides of the fabric. Selvage edges are very tightly woven and it pulls the fabric when sewn...making it pucker.
TIP...did you know all those dots on the selvage edge are all the colors used in fabric. This is great to take with you when picking other matching fabrics or paint colors for the room.
Once everything is cut, lay fabric on the floor and fold up the bottom 8 inches.
WATCH FOR DIRECTIONAL FABRICS WHEN DETERMINING THE BOTTOM AND TOP
8 inches
I placed the portable ironing mat under the hem and ironed flat.
So much easier to keep every thing on the floor when working, rather than moving all that fabric to the stand up ironing board every time.
Now unfold the 8 inch hem.
and fold up the raw cut edge to the ironed line.
You will have a 4 inch fold.
Iron that flat.
Ironed all the way across.
Now take that 4 inch fold and fold over again.
Iron flat again. You now have a 4 inch, double fold hem. Great weight for the drape to hang.
Pin all the way across
Use matching thread.
Sew close to edge. I use the inside edge of the foot as a guide.
TIP...pin the hem with the point of the pin towards the edge you are sewing, but not quite in the lane of the stitch.
That way you can sew away and not have to stop to remove pins or run them over and break a needle.
Hem is finished!
Lay flat on floor.
The DIFFERENCE in hem is...you will fold up 4 inches first.
Iron flat.
Open up hem...
and take raw edge and fold up to ironed line...2 inches
Iron flat.
Then take that 2 inch fold and fold up again.
You now have a 2 inch wide, double fold hem.
Match thread to lining too, for a professional look.
Sew close to edge with same pin technique.
Done!
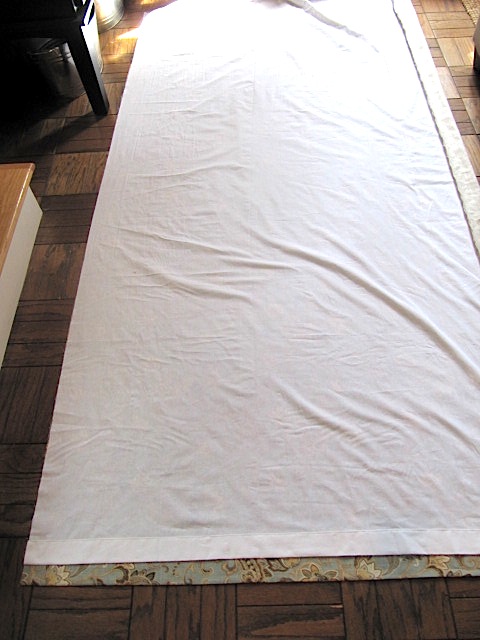
Now place your hemmed lining on the drape, RIGHT SIDES TOGETHER.
BUT only align one side of the edge.
I aligned the right side in this picture.
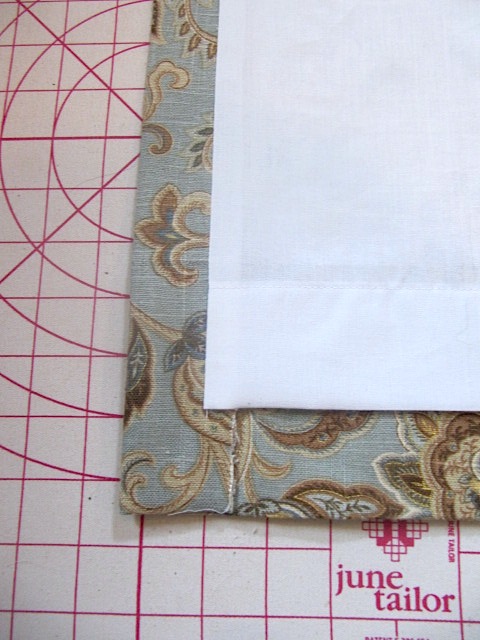
You will also leave 1-2 inches of drape fabric showing at the bottom.
Here is the close up of the hems. I measured 1 1/2 inches of drapery fabric showing.
Pin temporarily on the bottom until all measurements and smoothing are done.
Right side pinned, and bottom measured at 1 1/2 inches.
Now sew the RIGHT side only...the length of the drape with a 1/2 inch seam allowance.
Now the skootching part...
Unpin the temporary bottom pins.
Now drag over the lining fabric to the left side. (this is where the 4 inch difference comes in for the widths)
Line up the left side the length of the fabric.
Make sure you remeasure the bottom hems at 1 1/2 inches again.
Pin the length of the left side and sew with a 1/2 inch seam allowance, just like the right side.
Now you have a tube (open on the bottom and the top). Turn right side out.
This is the only time I took it to the ironing board. I pressed the seams with drape fabric on one side and the lining on the other. This cleans up the seams.
Back to the floor...
Smooth out the fabric so the the drapery fabric is showing...even widths on each side.
Close up.
Stay on the floor and iron both sides.
See that raw edge of the drapery fabric?
Fold it under diagonally.
Iron flat.
Sew with a hidden stitch. Start at the top...
Pick up a little of the bottom fabric and come up with a little of the top fabric.
See the little vertical stitches before you pull it tight?
Pull and they're gone.
Done nice and neat!
Good gravy that's not very straight, Lol. I think this was my fourth panel and I was dizzy!!
Fold over once...
and then again. I did a 4 inch hem folded over twice to finish at 2 inches wide. This 4 inches and the 8 inch main hem gave me the extra 12 inches that I mentioned earlier.
Measure according to your needs.
Sew close to edge.
I used rings with the clips.
Lined drapes hang nicely from the weight and the lining protects the fabric from the sun.
I really hope you enjoyed this picture tutorial for lined drapes. I know there must be other ways to make these, but this worked great for me.
Good luck with yours.
Happy Sewing,
~Karen~
This post is picture HEAVY to make it easier for you to see the step by step instructions. I always thinks it's much better to "see" the directions than "read" them. There are also little tips and tricks along the way.
Measuring...
To start, we all have different window widths and lengths, so adjust for your own drapes. The drapes for my project were just for "looks"on the sides of the windows, not function. The drapes will never be closed in the office waiting room, so I only needed the 54 inch width of the home decor fabric. (54 inches is the standard width for decorator fabric on the large bolts at the fabric store.) If your windows are wider, you will need to sew panels together to get the width you need.
For the height or length of the drapes, measure the length from the rod (if using a pocket) or from the bottom of the clip ring (whatever system you are using). Take that measurement and add 12 inches.
For example, my windows finished at 90 inches...so 90" plus 12" is 102".
3 yards of fabric is 108 inches, so I purchased 3 yards for each side panel...always leave room for mistakes or mis-measures.
Tools Needed...
They are not necessary, but some items will make the job a little easier.
- lots of floor space!
- ruler
- tape measure
- pins
- scissors
- portable ironing mat and iron
- if you have them...rotary cutter and cutting mat
- quilt rulers if you have them...yard stick if you don't
Here's the fabric I used in case anyone wanted to know the name. I bought it at Joann's...here's the link
Drape Tutorial...
Just to worn you, you will be on the floor and on your knees a lot!! Lol.
To cut each panel or to straighten the edge, fold fabric in half lengthwise.
Line the sides and the part you are cutting with lines on the cutting mat and then trim with ruler and rotary cutter.
TIP...if you have tile floors, use the lines in the floor as a cutting guide.
If you have quilt rulers, you know they are only 24 inches long. In the picture below, I used 2 rulers to cut the longer length I needed. See the yellow one on the bottom and the red one towards the top?
Find the line on the bottom of cutting mat...
Add the second ruler to the top to extend the first ruler...
then line up the second ruler with the same number at the top of the mat.
Trim with rotary cutter all the way up, holding the second ruler when needed.
I also trimmed the selvage edge on both sides of the fabric. Selvage edges are very tightly woven and it pulls the fabric when sewn...making it pucker.
TIP...did you know all those dots on the selvage edge are all the colors used in fabric. This is great to take with you when picking other matching fabrics or paint colors for the room.
Once everything is cut, lay fabric on the floor and fold up the bottom 8 inches.
WATCH FOR DIRECTIONAL FABRICS WHEN DETERMINING THE BOTTOM AND TOP
8 inches
I placed the portable ironing mat under the hem and ironed flat.
So much easier to keep every thing on the floor when working, rather than moving all that fabric to the stand up ironing board every time.
Now unfold the 8 inch hem.
and fold up the raw cut edge to the ironed line.
You will have a 4 inch fold.
Iron that flat.
Ironed all the way across.
Now take that 4 inch fold and fold over again.
Iron flat again. You now have a 4 inch, double fold hem. Great weight for the drape to hang.
Use matching thread.
Sew close to edge. I use the inside edge of the foot as a guide.
TIP...pin the hem with the point of the pin towards the edge you are sewing, but not quite in the lane of the stitch.
That way you can sew away and not have to stop to remove pins or run them over and break a needle.
Hem is finished!
Lining Tutorial...
Pretty much the same for drapes, but the WIDTH of lining is 4 inches SMALLER than drape fabric, So for example, my drapery fabric is 54 inches wide...I cut the lining 50 inches wide.
Same way to trim or cut to length as drapes.
Lay flat on floor.
The DIFFERENCE in hem is...you will fold up 4 inches first.
Iron flat.
Open up hem...
and take raw edge and fold up to ironed line...2 inches
Iron flat.
Then take that 2 inch fold and fold up again.
You now have a 2 inch wide, double fold hem.
Match thread to lining too, for a professional look.
Sew close to edge with same pin technique.
Done!
Drape Assembly...
Lay hemmed drape on the floor, right side up.
Now place your hemmed lining on the drape, RIGHT SIDES TOGETHER.
BUT only align one side of the edge.
I aligned the right side in this picture.
You will also leave 1-2 inches of drape fabric showing at the bottom.
Here is the close up of the hems. I measured 1 1/2 inches of drapery fabric showing.
Pin temporarily on the bottom until all measurements and smoothing are done.
Right side pinned, and bottom measured at 1 1/2 inches.
Now sew the RIGHT side only...the length of the drape with a 1/2 inch seam allowance.
Now the skootching part...
Unpin the temporary bottom pins.
Now drag over the lining fabric to the left side. (this is where the 4 inch difference comes in for the widths)
Line up the left side the length of the fabric.
Make sure you remeasure the bottom hems at 1 1/2 inches again.
Pin the length of the left side and sew with a 1/2 inch seam allowance, just like the right side.
Now you have a tube (open on the bottom and the top). Turn right side out.
This is the only time I took it to the ironing board. I pressed the seams with drape fabric on one side and the lining on the other. This cleans up the seams.
Back to the floor...
Smooth out the fabric so the the drapery fabric is showing...even widths on each side.
Close up.
Stay on the floor and iron both sides.
Finishing the corner points...
See that raw edge of the drapery fabric?
Fold it under diagonally.
Iron flat.
Sew with a hidden stitch. Start at the top...
Pick up a little of the bottom fabric and come up with a little of the top fabric.
See the little vertical stitches before you pull it tight?
Pull and they're gone.
Done nice and neat!
Top of Drapes...
This part is up to you...you may be using a rod pocket or clips or tabs.
To finish, just trim away so both fabrics are even.
Good gravy that's not very straight, Lol. I think this was my fourth panel and I was dizzy!!
Fold over once...
and then again. I did a 4 inch hem folded over twice to finish at 2 inches wide. This 4 inches and the 8 inch main hem gave me the extra 12 inches that I mentioned earlier.
Measure according to your needs.
Sew close to edge.
I used rings with the clips.
Lined drapes hang nicely from the weight and the lining protects the fabric from the sun.
Good luck with yours.
Happy Sewing,
~Karen~
Subscribe to:
Posts (Atom)