Showing posts with label bookmark. Show all posts

Monday, September 29, 2014

Fabric Heart Bookmark…Free Pattern

Hi everyone! A few years ago, I shared a tutorial for a fabric heart bookmark. Even though people love their e-readers, there are some who still love the feel of a book in their hands. This bookmark is perfect for that person. In my tutorial, I didn't have a heart pattern to share, so you had to find one yourself on the web.

heart bookmark


Well, last week I received an email from a very generous blogger. Suzanne, from the blog…Paper Piecing Patterns, had just found my blog and that Heart Bookmark post for the first time. She was so kind and made a pdf file of the heart pattern. She is new to blogging too, so pop over there and say hi!! Click here to visit.

To make it easier for you, I re-posted the tutorial below, so the pattern will be with the instructions in the same post. These bookmarks will make great little gifts for the upcoming holidays, especially for…

  • friends and family
  • teachers
  • book club members

Have fun making some for yourself too…cookbooks, magazines etc.


Come on in for the original tutorial…

Saturday, February 2, 2013

Valentine's Day Gift Idea...Heart Bookmark

Hi everyone!! Thought I would share a post I did in the past for this heart bookmark. I don't usually repeat my posts, but Valentine's Day is 2 weeks away, so I wanted to remind you of a quick and easy gift idea. I have new followers too, who may have missed this post.


Tuesday, April 3, 2012

Tool Time Tuesday...Magnetic Business Card To Bookmark

Happy Tuesday everyone!! You all know Tuesday's projects can use just about anything from anywhere. Well, today is no exception. You know those magnetic business cards you receive in the mail or from businesses around your town...we're recycling those into this cute bookmark!!


Tuesday, January 3, 2012

Tool Time Tuesday...Fabric Heart Bookmark

Hi everyone and happy Tuesday. It's Tool Time!! Today's tool is your sewing machine. This is a quick and easy heart shaped bookmark perfect for anyone or anytime, but with Valentine's Day coming next month...it's extra perfect!

This tutorial really is easy, but it's picture "heavy"...you know me with my pictures! Lol...I just think it's so much easier to explain each step in a picture. If I got my act together and started doing video tutorials, this would take 5 minutes vs 40 pictures!!

Here is the finished heart bookmark...I made up this pattern, so with lots of trial an errors...I hope you like it!


Wednesday, February 2, 2011

Tea or Coffee Anyone?...Craft Ideas and Organizing

Do you love to read books and drink tea...well, this project could be for you! I drink many different kinds of tea, but this particular box of tea bags has an extra goodie inside.


This might look like trash to you, but these cardboard dividers are always good for something.


Perfect size for a book mark. I know we can just cut up card stock and make one, but these are already done for you.


To pretty them up a little, I just glued on a strip of fabric. You can also use scrap booking paper too. I left a 1/4 inch margin on each side.


Punch a hole at the top...


and with a little ribbon and a doo dad for the end of the tie, your book mark is done.


I used a metal washer from the hardware store and stamped Love in the metal. It was my first attempt at metal stamping. This was my second washer and it's still a little crooked, but works for me!


edit...I put together a tutorial for metal stamping, so click here for that.


Now onto the coffee tip...I use these trays for many things. They are paper trays that I found in an office supply store in the clearance rack.


The best thing I use it for is the coffee pot we use every day. I keep the coffee pot tucked under our cabinets, in the corner and out of the way.


However, this particular coffee pot has to open on the top to put the coffee pods in, but the handle hits our upper cabinets and won't open up all the way.


Here's the fix. The coffee pot is in the tray. It just slides out very easily each time we need it.


Then it slides back under the cabinet when we're not using it. We could just slide the coffee pot, but most appliances have little skid pads on the bottom, so it doesn't move. The tray glides very smoothly.


We're in the middle of an ice storm here, so I think I'll have a cup of tea...or maybe coffee...or maybe both!
space
Take care,
~Karen~

Sunday, August 15, 2010

Accuquilt Go Hexagon Bookmark Tutorial...

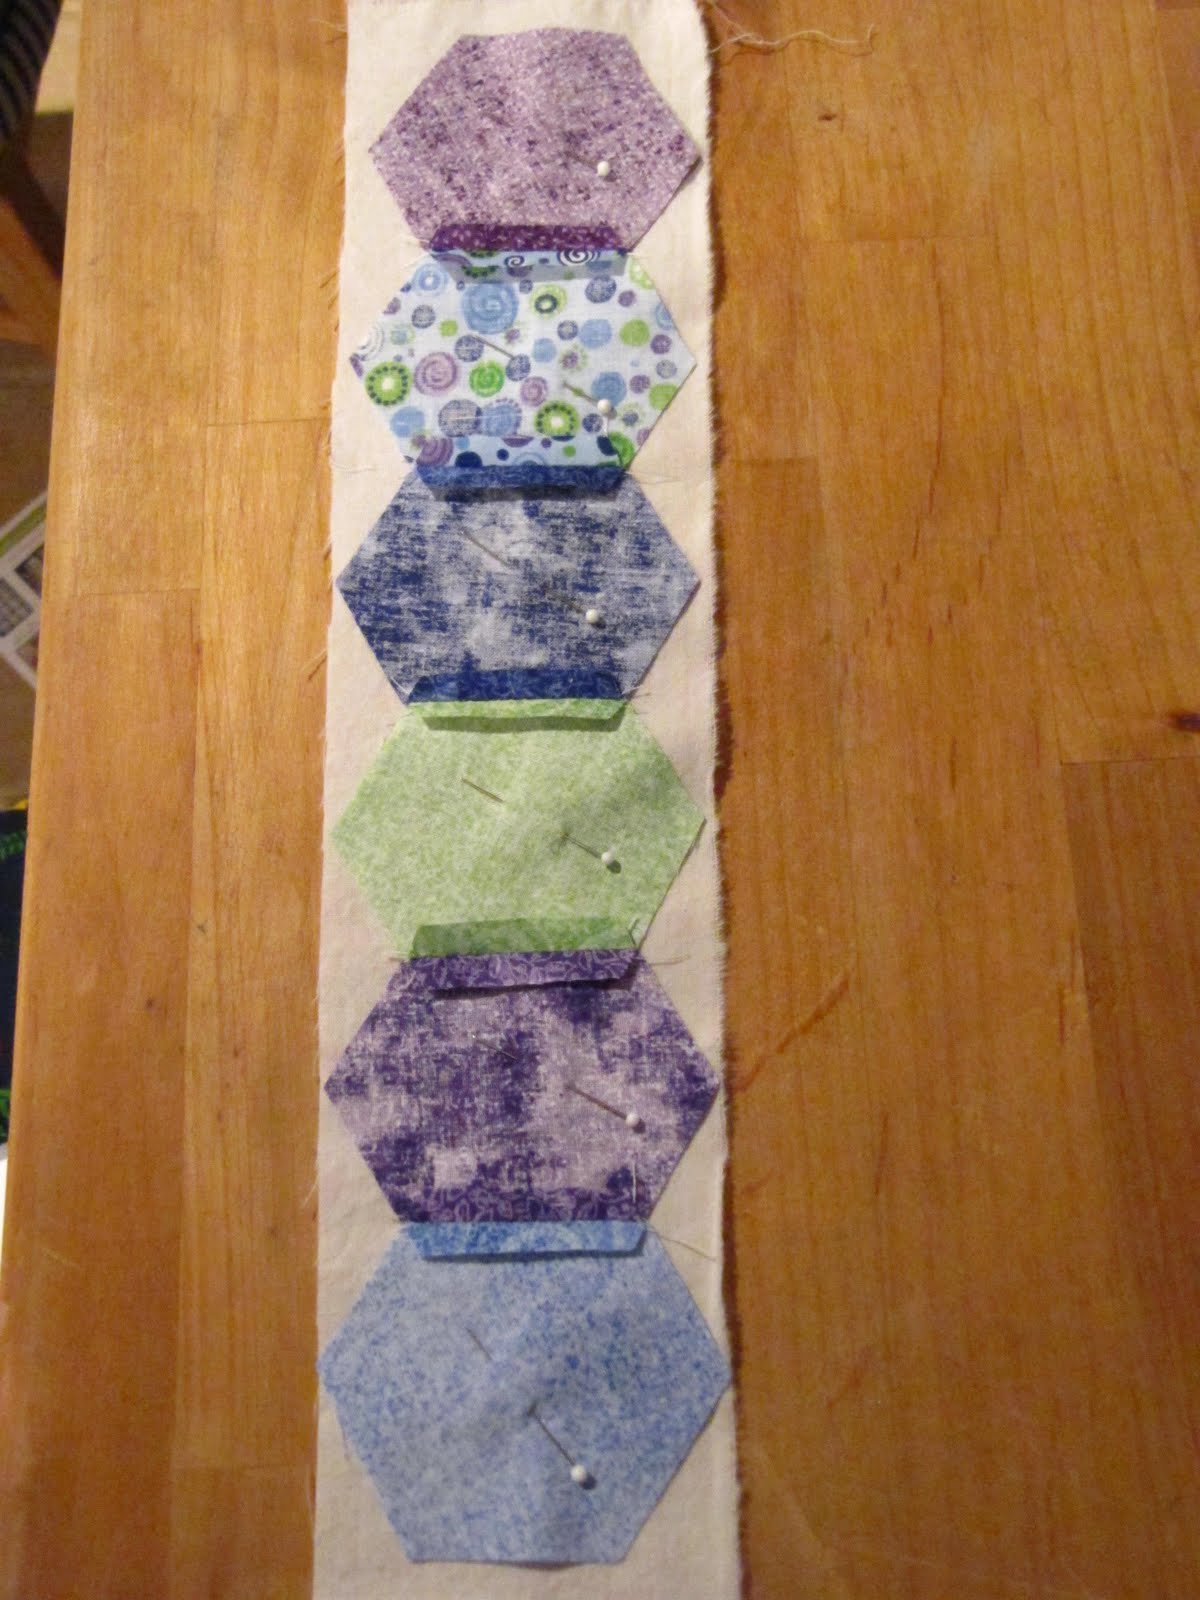
Here's another quick tutorial...a bookworm bookmark. I have plenty of hexagon tutorials coming up, but this one is very easy. My favorite shape of all the Accuquilt Go cutters is the hexagon. I love them all, but this die makes it so easy to cut them.
space
The die has 3 sizes as you can see below.


For this bookmark, I used the middle size hexagon.


Cut 6 medium hexagons...see the previous post on how the machine and the dies actually work.


Sew them together to make a chain.


Turn over and iron open the seams flat.


Here's a close up.


Pin the chain of hexagons, right sides together to a piece of fabric. I used plain muslin.


Sew together with 1/4" seam allowance, all the way around the chain of hexagons. Follow the shape of the hexagons and pivot (with needle down) at each seam intersection.


Leave an opening at one of the ends for turning.


Trim away all the excess backing fabric after you've sewn the seams. It's easier to trim the fabric after you've sewn it together rather than trying to cut the shape out first.


Clip a little at the seams for ease in turning inside out.


I used a chop stick to push the fabric when I turned it right side out.


Iron flat and sew opening closed.


Glue on some googly eyes or stitch some on.


and your done!!!


Buy that perfect book for someone special, tuck in this bookmark and sign the backing fabric with your name, date and a message. Great gift and very easy.


If you are new to my blog...click HERE to go to the post where you can enter to win an Accuquilt Go Cutter of your own. All the details are on that post.
space
Be back tomorrow with another tutorial.
~Karen~
ps...my laundry is almost done and the dog and family have been fed!! (but I'm still using my accuquilt)

Tuesday, June 29, 2010

Tool Time Tuesday...Eyemark? Bookmark?

Hello everyone. It's Tool Time Tuesday and you know what that means...something out of the box! I've either used something from a hardware store, an automotive store, used tools to make it or I've dug through the trash to find a treasure. Anything is fair game for Tuesdays even one of my old tutorials.
space
I made a little change to my eyeglass case tutorial and used a drill to do it!!
space
Here it is...My Eyemark!! One more thing you may have notice about Tuesdays are the titles to the post. I try to make up something catchy. Well, Courtney and Kelsie think "Eyemark" is...well, they don't like it.
space
I took an eyeglass case and attached a bookmark, so I think that equals an Eyemark. If I make millions from this some day, my girls are going to be sorry I copyrighted it first, Lol !!!
space
Here it is...a perfect combo to hold your glasses and to hold your page. See tutorial below.


You will need 2 pieces of fabric 4 inches x 13.5 inches. One of the pieces that I used was a pre-quilted fabric for the outside and the other is cotton for the lining. You can quilt your own piece first or use cotton for both. You just won't have the padding like the quilted kind. This pattern is reversible, so pick 2 cute ones.


The extras are: matching ribbon and some doo dads for the end of the bookmark. The doo dads are optional.


Start by placing the fabrics right sides together.


Stitch one short end with a 1/4" seam.


On the other short end, center the ribbon on the fabric.


I rolled up the rest of the ribbon and pinned it so it won't get caught in the seams.


pin to keep ribbon and edge secure.
space
Sew another 1/4" seam on this short end.


Now bring both seams to the middle, still with right sides together.


Finger press the seams open...


and match up the seams.


Pin both sides.


Sew 1/4" seam on both long sides, but leave an opening for turning. See my opening on the upper left hand side.


Here's the close up.


I clipped the corners to reduce the bulk.


Turn right side out through that opening. Machine or hand stitch that opening closed.


Now, open up the fabric that you want to be on the outside and start tucking in the lining.


The eye glass case is done, but the ribbon just needs a little jewelry. You can tie on a pendant from an old necklace, or a bead or a special little something near and dear to your heart.


I've picked a thimble...but this is where the drill for Tool Time comes in. If you love thimbles...just look away for this part!


I drill on a block of wood, so I don't go through my desk.


Didn't hurt one bit.


Now to get the ribbon in that tiny hole...


a big needle will do the trick.


Tah dah!!


Tie a knot to secure inside the thimble.


Now that's much better...a little bling or should I say Thimbling. Now that's a name for something...I'm going to use that somewhere!


I started to read this book and the title is so fitting for me right now. I haven't quilted in a while due to time and a crazy schedule. I feel like a "Lost Quilter". I think I need to find myself this summer.


Bookmark...


attached to an eyeglass case equals...
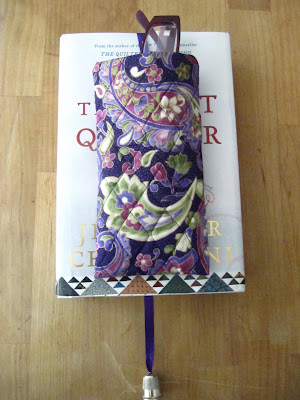


Eyemark! How about imark or seemark, or bookandsee, seebook, booksee, marksee...ok I'm going crazy and the girls are laughing at each name I yell out, so I give up.
space
What do you think? I think I like Booksee!


I need to go to bed. It's after midnight and I'm slap happy with all these names, LOL
space
Have a great Tuesday,
~Karen~
Related Posts Plugin for WordPress, Blogger...

LinkWithin

Related Posts with Thumbnails