I will add tips and tricks along the way too. These blocks are for the beginner and the experienced quilter...so fun for all!! You can click HERE for the first post and block in February and click HERE for the March block.
April is the Flying Geese Quilt Block
For a 12.5 inch unfinished quilt block, you will need...
- 8 rectangles in a medium or dark color cut at 6.5 inches x 3.5 inches
- 16 squares in a light color cut at 3.5 inches x 3.5 inches
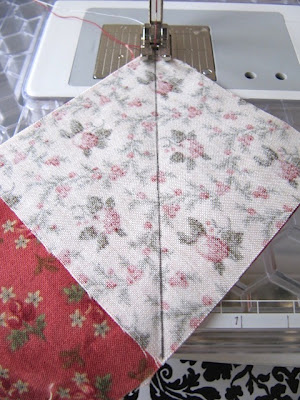
The first step is to take one light square and place it right sides together on the left side of the rectangle.
To make it a little easier and accurate, draw a pencil line from corner to corner as shown below.
Here's the pencil line.
Now sew on the pencil line.
I sew just a smidge to the side of the pencil line going towards the corner.
You can also use your center line on your sewing machine.
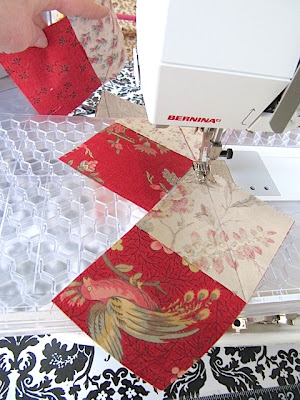
I love to chain piece, which means to keep on sewing one after the other with out stopping until you're done.
This is what all 8 rectangles should look like in this step.
You can trim to a 1/4 inch with scissors or rotary blade and ruler.
Trimmed.
However, here is this month's TIP!!!
Let's not waste this corner, because there is a half square triangle in there just crying to come out!!
BONUS...
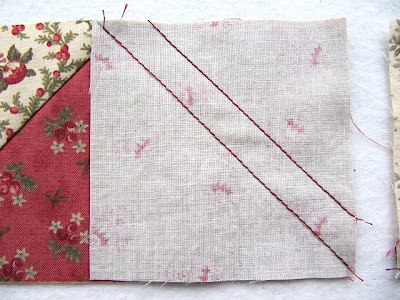
If you want this bonus square, sew on the pencil line as above, but DON'T TRIM.
Take your quilt ruler and place the 1/2 inch (half inch) line on the stitching you just sewed down the center and draw another pencil line.
this is a close-up.
Now stitch on that line.
Here they all are with 2 stitched lines on each.
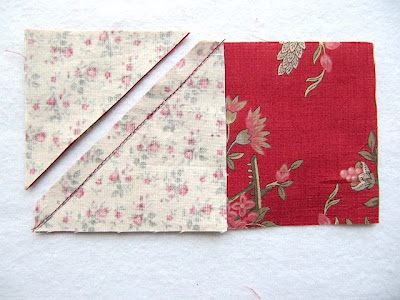
Now you can just cut up the center of the 2 stitched lines or place your ruler with the 1/4 line on the second stitching.
and cut with rotary blade.
Cut up the middle with blade.
or cut up the middle by hand with scissors.
Here are all 8 rectangles trimmed.
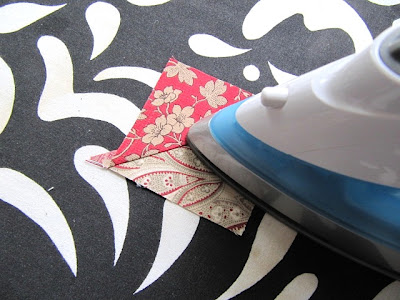
Iron back each light colored square on the rectangle.
Iron open your half square triangle too!!
The flying geese are for this month's block and the half square triangles are your bonus. I am looking for the next block to incorporate these extra squares!!
These are the 8 flying geese half done.
Now take the other 8 light colored squares and place them on the right side of the rectangle.
***You MUST have the first squares on and ironed open before you add this second square***
Do the same thing as before.
Draw your pencil line...making sure you're seeing the "triangle forming", which means you are stitching in the right direction.
Stitch on the pencil line.
Draw your bonus pencil lines 1/2 inch away from the first stitch lines.
Close-up of bonus pencil line 1/2 inch away from first stitching.
Stitch on bonus line.
Close-up of both stitching lines.
Trim those corners away.
Close-up.
8 flying geese.
16 bonus half square triangles that would have been in the trim pile in the garbage!! (these are not for this block though)
Back to the flying geese.
This intersection is critical for a nice point in this block. You need to have the 1/4 inch there.
Once you make lot of these, you can "eye" it, but you can use a ruler to check if this is your first time.
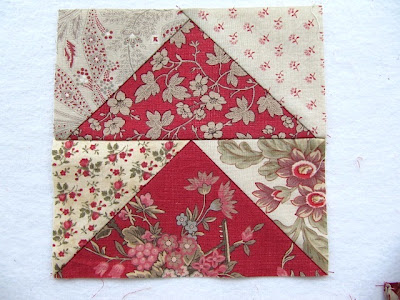
Now to assemble the Flying Geese Block...
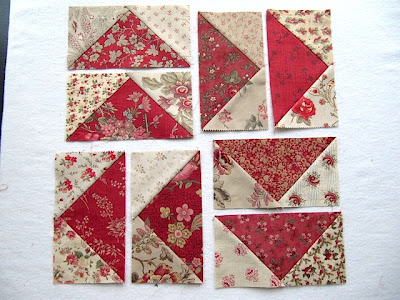
This is the placement of the geese.
You will be sewing 2 geese together at a time into 4 squares.
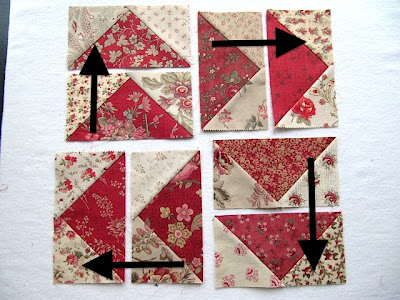
Fold over the geese, right sides together according to the arrows shown below.
For example, fold over the bottom one to the top one.
Like this.
Pin to secure.
Now sew with a 1/4 inch seam.
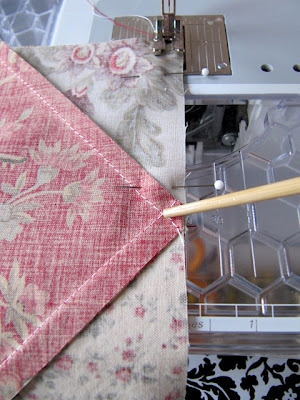
MOST IMPORTANT PART...the "X" intersection that I'm pointing to below.
Sew through this "X" intersection and you will get a perfect point on your flying geese.
Sew just a smidge to the right of the "X".
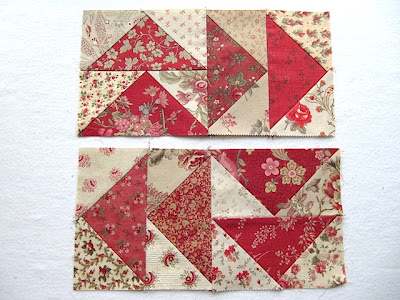
2 rectangles sewn together. Iron open.
Sew the rest into the squares to look like this below. Iron.
Now sew the top 2 squares right sides together and then the bottom 2 sets. Iron seams open but in opposites directions.
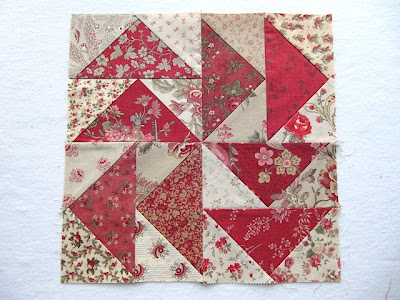
Then you will sew the top row to the bottom row, right sides together.
Make sure you match that center seam
Pin, sew and iron open.
Done!!
Here are the three month's of blocks all together. Bowtie, Linoleum and now Flying Geese
I also wanted to show you how to trim your flying geese.
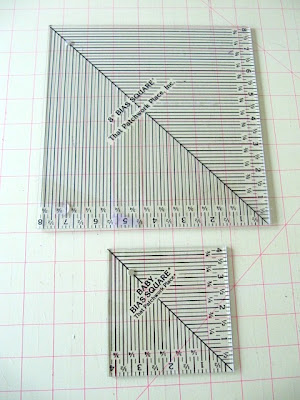
I love these bias rulers.
Take your ironed half square triangle and place the center line of the bias ruler on your center line of the square.
Line up the 2 sides that are "under" the ruler with the measurement that fits the square. In this example, it is 2.5 inches.
What ever is left over outside the ruler will be trimmed away with your rotary blade.
Perfect half square triangle measure and trimmed at 2.5 inches!
Happy sewing,
~Karen~























Karen, thank you very much! I began to understand how blocks are sewn! I am more and more like kviltting! You are my first teacher!
ReplyDeleteExcellent tutorial! and I love the bonus square!
ReplyDeleteWell presented tutorial with such detailed step by step pictures.
ReplyDeleteGreat tutorial! So glad I stopped bt.
ReplyDeleteBEAUTIFUL FABRIC+BEAUTIFUL PIECING TOO!
ReplyDeletemsstitcher1948@yahoo.com
Excellent! This block is one of my favorites to paper piece in itty bitty size for pins. It is also called Dutchman's Puzzle.
ReplyDeleteI have just discovered your blog today and just want to say you are very talented. I have loved reading your posts. :-)
ReplyDeleteI love bonus HSTs!! Been collecting bunches in a couple shoeboxes, and one day I'm gonna have some fun with them. :)
ReplyDeleteKaren,
ReplyDeleteThank you so much for all the details you give on the BOM. I enjoy reading your blog as you always have such helpful information.
Hi Karen, super tutorial. Love your time saving ideas. Thanks for sharing. Blessings and smiles, Emilou :-)
ReplyDeleteFollowed your tut to the tee and made my first flying geese block that actually looks right! Thanks for the great information :)
ReplyDeleteDid I miss the BOM for May? Love your blog & have used many of your great tips.
ReplyDeleteEasy to understand and follow as always, thank you you're a star :0)
ReplyDeletePeg xx
I have just discovered you and am really looking forward to emails. I love the easy and perfectly presented tut on flying geese so can't wait to receive more. WoW !
ReplyDeleteCaroline in the UK.