Here is one of the scrappy quilt tops I made with 1930's reproduction fabric...
The prairie points really add dimension to the quilt!
Come on in to see the steps to add the points to your next quilt top!!
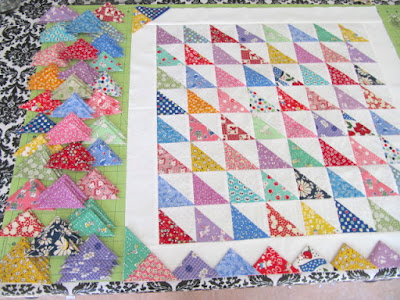
Here are the 3 1/2 inch squares I cut to make the half square triangles for the center of the quilt. If you'd like to see tutorials and tips for making half square triangles, you can click HERE for all my posts I've done in the past.
I placed them all on folding tray table and bellied up to the ironing board for lots of ironing!
Practice folding different sized squares you have to achieve the size point that will work best for your quilt design and quilt size.
Place fabric wrong side down on ironing board.
Fold up one corner, diagonal to the other side.
Press.
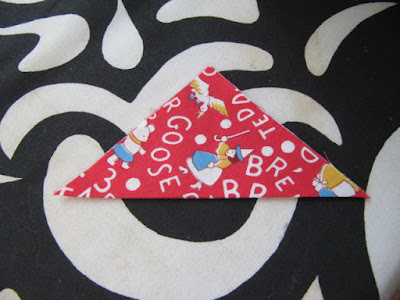
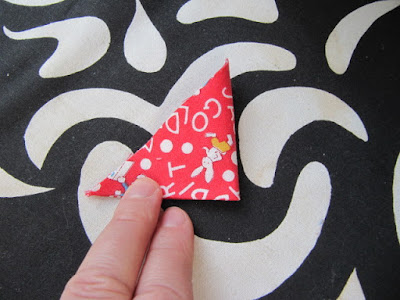
Then take the right corner and fold it over to the left corner. Press
Your point should look like this.
A fold on one side...
Two sides that open edge on the other side...
and all raw edges at the top.
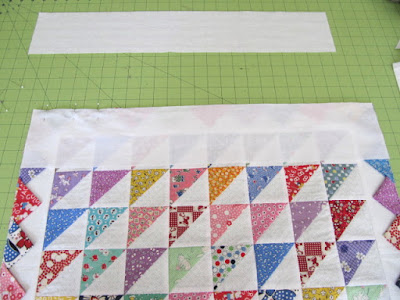
Now to place them on your top.
Gather them all up.
Start with the corners.
Place the folded edges, so the meet in the middle of each corner.
and then you will use the open point side to tuck in the next prairie point.
Then open the next point and tuck in the next one...and so on and so on.
Place them all around and adjust so they are spaced evenly on each side. You can just "eye" this or...
You can use a squaring ruler to measure them all the way across, inside each point. It doesn't have to be exact. It just checks to see if one is really off.
*QUILTING TIP*
Here's a tip I use sometimes when making scrappy quilts. I take a picture with my phone to quickly see the colors or fabric placement.
Sometimes when you are looking at a quilt close up, you don't see obvious things like same colors or prints next to each other.
You can see it better from afar in a photo.
I know it's picky, but see those two yellows next to each other? I changed it!! Lol Crazy, I know, but it's the little things for me!
When you have them all pinned and in place, I sew them down first with an 1/8 inch seam.
On my quilting presser foot, the inside edge is an 1/8 inch. The outside edge of the foot is a 1/4 inch along with the 1/4 inch marking on the plate, so just scotch the fabric in from that 1/4 inch mark.
I sewed all the way around the quilt to hold the prairie points in place before I add the next border.
This 1/8 inch seam keeps them from moving around under the next border piece.
Pin your next border piece on top of the points.
Pin and sew with a 1/4 inch seam. The 1/8 inch seam will never show.
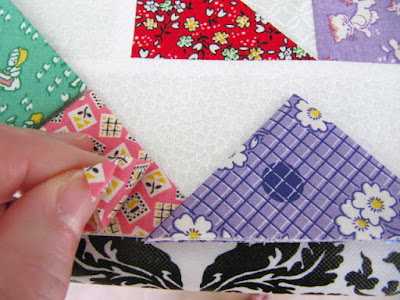
Fold back the points over the outside border and press.
Make sure the seam allowance is ironed towards the inside border. You will feel the natural way it wants to lay. Don't force it towards the point. It won't lay flat.
See the seam where I'm pointing?
and some close-ups...
I hope this tutorial will be helpful when you want to make prairie points for your next quilt!!
Thanks of stopping by and happy sewing!!
~Karen~










This is terrific!! The pictures are a great help...thanks!
ReplyDeleteSo pretty! Thanks for the tute!
ReplyDeleteWonderful tutorial! I'll definitely have to give this a try on my next quilt. Thank you very much.
ReplyDeleteSeeing the placement of one inside the other helps a lot. And seeing the corner angle with the ruler is great. Thanks so much!
ReplyDeleteKaren, this is great. I never thought to start in the corners. I have to find a way to put a triangle in each corner so it isn't so square. That bugs me the way the two yellows bugged you. :)
ReplyDeleteGreat tutorial! Thanks Karen.
ReplyDeleteLovely quilt! And nice job on the tutorial!!
ReplyDeleteThank you for this great tutorial.
ReplyDeleteYes, thank you very much. It's a great tutorial and I can't wait to use it when I make my 30's reproduction quilt. It is going to be so much fun!
ReplyDeleteThis is an EXCELLENT tutorial with great pics !
ReplyDeleteThanks Karen.
Rose
This is a wonderful tutorial, thank you :)
ReplyDelete