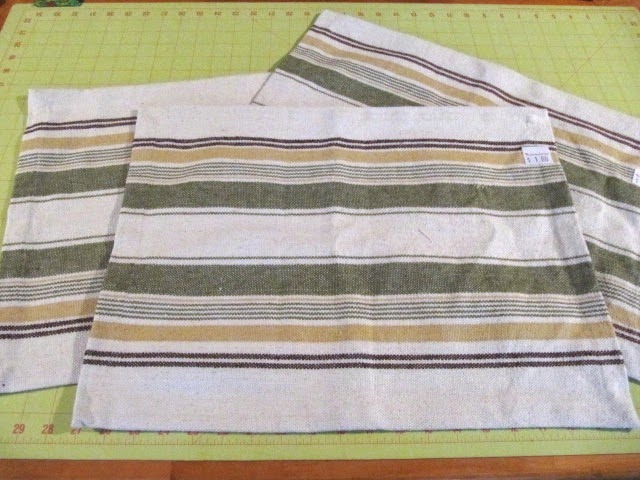
The perfect example of this are these placemats!!
Do we use placemats? No, but for $1.00 I had to get them to make a quick sew project!
I love place mats, because the edges are already sewn and hemmed for you.
Here's what I made!
A tote bag, a wine bottle bag and a key chain.
This is a quick and easy project with just straight line sewing…
For the tote bag, start with 2 placemats, right sides together.
Pin. Sew down one side, across the bottom and up the other side.
I out lined the stitches in black.
I used a 1/4 inch seam. The bag could be done here with just adding handles, but I wanted to box the corners to make the bottom of the bag wider. The bag stands up with boxed corners
To make a boxed corner, just pinch the top fabric close to one of the sewn corners. I'm working on the lower right corner.
Bring up the bottom seam...
and pinch it to meet the side seam.
Here is the bottom seam meeting the side seam.
If you keep the seams pinched in your hand, you can look inside the bag to see if the seams meet up perfectly.
You can decide how wide you want yours to be. I decided on 4 1/2 inches wide.
Pin through all thicknesses.
Here are both corners pinned, looking at the bottom of the bag.
A close up of the bottom view...
and a view of the side seam.
Sew across the width.
Turn tote bag inside out and you're almost done. You just need the handles.
I made the handles from the long hemmed edge of the third placemat. Already hemmed!!
Just cut off both hemmed edges.
I zig zagged the cut edge to finish it off the raw part that I cut.
Pin in place and sew to the top hem of the bag. Done with the bag!!
Cut it off and zig zag the raw edge.
Add a metal D ring, fold fabric in half and sew the bottom edges together. Sew another stitched line close to the ring to hold it in place. Done!!
The remaining section of the third placemat could make a great make-up bag or even pockets inside the bag.
I made a long storage bag. The top edge was still hemmed, so I just folded it in half length wise, right sides together and sewed down the long side and across the bottom.
Turned it right side out and it's an instant wine bottle bag or bag for fresh bread if you are using the tote bag for grocery shopping.
Here are all three…
Great picnic bag.
It's a sturdy tote bag for just about anything!!
With a cute little key chain too!
Thanks for stopping by,
~Karen~


I like that - cool idea!
ReplyDeleteAs always, an easy and precise tutorial with terrific end results, Karen.
ReplyDeleteGreat project. I used to make these a long time ago and am always on the lookout for cool placemats. Thanks for the reminder.
ReplyDeleteThank you so much for sharing this, Karen! You explained everything perfectly. With my limited sewing skills this is definitely something I can handle.
ReplyDeleteThat looks cool :) Your tutorial is great. I always keep looking for placemats and table cloths for such projects.
ReplyDeleteRoopini,
Let's Make It Lovely
This is fantastic!!! I lined a basket for crochet using some napkins for all the same reasons that you used these mats for your bag! xx
ReplyDeleteBINGO! Just got a Christmas checked off my list!
ReplyDeleteThanks!
Love the idea of the matching wine bag to make a picnic set!! I've got a Craft Gossip post scheduled for tomorrow morning that links to your tutorial:
ReplyDeletehttp://sewing.craftgossip.com/tutorial-tote-bag-wine-bag-and-key-fob-from-3-placemats/2014/09/03/
--Anne
Great idea!
ReplyDeleteWonderful, great tutorial and fabulous ideas.
ReplyDeleteYour blog posts inspire me so much! I plan to wrap the key chain around the handle of my bag before stitching it so i can clip my keys to it when i shop! It will be a part of my bag and i can't lose it. (a common problem). Great post. Thanks.
ReplyDeleteAnother way to box the corners - cut a 2" square from the two edges of the bottom seam, then reshape and sew. It's the same result but a different route. If you look at the triangle you cut off with your method you'll see the square!
ReplyDeleteAnother wonderful and creative idea! I will be making one of these for my son and his girlfriend to use as a picnic tote. One Christmas gift idea down. Thanks!
ReplyDeleteGreat use of bargain placemats! Can a girl have too many totes??? I think, not!
ReplyDeleteThanks. That's such a great idea.
ReplyDelete