One afternoon of a big mess, one hour of hell trying to find the studs in the wall, one wonderful husband who helped me with it all and we finally have this...
I hope some of the tips will be helpful for you too…
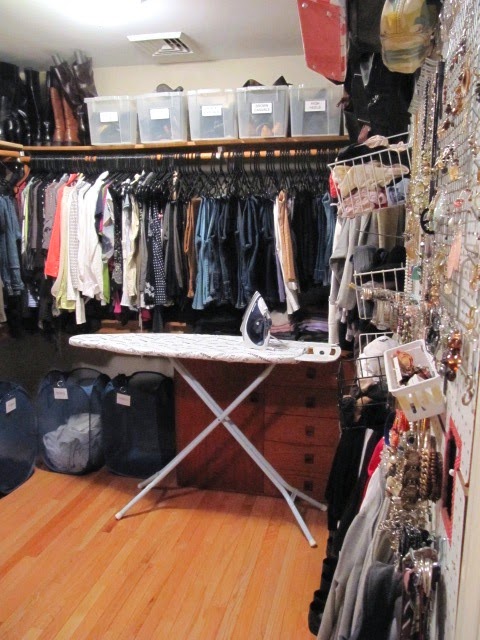
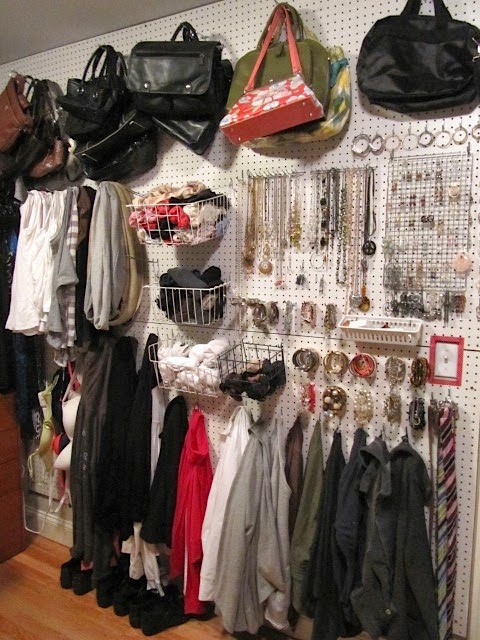
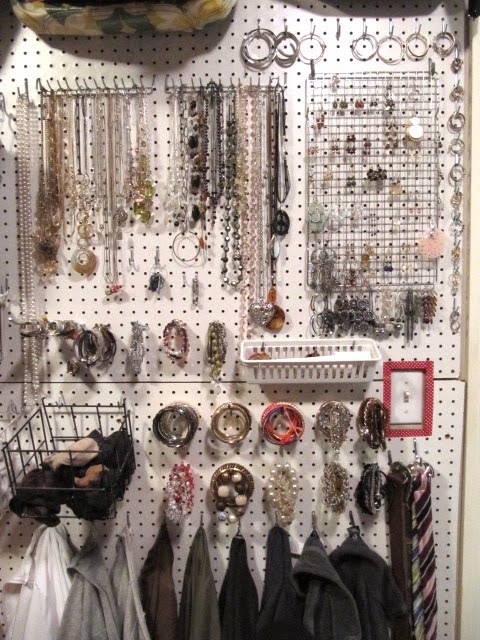
Here is the finished wall of the 2 pieces of peg board. I didn't take any "during" pictures, because to be honest, I was sweating and aggravated. Lol
I have a two tips for this whole process…
- you MUST find the studs in the wall (if you have sheet rock or plaster) and
- it is definitely a 2 person job
Peg board is about $15-$20 for a 4 foot by 8 foot sheet. The hardware store will cut it to size for you too.
To mount peg board to any surface, you must have spacers on the back of the board. The spacers allow room for the hooks to go into the holes in the pegboard and not hit your wall. You can either use plastic spacers or furring strips (explained below)
So the process is…
FURRING STRIPS
- find your studs and mark the rows on the wall with an "X". They usually run every 16 inches on center, but every house is different.
- if using furring strips, mount the strips on the outer edges of the wall where the studs are. Make sure you are within the confines of the borders of your peg board.
- Once the furring strips are mounted, one person holds the peg board while the other screws it in place. Make sure you use screws, not nails, so you can unscrew it and take it down when needed.
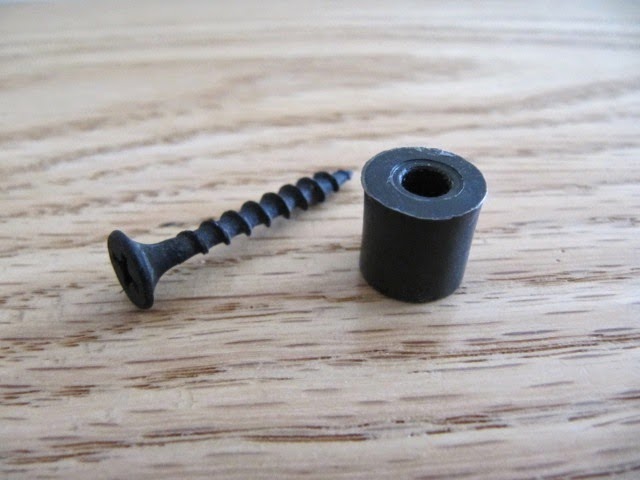
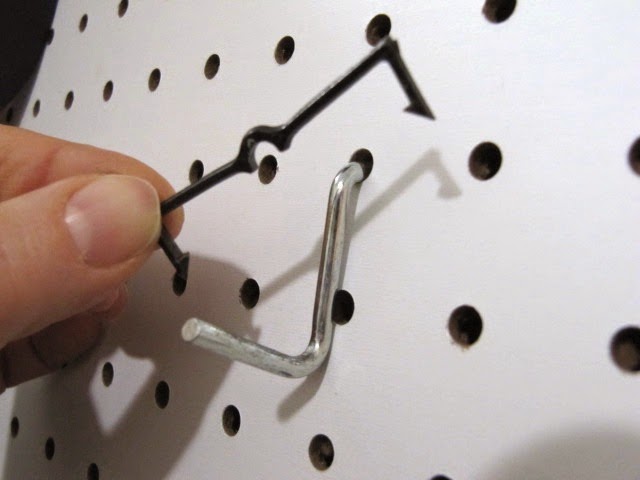
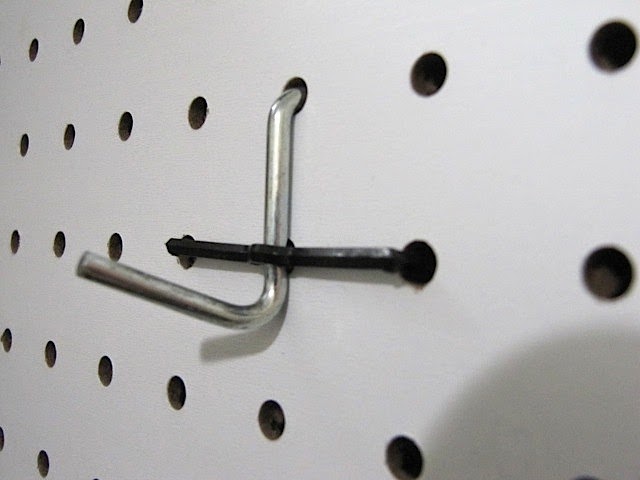
PLASTIC SPACERS…see picture below
- find your studs and mark the rows on the wall with an "X". They usually run every 16 inches on center, but every house is different.
- while one person holds the peg board where you want to mount it, the other will mark the rows on the front of the peg board that line up with the "X" for the studs.
- once you have the rows for the suds marked on the front of the peg board, place and hold one spacer "behind" the board and slip the screw into the hole from the front then into the spacer on the back. Screw securely into the stud.
- Do this along the top and all sides to secure. Probably 4 screws on the long sides and 3 for the short sides.You will need something in the center of the board to keep it from moving, so either use a small piece of furring strip or 2 spacers in the center row.
These little plastic devils are the spacers that come with the packages of hooks and what nots in the peg boards section. Every other time I have mounted peg boards in years past, I have used furring strips, but this time I thought I would give the plastic spacers a try.
They are great for the corners and along the edges, but not so much for the center of the board where you need them too. We ended up taping them to the back to hold them in place then carefully held the board in place to screw them in. Your arm can't reach up the back to hold it in place while you screw, so either tape it or add a dab of hot glue on the outer edge to keep it in place.
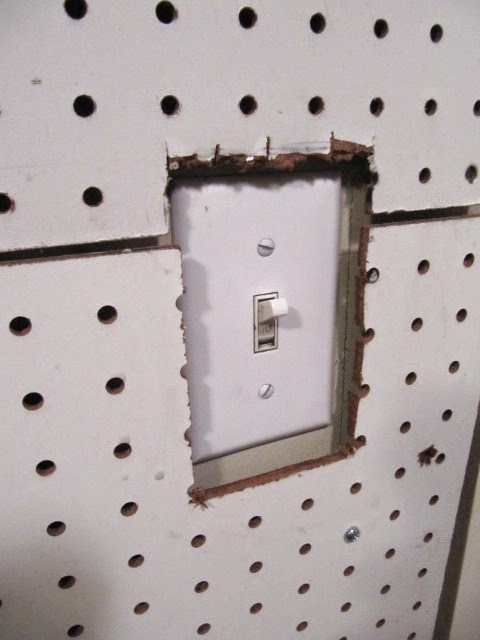
You may have to cut out areas for light switches or outlets. I thought a little hack saw would work great, because I was lazy and didn't want to go in the basement to get my hand held electric jig saw.
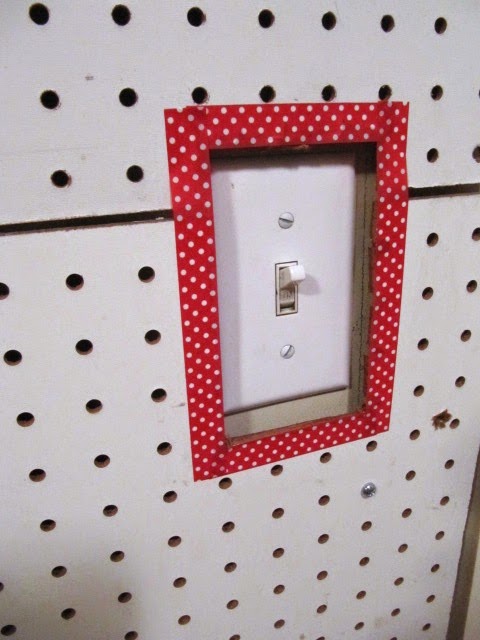
Here's the after...
Here's the hacked up before. Lol
The top section is my art work with a hand saw. The bottom part of the switch is the electric jig saw. Much better.
Either way, washi tape will fix anything!!
Thankfully, it's only my closet.
Most all of these things were in drawers and cabinets. Now I can see everything at a glance and I love it!!
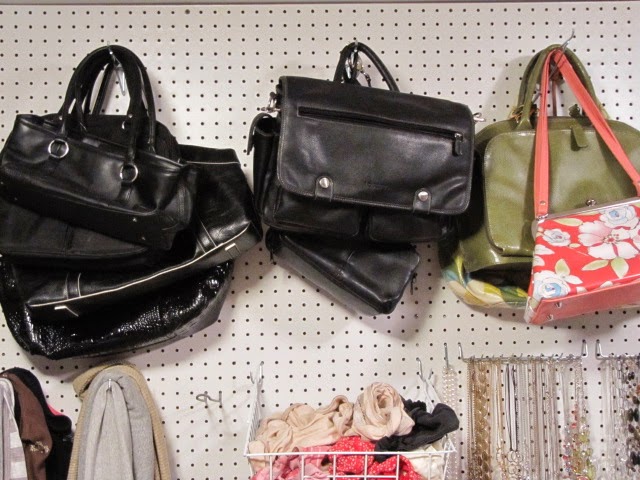
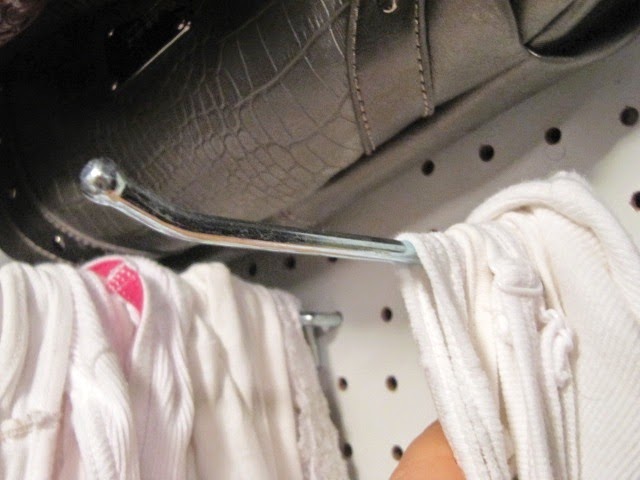
Purses hang from long hooks way up high and out of the way.
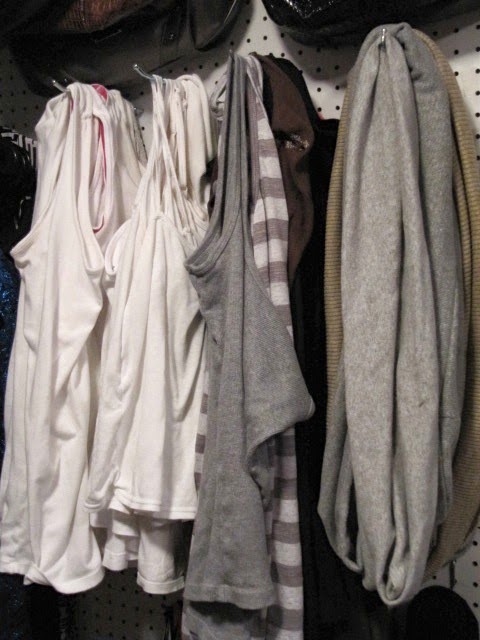
Tank tops and scarves on long hooks too.
So easy to slip them on and off the hooks.
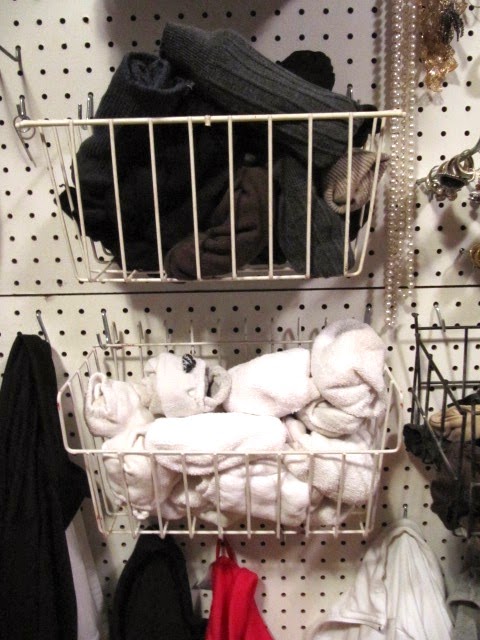
I hung wire baskets to hold socks and other unmentionables. Lol So easy to grab and great when putting laundry away too.
I just hung the baskets from big "U" shaped hooks.
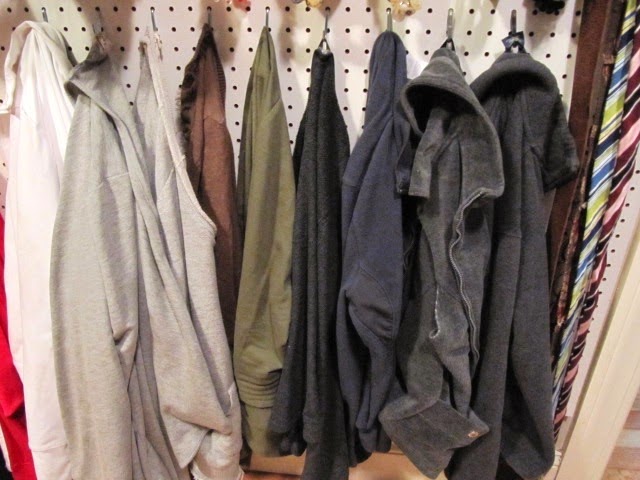
I love all my jackets and sweatshirts hanging where I can see them.
I use the loop tag on the shirt to hang them.
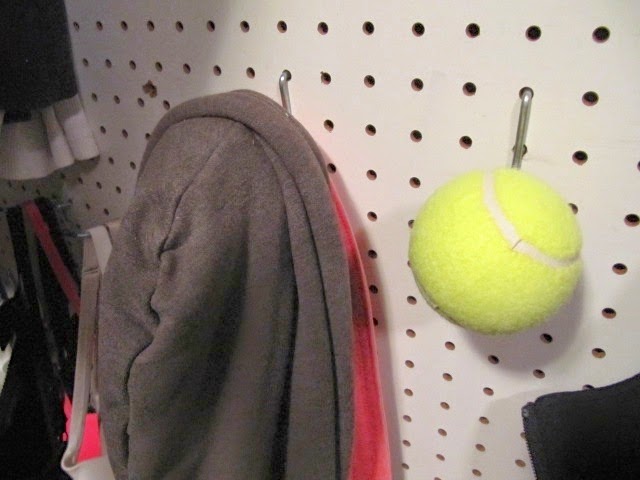
The ones that don't have a loop tag, I use my old tennis ball trick, so the hook doesn't poke through the shirt.
Poke a hole in a tennis ball, then put it over the pointy end of the hook. Click HERE to see that tennis ball post.
Now just hang your jackets on the ball.
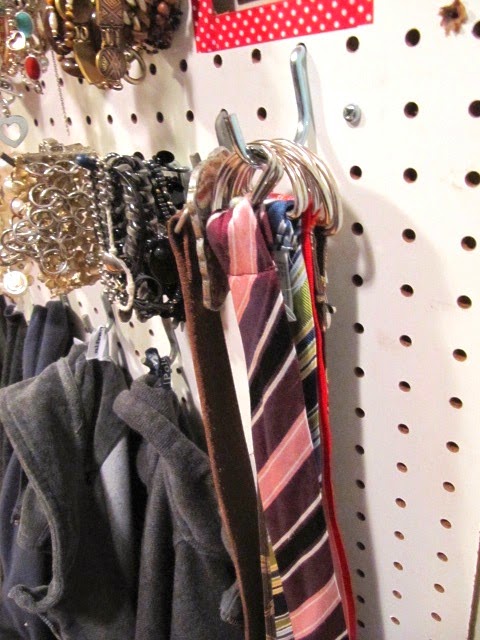
Big hooks will hold all your belts right where you can see them.
It's great for all your costume jewelry too.
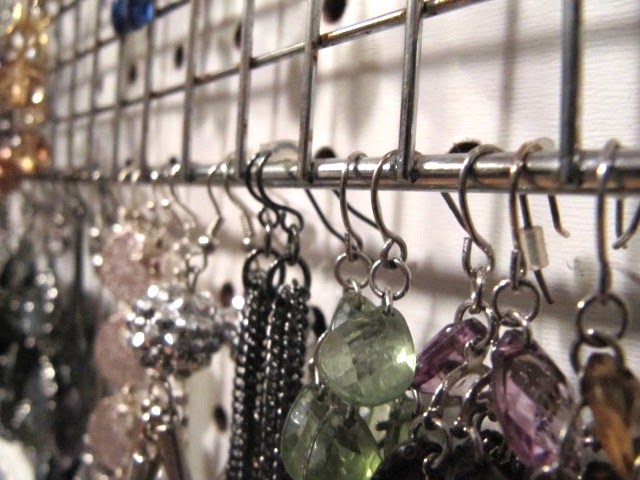
Remember my old post for using a cookie cooling rack for hook earrings? Well, just hang it on your peg board.
Click HERE for that post.
The wired earrings hang on each row of the cooling rack.
Individual hooks will hold your hoop earrings too.
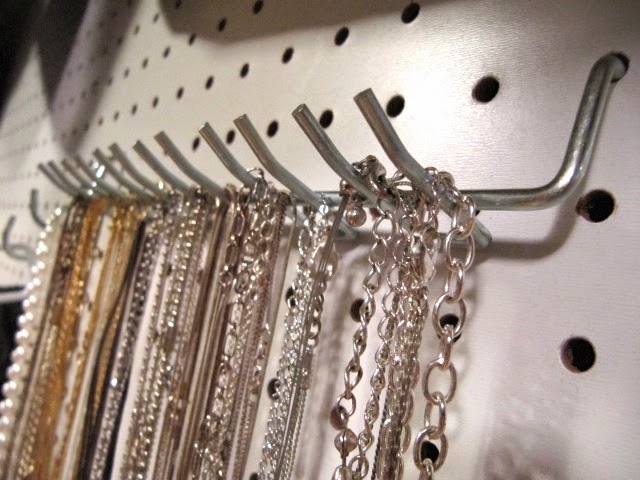
The peg board tool that holds screwdrivers is great for all your necklaces.
Hang chains from each holder.
Short hooks can hold all your bracelets.
and the longer hooks organizes all your rings.
For items that can be hung up, I mounted a small basket.
Don't forget to add these little plastic strips. They keep the single hooks from sliding around and falling off when you removing something from the hook.
Just place it over the hook and pop each end into a hole on the peg board.
Well, worth it. I still have to add more to mine. They usually come with the assortment kit of hooks.
Another tip is for your ironing board and iron.
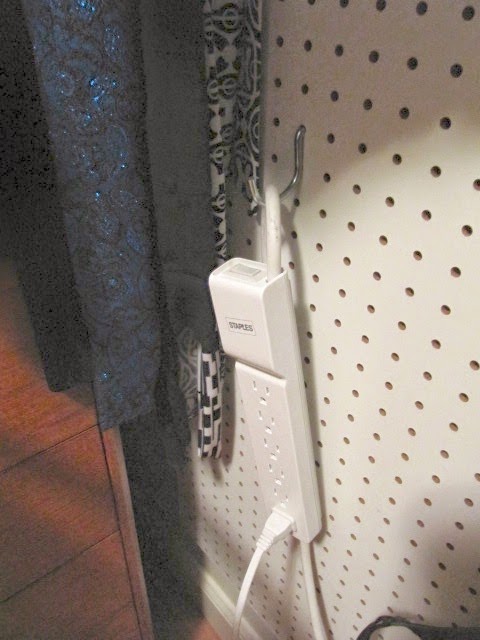
I hung a power strip on the peg board. I just plug the iron into it…it's easy to click the iron on and off with the power strip, rather than plugging it in every time or turning that tiny little dial on the iron.
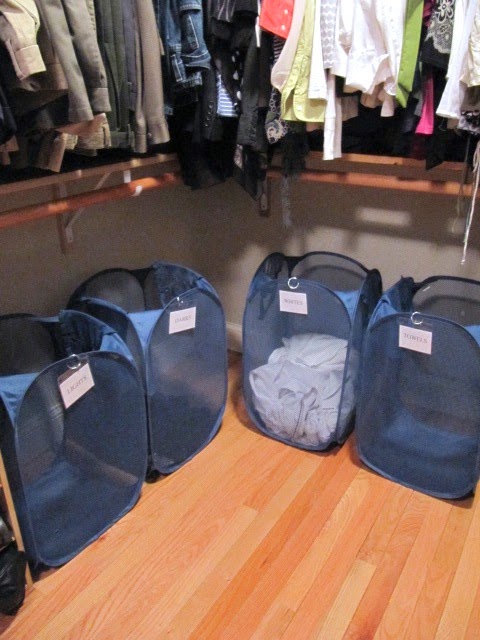
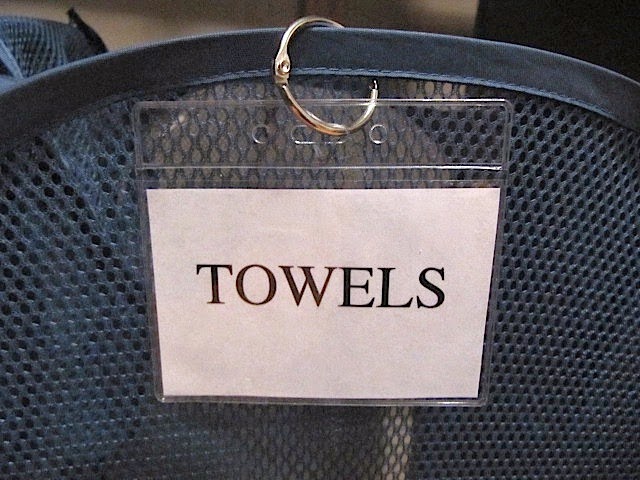
I use name badge holders to mark each basket.
Laundry is already separated when I bring it down stairs…one less step to do.
I hope this post was helpful. Adding any size peg board is great to keep you organized in just about any room in your home.
Thanks so much for stopping by,
~Karen~


















Excellent ideas! Some things I never would have thought of. Thanks for sharing.
ReplyDeleteFantastic. That looks great. Just need a room for that. But we are still on planning our house. :-)
ReplyDeletewhat a great idea!!
ReplyDeleteBest ideas EVER!!! Wish my closet was a "walk-in" so I could do this.
ReplyDeleteScarves first, then wreathes and now purses ... LOL!
ReplyDeleteOmg Im so glad I saw this today!! I live in a teeny downtown "loft style" apartment, meaning open floor plan & no doors on anything but the bathroom & a couple under-sink cabinets. I swear, that's it. No closet door, no pantry or kitchen cabinets... AKA: nowhere to hide a mess! Therefore, I'm always looking for functional organization that also looks pretty... Would love to make this work in my closet, but in the meantime, I've got an old screen door I was going to repurpose for holding jewelry this weekend. I've already bought a few hooks to screw into the frame, but I'm totally going to adapt some of your genius for my door-- like the screwdriver holder & the little basket (I already have one that'll be perfect!). And maybe more if what I've already got doesn't work out-- like a wooden dowel on hooks for holding bracelets, smaller one for rings... we'll see!!
ReplyDeleteAgain, thank you SO MUCH for sharing this! Perfect timing!! Don't ya LOVE when that happens?!
Karen that pegboard with your bags and things look like a section of a boutique store! So neatly organized and easy to see what you have. I don't have anywhere to put a pegboard though as my closet is narrow and all clothes rods.
ReplyDeleteLOL - I found out the hard way that hanging pegboard is definitely a two person job. And you are right about those spacers. They are devils!
ReplyDeleteAmazing tips and ways of using hooks, etc. My husband is a better organizer than me. We live in an older but adorable mobile. The back door is our main entrance because it is more convenient. So we enter from the back door into the narrow laundry room (not the prettiest entry ways but is fine in our mobile). Hubbie installed pegboard on one side of the laundry room where his tools are neatly hung. These tools are for house and some for outdoors. If needed, I can even use a few empty pegs for hanging clothes from the dryer temporarily. Also, for convenience, I keep 2 or 3 empty clothes hangers on a lower peg so they 're handy. I never heard of the tennis ball trick. I'm going to use that idea on the hanger I have on my bedroom door. I think I'll cover the balls with cloth so when they are not in use, they'll be cute! I would like to take a pic of our laundry peg board for you (if you are interested). BTW. I love it when you give your husband credit and appreciation. Very touching and you sound happy. Thank you for your blogging.
ReplyDeleteOr draw a smiley face on them.
DeleteWhat a great closet! Would you like my address? ..... I think I remember one of your posts about a cheese thing. Mostly grated cheese in a mound on a baking sheet. It spreads out and hardens and looks lacy. I can't seem to locate it. Can you please advise? And you can come to NC when you want to escape the cold! :)
ReplyDeleteYour closet is looking great! A few wall stud finding hints -
ReplyDelete1. if original to the house, the light switch and outlet boxes are nailed to the side of a stud. Remove the plate and carefully!, peek in the box, you can figure out which side if you can see the nails.
2. those little electronic stud finders are worth the price, which isn't that much now. Especially if you factor in the time to repair holes that could have been avoided.
3. if you don't have a stud finder, try an electric razor. Turn it on and place it against the wall and move it side to side - the sound will change when as you move over the wall studs.
4. if you never got around to filling the nail holes on the baseboard, the nails will be where studs are.