Here's a sneak peek at the backsplash...
The process for the making the wine cork backsplash is easy...come on in and see!
This is the lower section backsplash that I will be working on.
When I remove all the knick knacks, it's kind of boring. When I add the board with the wine corks on it, it will not only spruce it up a little, it will hide the lamp cords too!! Bonus!! I hate cords showing. Lol
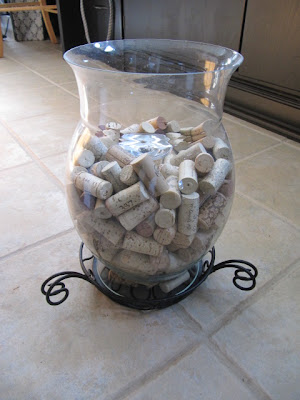
Here's the solution. A large collection of wine corks from my friend and neighbor Gina. Thanks Gina...took me a while to find a project with these, but better late than never.
I've been storing them and adding to the collection in this candle vase.
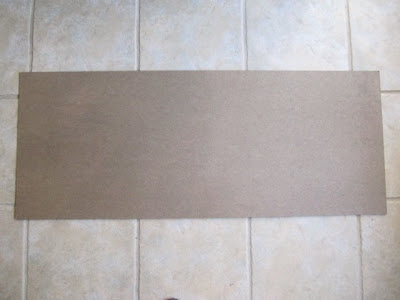
This is the board I used for this project. It is a hardboard panel. You can find it in the section in Home Depot where they sell smaller pre cut pieces of wood.
It is 2 feet by 4 feet and is only 1/8 inch thick. This pieces was only $5.86!!
I had them cut it to my exact size for the backsplash...which is the larger rectangle in the picture below.
You can get 2 free cuts at Home Depot and then very inexpensive after the first two. I have plans to make signs out of the other 2 boards, so that 3 projects for $5.86
Here's the board all set to go.
I did a few little specialized cuts for my area...you may or may not have any other cuts at all.
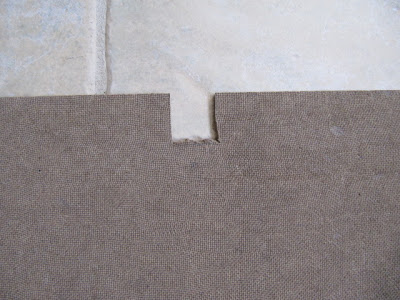
Up underneath my cabinet is a small hole for a cord to the light that is mounted there.
I just marked the width of the circle.
Hardboard is a particle board, so it's easy to cut.
and it's very thin too.
I said it is easy to cut...I didn't say I was good at it! Lol
I pretty much just hacked at it in the end...no one will see it
Fits like a glove.
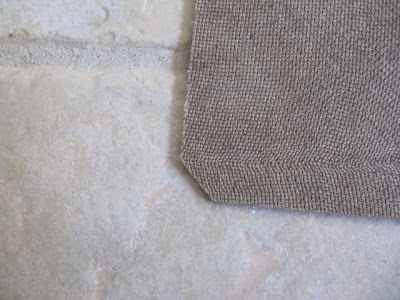
I also trimmed away a little bit of each corner so the lamp cords have a small space to fit.
Perfect!
Now to pick a design for the corks.
Straight rows?...
or a woven pattern?
Woven pattern it is! Better get out your glue gun and lots of glue sticks! It only takes a little line of glue on each cork, but there are a lot of corks. Lol
This is going to take a while.
and a little bit more...
I do have a few tips for you too!
If your corks are tapered, don't have both wide ends together at the same side....2 red lines in the picture below.
Alternate the wide parts on opposite sides. Forms the square shape better without any gaps.
Some corks have words and lettering on them. Spread the words around. I used one cork with letters and one blank one to make the board look even throughout.
I looked for special things too. This is a letter "M", but I mounted it upside down like a "W" for my last name. Poor man's version of a monogram!
Here's a quick way to determine how many corks you'll need in your space. Complete one full row across and then one row up.
44 corks in each long row, by 9 rows high. My rows are the 2 corks together...if that makes sense.
I will need 396 corks for a board that is 40 inches x 16 inches, just to give you an idea of what you might need.
I thought I had enough corks...
but I don't.
I had a request out to family and friends to save their corks, but I found a quicker way...eBay. They should be delivered today!!
I bought 2 lots of about 250 corks for $5.00 each.
You could probably go to restaurants and bars and ask them to save them for you too.
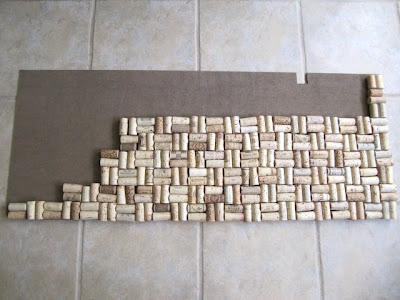
Before I thought of eBay, I thought it would be fun to leave the "unfinished" look and glue the corks on as we went along.
By the way, that little section I finished gluing took about one hour to do...not bad. Nice cup of tea and an NCIS marathon and I should finish the rest!
Finished or not, I love the way it looks.
I'll update you when I finish gluing the rest!!
Here's another tip if you want to start saving your corks, but use them too decorate too.
I put an upside down tall wine glass inside this vase and filled around it with the corks I already had.
Then I placed a candle on top of the wine glass base.
Perfect for a table centerpiece or on your coffee table. Just throw new corks in as you go along.
The section in the bottom of the wine cabinet is another Tool Time idea I use in my sewing room.
Remember the French drain pipe idea?...click HERE for that post.
Just cut a section of french drain to fit your area and then stack them up. Perfect for wine bottles.
A 10 foot length of 4 inch wide French drain pipe is only $6.22. You can get a lot out of 10 feet.
I hope you like this wine cork backsplash.
If you don't have a use for the backsplash idea, you can still glue the corks to the board and use it as a cork "message" board over your desk.
Just an FYI...my daughter Courtney figure out that if we need 396 corks for this project, with the average cost of a bottle of wine around $12.00, this project would really cost me...$4,752!! Too funny.
UPDATE!!!! I FINISHED THE BACKSPLASH. YOU CAN CLICK HERE TO SEE IT!
Have a great day,
~Karen~











I love that backsplash.. I am going to do that to my wine cabinet awesome !
ReplyDeleteWhat a nice idea! I love it!
ReplyDeleteI particularly love the candles vase full of corks!! What a great idea to buy on Ebay - I have been saving corks but so many bottles of wine in my price range in the UK are screw top!!
ReplyDeleteGreat idea, I think I would cut the corks in half lengthwise and so half the amount needed. xx
ReplyDeleteWhat a great idea to cut them in half!! I did have to cut the length off a few long corks to fit and it would definitely be a process to cut the corks lengthwise trying to get them even to lie flat. One tip might be to put the cork in a vise grip (the kind that are attached to a workbench). That will hold it in place as you cut.
DeleteThanks so much for the idea!
Hi, I'm planning to do a cork board too, but inside a frame, so I can hang it in the kitchen and pin all the take-away menus, hand written recipes, etc...
ReplyDeleteThe tip I have to cover more surface with the same amount of corks, is to cut each one lengthway in half, and you glue the cut section onto the board (which is almost flat, therefore it is probably easier to apply the glue and make sure that they stay on the board once glued). So when you do your woven pattern, it's two 'corks' from the same cork!
I love the look of your backsplash!
The light colored corks as a backdrop allow everything in front to stand out. It also gives the hutch dimension.
ReplyDeleteGreat idea! I love the corks in the vase too, and so clever to use a wine glass for the base of the candle.
ReplyDeleteSuch a great idea, Karen! I've been collecting corks for years and my son manages a wine shop and brings them home, too. I once thought I would sell them on ebay, but changed my mind when I saw how little they go for. Lucky you, there are people who think it's worth the trouble, LOL! Now I know what to make with them. Any ideas of a different glue that you think would work well?
ReplyDeleteI save corks and boy I have a ton of them. Like your creation. Love your pictures and instructions very informative. You take it right from the beginning to the end. Keep your great ideas coming!
ReplyDeleteSuch a great idea! really cute for a bar area.
ReplyDeleteHi Karen..........great project! It's unique and fun to do. Looks kinda neat unfinished....a real professional touch.
ReplyDeleteLike you, I hate to have lamp cords be right there - in your face - so years ago I had Brad to teach me how to rewire a lamp. It's really so easy! Also, he taught me how to splice cords on led strip lights. Now I can change cords at whim to make them blend in, if not disappear. (My secret is to take each piece and lay it down in order then just work backward to reassemble) And painting them isn't out of the question, either. :-)
Karen,
ReplyDeleteOnce again, you have shared a fun and creative idea with your readers. Your blog is wonderful and I look forward to every post! I love the idea of 'storing' the corks in the vase with a candle until there are enough for a larger project.
Thanks for sharing these ideas!
Enjoy your creative day!
~ Vickie
AWESOME!!! Love love love it. I saw someone else commented about cutting the corks in half. Be careful if you ever do that because corks get crumbly and fragile when cut. I read a tip once about soaking them in water first, which helps them during the cutting process so you don't destroy a bunch of corks. Good luck finishing up the project! I need to do something with my huge bowl of corks, and I'm thinking this might be just the project for them!
ReplyDeleteA friend of mine is doing a whole wall in her basement with corks. I had been saving corks from every bottle of wine we'd drank in our house but since I didn't know what to do with them, I've been donating mine to her for the wall project. Now I wish I hadn't - I'd love to do this myself - hmmm well maybe I've donated my share tee hee!
ReplyDeleteYou are so funny! Great ideas today! My current "wine work" project is covering a bird house with them! :) :) Never thought of covering a whole wall with them! WOW!!! (Good thing I love wine!)
ReplyDeleteHi Karen,What a fantastic and wonderful idea!!!It looks really great too!!!Love the recycling bit too!!!Have a fantastic day!!!
ReplyDeleteLove
AMarie
what a marvelous idea ! the recycling looks just nice !
ReplyDelete