
Here is the Santa Claus tree...click here for the original post on that

To start, I placed the hole tree in the storage container I keep all the supplies in.


The tree stem was too tall and bare looking for me, so hiding it in the container helps.

The tree stand fits perfectly.
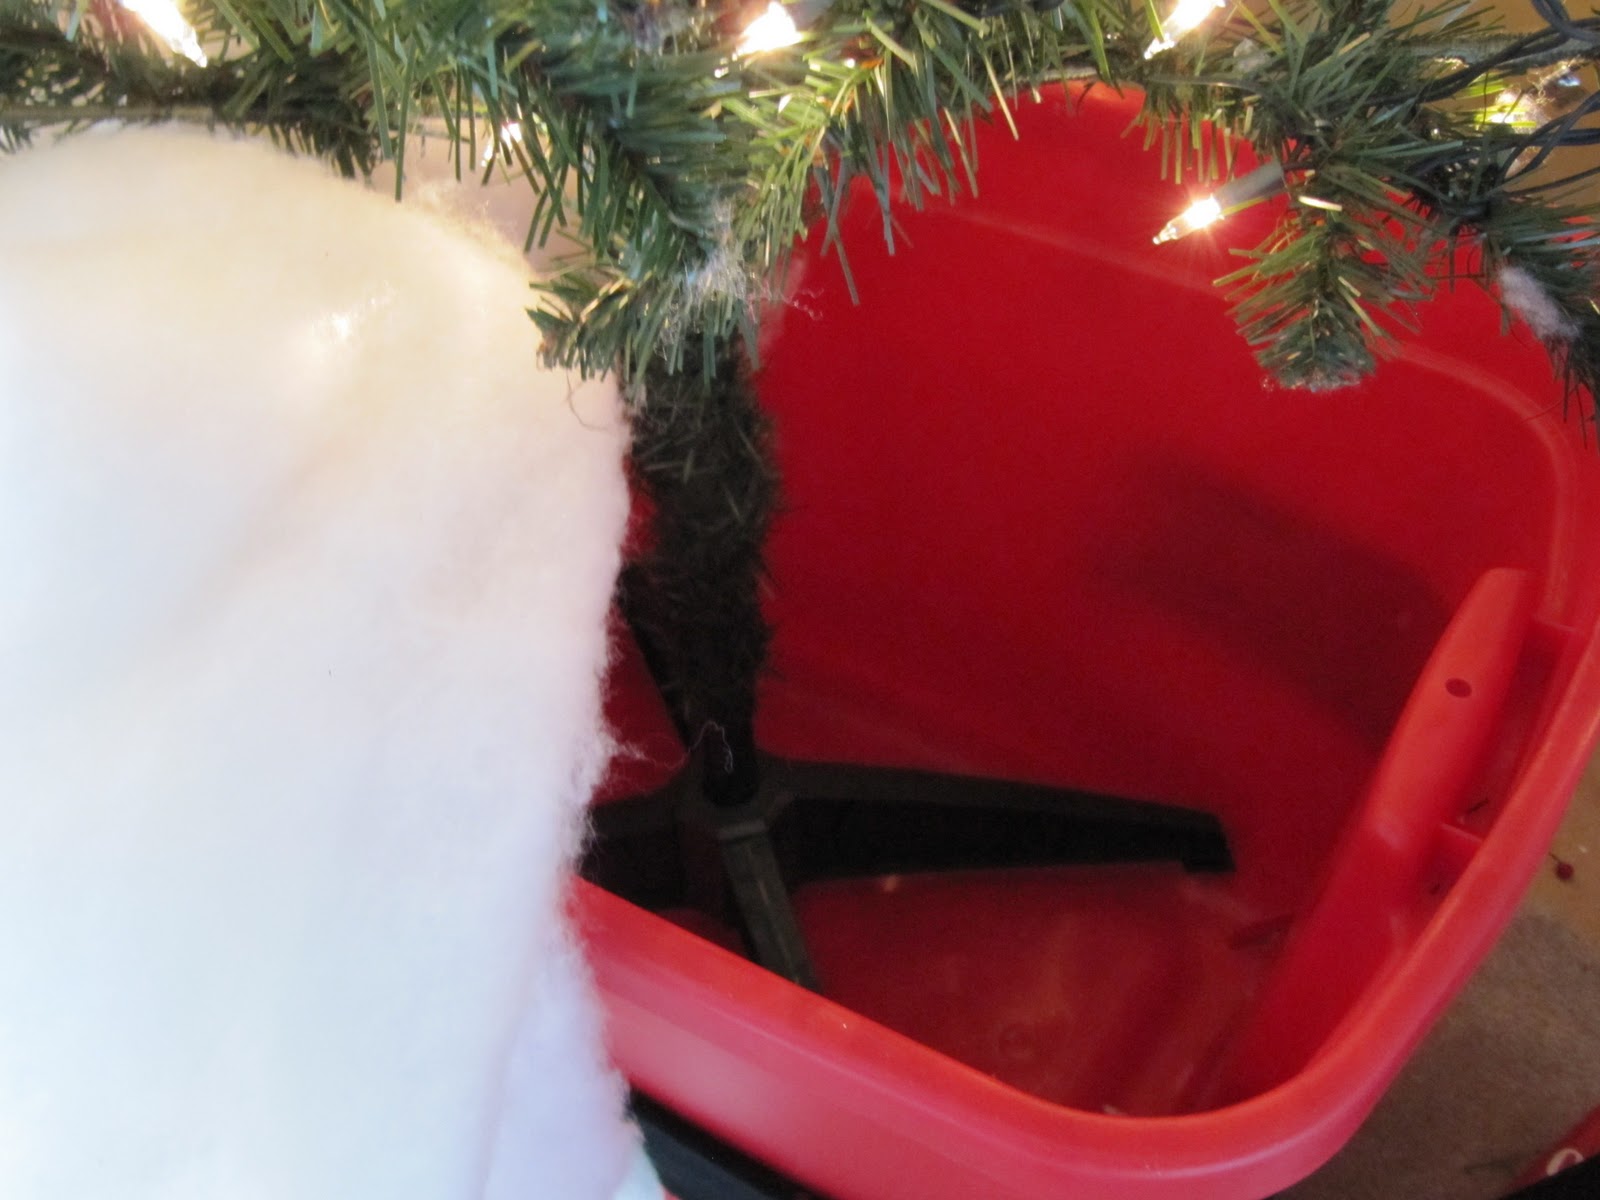
Then I just wrapped the base with a piece of quilt batting to look like snow. You could use a white blanket or throw too.

Now here's the process of decorating...lights first. This is a pre-lit tree, but 6 of my other trees are un-lit.
Here are a few light tips...
- start at the top
- wrap the lights from the inside out to give the tree a little depth
- I use five to six 100 light sets on a 6 foot tree

After lights comes the garlands or beads. I use three different garlands...red wooden beads, red berry garland and the peppermint candy garland I made. Click here for the peppermint candy tutorial.
I go by the 3 to 1 rule...I made this up, but it helps me when I'm buying clearance items and need to know how many I should buy.
- 3 feet of garland for every foot of tree

The berries I found in the floral section on clearance during the year. Adds dimension to the tree when they stick out from the branches.

Just layer the garlands between each other with a little draping.


See how the berries stick out.

Next comes all the ornaments.

Add different sizes and textures...about 40 balls Click here for Santa ornament tutorial

10 candy canes

20 longer plastic candy canes to add length...bought these a long time ago at Walmart. Love plastic!!

These word ornaments are great too. I use them for fillers after the balls go on for color in the bare spots. A box of them was about $2.00 regular price.

Here's where I start...at the top!
- Balls on first. For some reason I always start at the top right and then zig zag my way down, right to left...right to left.
- think triangles as you placing them...see the 3 red balls, they form a triangle

then use your other ornaments to fill in between.

Then I wanted even more fillers, but free ones!! I covered Styrofoam balls with cotton batting to make "snowballs"

Use them to fill in bare spots

Zig zag your way around with these too

Now for more dimension. I found these in the Christmas section of Walmart (where else) but floral sections at the craft store is a great place for things like this too. Don't always think Christmas.

Start at the top and do your "zig zag" thing. Put a few on and stand back...look to see where the next zig is going to be.


These are wires, so they just wrap on the branch very easily.

Now the topper...this can be anything related to your tree. I used a Santa hat and those large over sized candy canes that are yard ornaments.

You might have to wire bigger items on at the top.

Add a few fake wrapped presents for decoration at the bottom and you're done.

Here are some quick tips when packing it all away...remember this is the box from the bottom decoration.

I place all the balls on the bottom...they are shatter proof plastic

cover with a layer of recycled bubble wrap.

Bag up small items

Paper towel tube for garland


Liquor box divider for ornaments

All safe and sound...

You can get these liquor box dividers for free.

layer with soft things for protection

The berries are a pain in the hooty...they keep getting tangled. Layer each section with garbage bags.


When you pack your tree away, it NEVER fits in that rinky dink box again. I use a bungee cord to keep it together.

All set for another year...Now where is that cover?!?

Hope this helps a little. Maybe you can use a few of the tips when Christmas rolls around this year. This post will be in the archives, so when you need it in December, it will be here.
Take care,
~Karen~
This is exactly how I decorate a tree and I have seen so many out there that just look awful, So this tutorial will help those challenged ones.
ReplyDeleteThanks Karen!! This is great! I've been pricing out sock organizers for my ornaments ... an low and behold we have two cases of beer hanging out in the garage ... time to go pull out those inserts! Thanks for the tutorial and great packing tips! Happy Holidays! ;)
ReplyDeleteThat is just amazing. You have some tree, very pretty. A lot of great tips, Thank You.
ReplyDeleteWonderful Karen. You are an inspiration!
ReplyDeleteWow that is a pretty tree! I love how full it is. Gave me lots of inspiration to think about for next year!!
ReplyDeleteExcitement PLUS! thats what i felt when i saw your blog this morning. I have already planned a Santa theme for my tree next year but some of these ideas will make it extra special. Now I can't wait for Christmas! LOL
ReplyDeleteAm I right to assume that you don't put decorations in the back against the wall? Do you remove any branches back there so it hugs the wall more?
ReplyDeleteand BTW, your Santa tree was my favorite :-)
If you place all the stuff in the front the tree is side heavy and will tip over. A suggestion -tie a piece of cord around the middle at the top and place a cup hook in the baseboard to tie the tree so it doesn't tip over
DeleteMy tree always fit back in the box but I finally got rid of this year. 3 foot tree for me next time! I love using the storage box as the bottom of the tree...what a great idea!
ReplyDeleteBungie cords and batting covered snowballs!!! Such great ideas!!
ReplyDeleteLOVE your post and your tree! I also love being very organized too! Really good points all around!
ReplyDeleteI started a new red/white themed tree this yr. and mine looked very similar to yours, but not as much on it of course! ha
Thanks so much!
Tanya
Thanks for another great post. I have the same question as Patty - how far around the tree do you decorate?
ReplyDeleteCan too get the tree back in the box! I use a real tree now but had a fake one in college. I would spend a couple hours each year smoothing the branches together when I put it away, and another few hours "fluffing" the tree when it went back up in December! I don't recommend it, as it really wears out the branches! :-D
ReplyDeleteThanks! I will definitely use your tutorial next year!
ReplyDeleteI have to tell you about our peppermint garland. I showed my friend your tutorial post. I already HAD all my peppermints/low temp glue gun/glue sticks, but she beat me to the punch! I took one she gave me to my parents house. They have not had tree in YEARS as they always have travel to family for the holiday. I told my dad I would take it home if he didn't want it. He was going to wrestle me for it! That little tree only had lights and the garland...but it was SO CUTE! My dad thinks my friend and I are genius..but its YOU! Thanks for your blog. Its in my 'daily read' file!
ReplyDeleteWhat an explicit set of directions. Well done! Love your dividers. Nancy
ReplyDeleteDid you also make Mickey Mouse Santa ornaments? There were some that looked like they had the Mickey ears. Btw, I am absolutely in love with your blog!
ReplyDeleteI agree! I love how you turn the container into "santa belly with belt" and those candy canes! I am simply awed. I am totally inlove with the Christmas tree decorations you've used. Thanks for sharing this brilliant idea!
ReplyDeleteThank you for all your wonderful ideas and tips! I LOVE following your blog! You are one truly
ReplyDeletetalented lady.
Thanks for the organizing tips :)
Great help!!!
ReplyDeleteGreat help!!!
ReplyDelete