
I am going to clarify one thing before I begin this post. I LABEL EVERYTHING...even my coffee pots. You'll see in a minute. We have most of the holiday functions and parties at our home. Both my family and my husband's family get along so well and have a great time together. When we have everyone for Thanksgiving and Christmas and Easter there can be over 45+ people. To keep things flowing and organized, I label the food and the drinks.
Here are a few examples of Holiday place card holders that you can make to label your next party. If you have a small dinner party, having place card holders for each person is great. For me, with that many people, I just label the edibles LOL!!
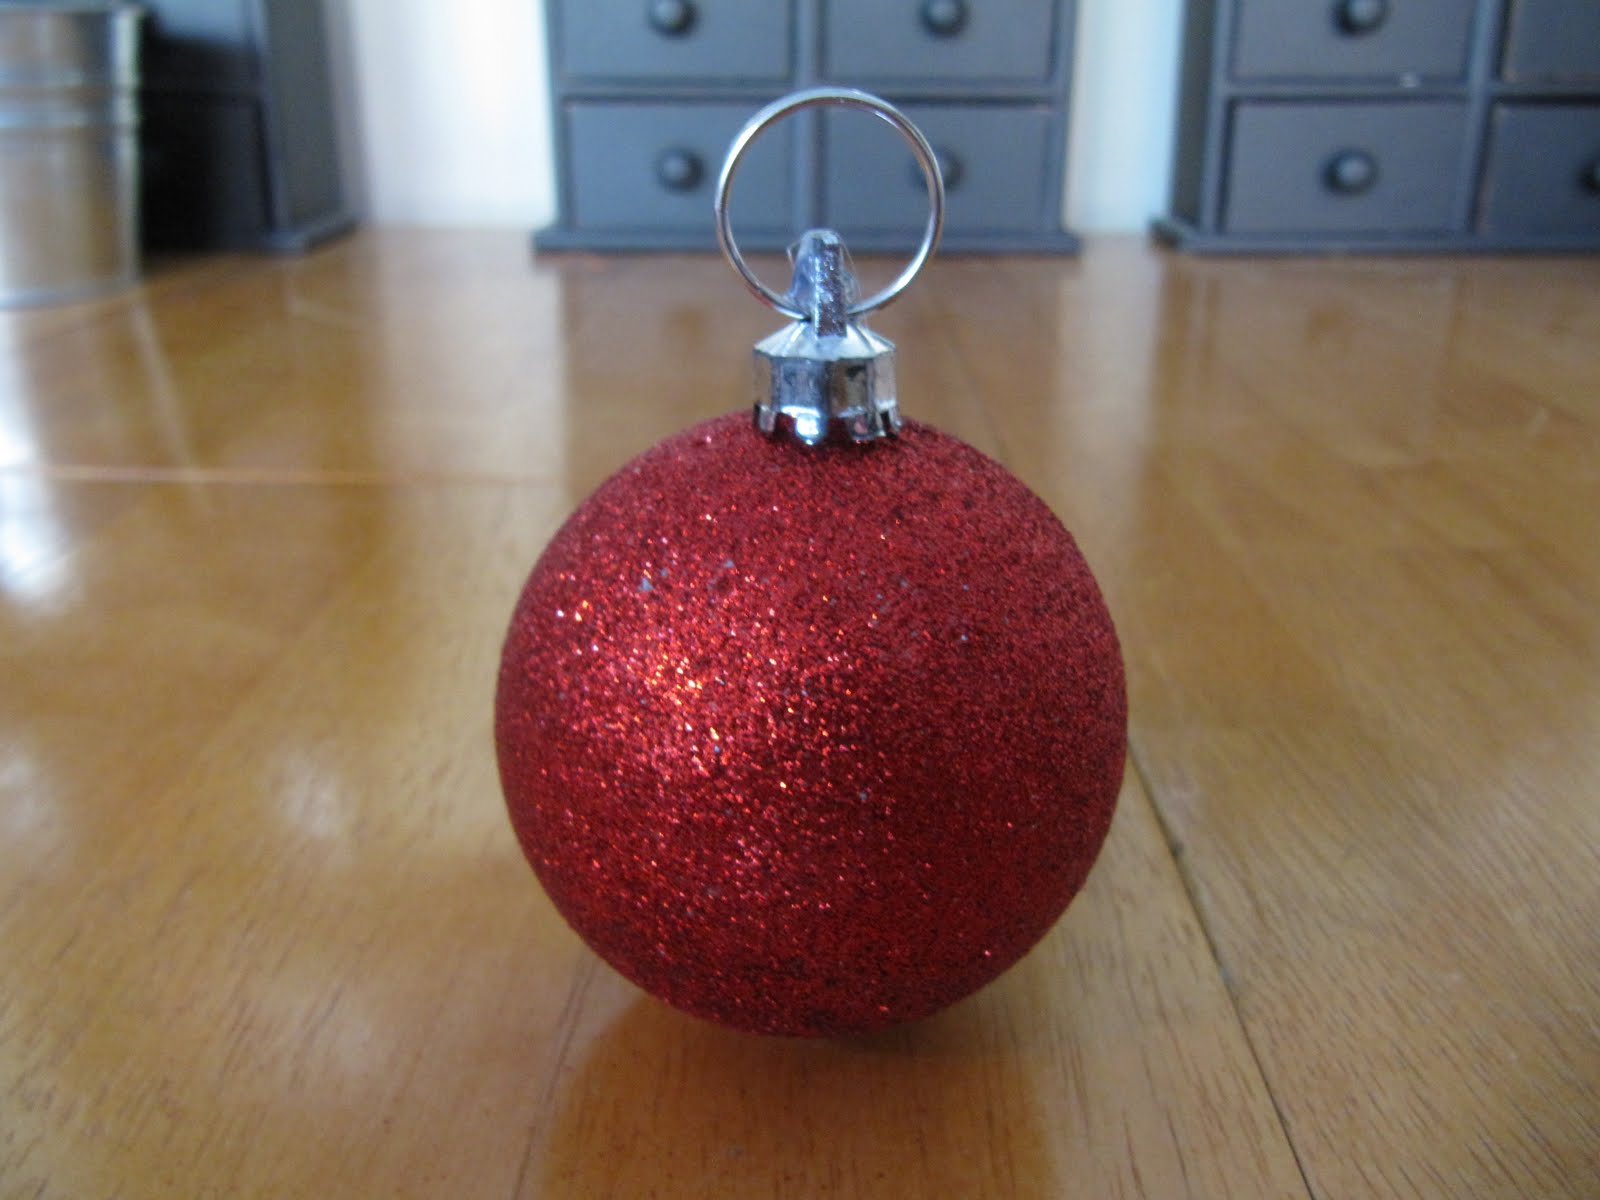
Let's make our first set from ornaments. These are from Walmart. They are the plastic non shattering kind.

$1.00 for a set of 4!!

Love the red, but they have so many other great colors too! This picture shows the problem with using an ornament...they're top heavy.

Here's the fix. These are curtain rings, found in the sewing section. You know those little rings on the back of a Roman shades where all the strings go through.

You can also use washers from the hardware store...you knew I would get a hardware store item in a TTT post.

This is a small thin key ring...you'll see this in a minute.

First try out which ring you need to use on the bottom of your ornament, according to it's size.

Hot glue it on. Make sure you place it directly in the center of the bottom or it will be wobbly.

Open up the key ring and thread it through the top of the ornament.

Here it is standing on it's own, but the key ring needs to be standing up too.

Position the key ring, making sure the part with the 2 parts of the metal are at the top.

See the 2 parts there?

Now just squirt a little hot glue in there and hold in place until it dries.
All done!!

If you don't have a key ring, you could take the 2 washers and glue them on together at the bottom.

Just make sure you leave the top part unglued, so the card can fit in there.

Now here comes the labeling part. I only printed of few for examples, but you can label anything from the dishes you are serving on a buffet, to whether that is milk or cream in the pitcher next to the coffee. Believe it or not I serve milk, half & half and cream at the coffee station. I have another tutorial on how to label them coming up soon.

Are these not the cutest. I make three different 30 cup pots for hot drinks...one regular coffee, one decaf and one hot water for tea. These work great for that.

Just slip the card between the 2 metal rings of the key chain.


Cute if you add a little tree next to the coffee pot too.

and here it is as a place card for each person at the dinner table. Guess I'm the only one coming to this party...LOL!!


You can also buy different shaped ornaments like this one.

It was made of Styrofoam, so I used floral pick for this one.


Just stick it in.

and the card rests up against the floral pick.

Here's the back. You could also wrap a little box and do the same thing!!

This is an easy one. You could really add some decorations to this if you'd like. Maybe a ribbon.

I left it plain to show you it is just a business card holder from the clearance rack.

How about a paper clamp.

or how about a spool of thread for a sewing party!! I used 2 floral picks stuck in the paper.

Too cute...

and last, but certainly not the least...you can take scrapbook paper, fabric, note cards or last years Christmas cards and make a simple folded card holder. For the fabric you could just fuse two pieces together or fuse or glue a piece to some card stock.

I used a Christmas note card.

I cut mine 4 inches x 4 inches, but you can experiment with yours.

Fold in half design towards design.

Now take the top edge and fold it down to the bottom folded edge.

Like this...

Flip it over.

and fold down the other top edge to the bottom. The front edge of mine looks crooked, but the card was scalloped in the front.

Just place your card in the fold.

Just perfect and this one is free!!

If I think of any more, I'll be sure to share them with you. Now don't wait til the last minute to make these. Start them early. They make great gifts too.
- buy a set of plate chargers, you know those big plates that go under the dinner plate, make or buy a set of napkins, napkin rings and make a set of these place card holders to go with all of it. A great gift!
- just make a set of the place card holders and have a set of all the names in the family you are giving this too.
- make some and use it to give a special photo to someone. Place the picture in it instead of the name card.
- have one in a guest bedroom or your children's room with a little inspiration saying or love note for your hubby or significant other.
~Karen~
ps...see the post I did yesterday on my Blog Buddy series. I need your help!
linking this to The Idea Room, Under The Table and Dreaming and Metamorphosis Monday Parties...join the fun
Those are so freakin' cute! I love them...thanks so much for sharing the tutorial.
ReplyDeleteFantastic ideas Karen..... I'm off to find little bits to make some.....
ReplyDeleteHugz
Karen, como siempre, tienes ideas maravillosas. Gracias por enseñarnos cómo se hacen. Un beso
ReplyDeleteLoving these ideas! I am having a holiday open house for my home business in just a few weeks and the ornament card holders will be perfect for labeling foods and beverages. I LOVE "Tool Time Tuesday"!
ReplyDeleteI LOVE Tool Time Tuesdays! You always give me such wonderful ideas and inspiration. I've always wanted to buy ornament name holders, but they're just so darn expensive. Now I can make some of my own!
ReplyDeleteGotta love TTT. Karen you are one of a kind and your inspiration is wonderful. I am sure I am not the only one who looks forward to Tuesdays.
ReplyDeleteBe always in stitches.
These are such adorable ideas....I have the in-laws coming into town for Christmas this year, so I may be trying one of these out. :) Thanks!
ReplyDeleteYou are so creative! Thanks for another "must do" craft idea!
ReplyDeleteI bow down to your creativity and your AWESOME organizational skills. :) you rock!!
ReplyDeletePS thanks a million for mentioning me in your last post! xo
These are all such great ideas!!! Thanks so much for sharing them!
ReplyDeleteThey look so much cuter than the neon orange labels my husband slaps on the items. I may have to make a bunch of these.
ReplyDeleteI just love all these ideas - cute and inexpensive. Right up my alley!
ReplyDeleteGreat ideas Karen. Thanks for sharing. I need to start early too or it waits til next year!
ReplyDeleteI totally love the ornament place cards! I might make some to use as price cards on my craft show table. Thanks for the TTT!
ReplyDeleteI love the ornament idea! And we have the same Christmas dishes as you do :-)
ReplyDeleteCute ideas from "Creative Karen"... I love all
ReplyDeleteof them. You are truly inspiring, keep them
coming...":O)
I love these ideas. The scrapbook group has started having their christmas party at my house and I have to stand in the kitchen to let everyone know what there is to drink and where it is...not anymore. Thanks Karen.
ReplyDeleteWanda
http://wandas-quilts-crafts.blogspot.com/
What a great idea! Last time I used seating cards no one paid attention to them. :)
ReplyDeleteThat is a great idea. They would be wonderful for displaying Christmas cards!
ReplyDeleteAll are so cute! Thanks for posting the great ideas.
ReplyDeleteThese ideas are so simple and pretty! I love them!!
ReplyDeleteYou are so creative, Karen. I would not have thought of that, but I sure will be using your ideas...we have all of our holiday gatherings at my house. Guess I'd better get busy! Thanks for the ideas!
ReplyDeleteXOXO,
Cyndi
Oh, that has to be one of your best ideas ever!
ReplyDeleteThis is SUCH a great idea, Karen. I can see the Christmas table all nicely set with these place card holders - gorgeous. Honestly, you just come up with the best ideas!
ReplyDeleteGenius!! I love these! I am certainly going to add these to the Holiday table. I like the Christmas balls the best.. I think LOL .. ohhh they are all fantastic :)
ReplyDeleteYOU ARE JUST TOO COOL! GREAT IDEAS!
ReplyDeleteToo smart again... love this idea. Must go and buy a hot glue thing right now...
ReplyDeleteI just love coming here....just love it.
ReplyDeleteYou've left me scratching my head wondering - - -
ReplyDeletewhy couldn't have I thought of this ??????
Hugs,
Gerry
You seriously rock, girlfriend! Thanks for such a great, useful, easy idea! Time to party!
ReplyDeleteLOve love the round ornament ones - great idea!!
ReplyDeletethanks!
Very cute ideas! Thank you for all your time!
ReplyDeletesuch clever ideas!!! Thank you for sharing your talents!!
ReplyDeleteAll wonderful ideas. Time to head back to Hobby Lobby and look at the decorations in a new light.
ReplyDeleteI like the idea of Decaf/Regular. And a good way to distinguish between Pumpkin and Sweet Potato Pie in our family. We have to have both!!
Very cute idea Karen!
ReplyDeleteGreat ideas, I saw chargers on sale last week so I must pick them up tomorrow. What font did you use for the cards at the beginning of this post?
ReplyDeleteThose ornament holders are genius--thanks for sharing!
ReplyDeleteI love the ornament labeling idea! I have a bunch of those that I got on clearance after Christmas last year and I had no clue what to do with them - thanks for the idea!
ReplyDeleteGreat ideas here! These put me in the mood to throw a party.
ReplyDeletelove. that's all i can say. i just LOVE the ornament holder.
ReplyDeleteHi there!! I am your newest follower. I found you on the crafty link up! I love finding new blogs and yours is lovely:) You can find me at www.bouffeebambini.blogspot.com
ReplyDeleteHave a peek at my giveaways if you stop by. Everything is handmade and gorgeous!
WOW!! these are so wonderful1 great job
You are brilliant! How do you keep coming up with these amazing ideas? I love them all!
ReplyDeleteBest wishes,
Natasha.
You did it again. Great ideas. Hope you don't mind if I use a few of them for my Holiday dinners. :)
ReplyDeleteKaren, you just make me happy that I came across you...when are you coming to STASH?> gotta love these...will make some for sure..thank you for being sew darn inspiring.
ReplyDeleteThese are all so cute -- the ornament and gift are my favorite. Thanks so much for sharing them with us!
ReplyDeleteGreat Ideas! Thank you for sharing!
ReplyDeleteSuch simple, fun & elegant ideas! I especially love the ornament and the thread spool :-)
ReplyDelete(visiting via Merry & Brite party)
I think I just fell in love with you a little...the more and more I read into your blog the more great things I find....You're so crafty!!
ReplyDeleteHi Karen, just to say I have just made some of these.... they were so quick and easy....
ReplyDeletethanks for the idea... hope you can pop in and have a quick look.....
Hugz
http://bubzrugz.blogspot.com/2010/11/hoot-hoot-christmas-is-coming.html
Great ideas, my favorite is the first one with the round ornament...very cute!
ReplyDeleteWow! Aren't you the clever one? Very cute idea and budget friendly. Love it. Thanks for the inspiration...Linda
ReplyDeleteOh, I am your newest follower. Stop by and say hello. Happy Thanksgiving! Linda
ReplyDeleteYou are a genius! I signed up to be your newest follower!
ReplyDeleteNice surprise to discover this. I was googling for something else, but now I forgot what. Am enchanted. Thanks for the idea and your effort!
ReplyDeleteI LOVE the font you used on the cards... do you know the name of it?
ReplyDeleteYou are unbelievably creative!! I am checking out all of your organizing posts and am in awe...
ReplyDeleteSuch great ideas!!! Would you be interested in sharing these on my 25 Days of Handmade Christmas series? My blog is embracingmessy.blogspot.com. You can email me at embracingmessy@gmail.com if you're interested!
ReplyDeleteKelsey
LOVE LOVE LOVE these ideas... I must remember these for next year thanks
ReplyDeleteHugs
Susan
This comment has been removed by a blog administrator.
ReplyDeleteThis comment has been removed by a blog administrator.
ReplyDeleteThis comment has been removed by a blog administrator.
ReplyDeleteI found your blog through Pinterest :) I love this!! I will be making some of these very soon! I love getting Christmas ideas in the summer, lots of time to work on them! Thanks for the GREAT idea!!
ReplyDeleteWhere did you get your key rings?
ReplyDeleteMom and I found the pictures of myself and my siblings with Santa. I think I will make the ornaments to display them as the table center piece for dinner. Great conversation starters. Thanks, WL
ReplyDeleteAmazing, thank you for the step by step. I can't wait to make these.
ReplyDelete