
Well, look at these in what else...galvanized metal. However, they do come in white, black, off white and so many other kinds from metals to plastics.

and these were on sale too!!

Ok, can you hear my mind ticking away. Here we go...

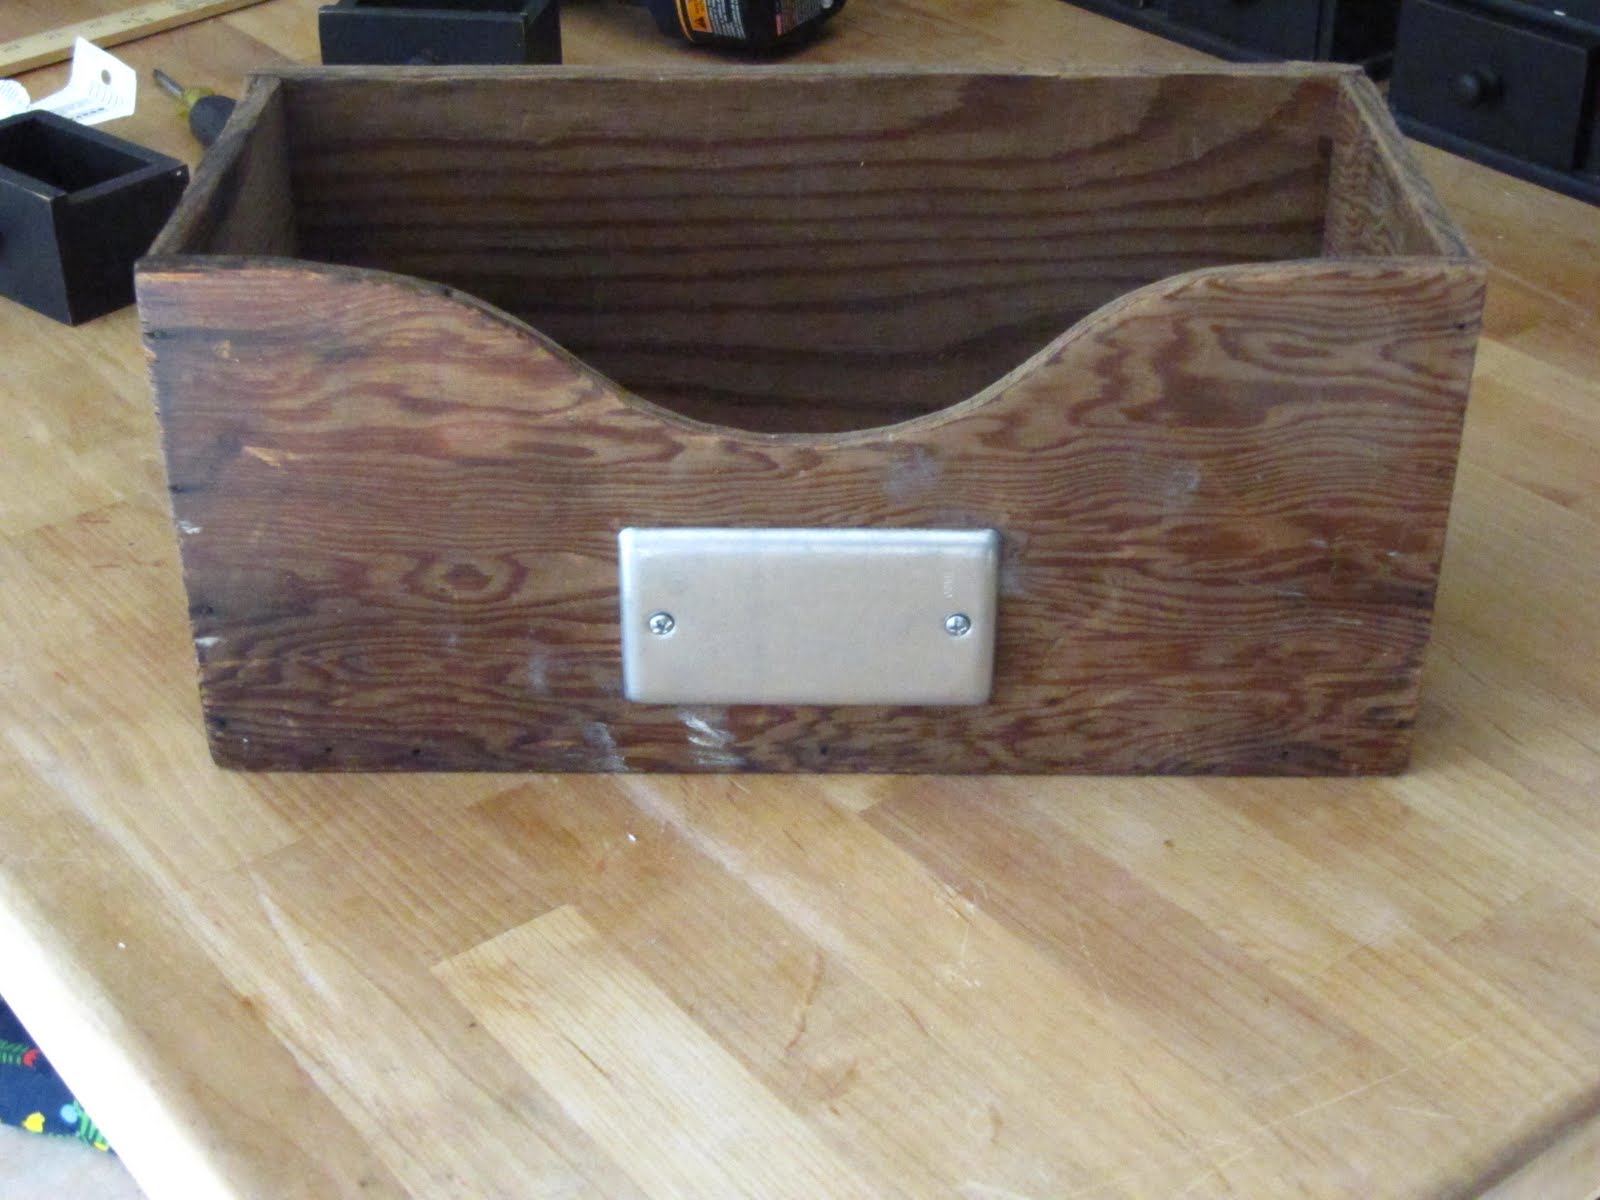
This is a very old wooden box that came from my grandfather's woodworking shop. My dad had them and now they're mine. I left the finish just the way it was so many years ago.

I placed the switch plate on the front of the box and centered it.

Mark the screw holes for drilling.

Don't you love all the dinks in the box...I never met my grandfather. He passed away before I was born, so it's nice to have something of his.

Now it's time for my favorite tool!

Drill the 2 holes from the pencil marks.

Here are the 2 screws that come with the switch plate (flat tips). They worked fine for this box, but if you have trouble with another surface, you might want to use...

pointy (technical term) wood screws.

Now just screw the plate to the front of the box.

and here you have it all finished. See below for different ways to use them.
You could put your favorite herbs in the box and label the switch plate.


Look who helped me do the labeling...our old friend Mr. Dry Eraser. It rubs right off the switch plate when you want to change the contents of the container you have.


How about all my quilting friends out there!!! I know you have fat quarters, scraps, squares or strips that need organizing.

Remember the "Crap Baskets" on my stairs? Well, instead of the name badge holder for the names how about a switch plate!!

I used the dry erase pen here again just as an example, but you could paint the names on or use a stencil or vinyl lettering or even a picture of the person Mod Podged on!

How about in the mud room over each person's coat hook.


and last, but not least, on the front of a fabric covered box. I used the same method as the wooden box. Mark the holes, but I just used a pointy awl to pierce the fabric and the cardboard box. I screwed in the flat screw and it stayed, but you could use a little nut to secure it on the back.

I think I might find some nice lettering in the scrap booking section to label these for my recipes. Not sure yet what to put in there.

The top row is more covered boxes with the pipe straps that I used on another post. Missing 2 though off to the right! Off to Home Depot I guess!

The bottom row are the photo boxes that I painted black. They actually have photos in them. Now the only issue I have with them is the brassy gold label plate...they don't match the galvanized plates above. Never fear though, I see paint in their future.

So ladies, onto the electrical department and "switch" it up a little.
space
Don't forget to look back at other fun Tool Time Tuesday ideas here.
space
I'm linking this post to Just A Girl...Show and Share Day. Go take a peek for some unbelievable ideas.
space
I'm also linking to CSI's Hardware Store Challenge...You have to make something from a hardware store! I know...hardware is my middle name. I've been doing hardware posts for over a year now!! This is perfect for me. I should have their blog button here, but I am inept at adding that to a post, so I put it in my side bar. I hope that's ok!
spacespace
Happy Tuesday,
~Karen~
They look great! Clever ideas.
ReplyDeleteLove all your ideas, Karen!
ReplyDeleteHugs - Lurline♥
What a neat idea!!! Thanks for the inspiration!!!
ReplyDeleteI would sure love to go on a trip with you to Home Depot and see if I can figure out how you come up with all these brilliant ideas. Do you spend hours there? Do you go with something in mind or does it just come to you while you are there?
ReplyDeleteYou are genius!
Nice. Nice. Nice.
ReplyDeleteWhen I grow up, I want to be just like you!!!
ReplyDeleteAbsolutely gorgeous! I love it.
ReplyDeleteThey look great! love all.
ReplyDeleteSuper idea! You lucky thing having the wonderful boxes.
ReplyDeleteEres increible!! Means: You're amazing! Thanks for all great ideas.
ReplyDeleteWhat an attractive way to feature some fat quarters in a decorative way...maybe for the different seasons? I like it a lot...now I have to acquire a wooden box or two so I can DO this one!!! LOL
ReplyDeletekaren, you have such a great deal of creativity!! You would love to go into my husband´s "corner of the house where he works" or as I call it..."the trash corner". He is into electronics, and mechanic stuff. I would through away tons of things, but you would probably turn it into something pretty and useful!!!
ReplyDeleteI love all your organizing ideas, you are so creative. Thanks for commenting on my post, I hope I fixed the problem. Your blog is one I will be visiting often...
ReplyDeleteYou've done it again! Great idea! Everything looks so crisp with plates attached. Have a great day!
ReplyDeleteKaren~ I have 2 old boxes one was
ReplyDeleteMom's and one was Dad's so that
is a wonderful idea. Boy hubby's
truck is sure going to be empty,
by the time I get through with it.
He's an electrical contractor and
has all this on his truck,,,huh I
mean he did have all this on his
truck.LOL.He'll just have to replenish it.:O)
Great idea!
ReplyDeleteThank you Karen and have a great day!
HD should give you a commission! Love your idea! Thanks!
ReplyDeleteFun idea. I enjoy your Tool Time Tuesday. Thanks for sharing.
ReplyDeleteMary
genius!
ReplyDeleteOkay this is such a great idea! I always get funny looks from the people at my Home Depot or Lowes!
ReplyDeleteThanks for sharing!
What a neat idea!
ReplyDeleteVery clever, love your organized shelf.
ReplyDeleteHome Depot is a regular stop for me on Wednesday..gee thanks. haha
ReplyDeletePat
Well, having an electrician for a sweetie, I can tell you that we have tonnes of these around the house.
ReplyDeleteWhat a clever idea! You continually amaze me. Imagine having ideas for a millions little things running around your head.
It's scary at times isn't it? But we get the results! Wahoo!
So cute and clever!! I can't get over all the different ways you are able to use the plates. Thank you for sharing your ideas ... I am looking at a few baskets on my shelf that could use a little dressing up. :o)
ReplyDeleteHave a wonderful evening.
Sincerely ~ Tricia
I am looking around right now to see where I can put these! Great idea!
ReplyDeleteI love the idea, how creative. It looks great!
ReplyDeleteSeriously! You kill me! ;o)
ReplyDeleteI think that's absolutely brilliant! I love it! I'm pretty sure if I decorated with all things hardware my hubby would be a happy man. Love it.
ReplyDeleteI LOVE this idea so so much! As a metal lover, this is right up my alley. Giddy!
ReplyDeleteDonna
http://funkyjunkinteriors.blogspot.com/
What a smart idea!! Loving this!
ReplyDeleteSo simple, yet so perfect. Too bad I'm not a judge because you would totally get my vote. Alas, all you get from me is the knowledge that I am totally going to copy you! Thanks for sharing your creativity
ReplyDeleteI love this idea. Of course I love anything galvanized. I have to think of places to use these now!
ReplyDeleteOMG - genius! Love it!
ReplyDeleteThanks so much for linking up to The CSI Project's hardware Store Challenge! We hope you will come back next week for the Martha Stewart-inspired challenge -- The MS Craft Department are our guest judges!!!
XOXO
Jen
Oh man, I'm going to be dangerous with this knowledge!!! Thanks for sharing!
ReplyDeletefirst time here and I'm so glad I found you, thanks for the inspiration!!
ReplyDeleteValerie
http://www.PastimesOnline.ca/Vals-Quilting/
Love this idea! So cute and creative. Great job!
ReplyDeleteAdore! Would you come and organize for me?
ReplyDeleteso many uses and so many clever ideas.thanks.
ReplyDeleteLove this idea! I am going to have to add it to my "project list". Thanks for sharing.
ReplyDeleteWhat a clever idea! And I love your conduit pipe handles too! I am getting ready to create a craft room in our basement. I'm definitely bookmarking this idea!
ReplyDeleteThis is awesome! What a super clever idea!!!
ReplyDeleteYou need to open up your own hardware store. Your one clever gal.
ReplyDeleteI enjoy all of your ideas, very productives ideas to our work place. Go ahead!!
ReplyDeleteI adore your sewing space! I would love to move in! Thanks for sharing your great ideas!
ReplyDeleteLove, Love, Love it all! your ideas are amazing... Can't wait to see more :-) Do u have Youtube? God Bless :-)
ReplyDeleteGalvanized metal works with magnets... so what you really have is a bunch of small magnet boards... create a series of small magnetic messages, or things to remember, and you can post them anywhere.
ReplyDeleteCool idea....
Love this idea. Arrived via Pinterest and can think of so many uses for this. I wonder if they could be 'written on' with a metal scriver?
ReplyDeleteLove Bennys!
ReplyDeleteali @ Forty before 40
www.40tasks.blogspot.com
Very clever! I love outside the box thinking! I can't believe I never thought of that!! I can't wait to try it.
ReplyDeleteGreat idea! Looks so clean and stylish.
ReplyDelete