My current sewing room has a history and story all it's own, which some of you may have read in previous posts. It was a creation brought out from tragedy. As I mentioned earlier, my previous sewing room was in the basement, underneath an apartment we added on for my elderly father. My father, who is very forgetful, has had several disasters with water. He has flooded our home 5 times, two of which "rained" on my sewing/craft room in the basement.
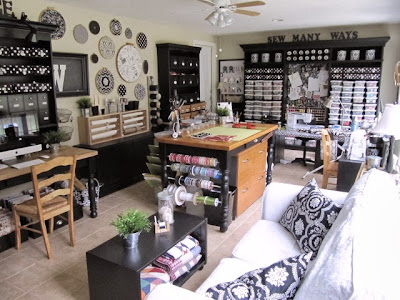
In desperation, I knew I had to find a space somewhere else in the house. My sister, who felt so badly for me, was the driving force behind getting my sewing room up from the basement to an area off our family, what was then a three season porch. The porch had long eating tables and was used for all our large family celebrations and holiday dinners. Well, there have been lots of changes over the last 4 years, but here is what the space looks like now.
Today, I wanted to share a whole new post with you with tons of pictures for inspiration. I know sewing and craft room are not the same, but the ideas can be incorporated into any room or space. My life is based on using things I already have, saving money with thrift store finds, upcycling things with paint and turning unwanted items into gems.
Every single thing in this room is a hand me down, a thrift store find, bought on sale and refurbished or made by me. Throughout this post, I will share all the pictures and the links to the project posts, so you can make them too!! There are lots of links to other post with the instructions, so just click the words HERE that are linked in red.
This post is very picture heavy, so grab a cup of your favorite beverage and let's start the tour.
The first spot is the wall that isn't showing in the main photo. It's the wall behind the door as you enter.
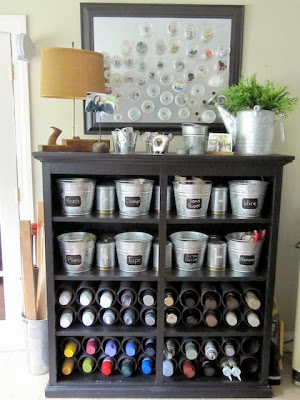
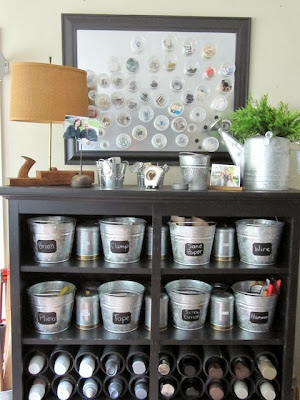
This is my work bench where all my tools, paints and hardware are stored. In the previous sewing room post, this cabinet had white plastic containers in it filled with supplies. Not sure what this pieces of furniture was before, but it does look like a dresser with all the drawers removed.
The frame above the cabinet is a piece of sheet metal with magnetic plastic cups for storage. The cups hold all my tiny parts and pieces...screws, nails, tacks etc.
Click HERE for the link on how to make the magnetic frame and
Click HERE for the post on how to make the magnetic plastic cups.
Here are some ideas from the top shelf...
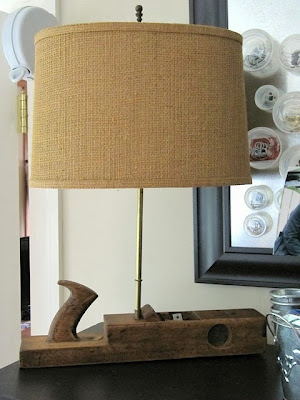
This is a lamp I found in a thrift store. It's a wood planer with a lamp kit added. Perfect for a work bench!
You could probably turn anything into a lamp with a simple lamp kit!
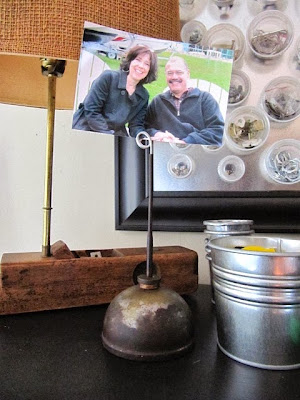
This is an old oil can I use for a picture holder.
Just twist a wire and place it inside the hole where the oil comes out.
Include special things in your sewing craft room to add a person touch.
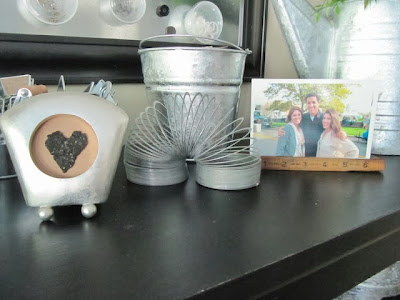
I framed a piece of road asphalt I found on a walk with my husband. It's shaped like a heart!!
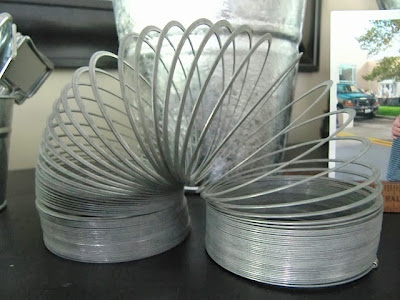
I have the 2 Slinky's my daughters played with when they were little. They are great to hold papers and notes...like a mini organizer.
I also use old fashion expandable ruler for another picture holder.
The slats in the ruler holds the photo.
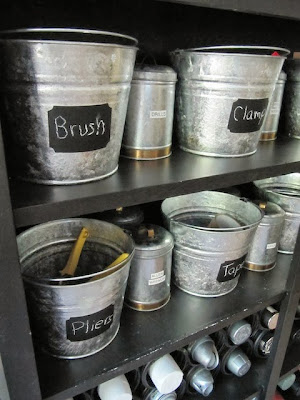
The first 2 shelves are for all my tools.
I bought the galvanized buckets at Tractor Supply for $2-3 a piece.
You can click HERE for the post on how to make the chalkboard labels!!
All my spray paint cans are stored in the bottom rows. I use plastic French Drain tubes that I cut to fit the shelf.
You can click HERE for the post on how to make them yourself.
The French Drain tubes help to use the whole space of the shelf, top to bottom.
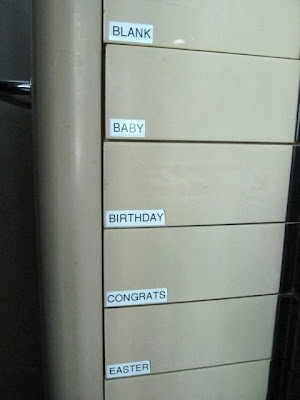
Moving along that wall is an old dental cabinet my boss gave me. I am a dental hygienist, so I couldn't pass it up.
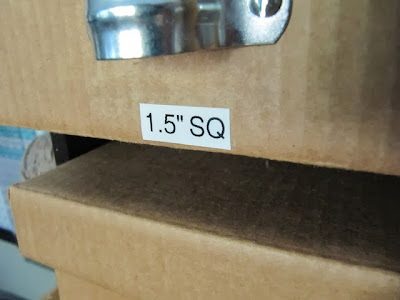
The small drawers are perfect for a card organizer. I used my label maker to identify each drawer
Now everyone in the house can find a card when they need one.
An old waste basket holds yard sticks.
If you gather up like items and put them in one place, they are easy to find and you won't repurchase more of the same thing.
These yard sticks will some day edge the border of my cutting table or my sewing table. On the "to do" list!
This is the only long wall in the room. Holds lots of stuff.
This is my desk...
The base is an old farm table. I painted the legs black and I left the butcher block top natural. I added the top part of my old dining room china cabinet to the top. I removed the glass doors and painted it black too.
Here is an old "before" picture of the china cabinet in 2 pieces. You can paint all different kinds of furniture one color to unite them.
Starting at the top of the desk...
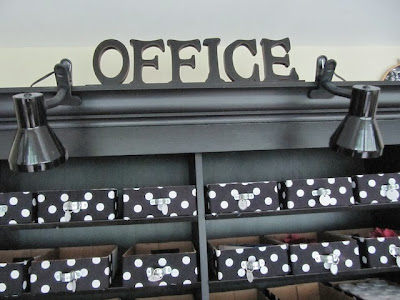
I added 2 clip lamps to the top for light shining down on my desk. This way, I don't needs lamps "on" my desk and that frees up space for my computer and other things.
I plugged the lamps into a surge bar, so I can control both on one switch on my desk not at the top of each lamp.
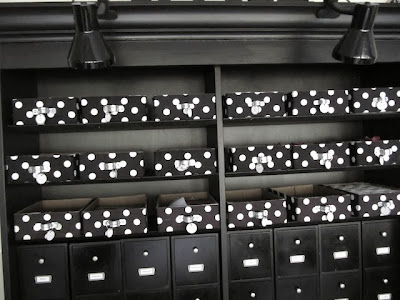
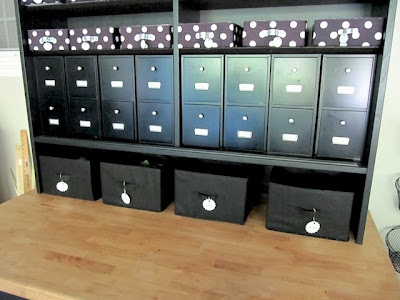
The polka dot boxes have been a popular post on my blog. I use these to store all kinds of things.
Click HERE to see how to make these.
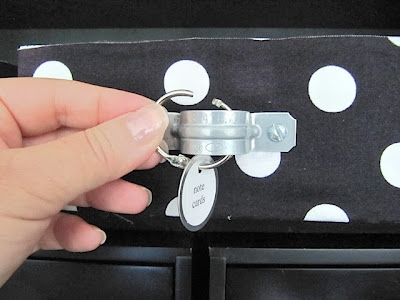
I screwed in electrical conduit pipe straps into the boxes for handles. Key tags hang from the straps to identify what's in each box.
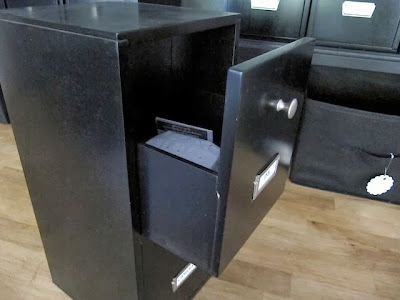
In the next section, I bought old CD storage boxes from the clearance section of Staples. They fit perfectly in the space.
The boxes came with a slot to label each drawer.
I keep pencil, pens, staples, ink, post it notes, memory cards etc...all office supplies.
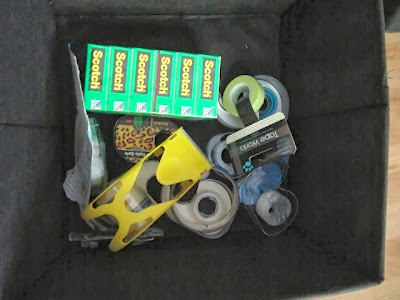
These fabric boxes below that were $1.00 in a discount store. They hold big things like rolls of tape etc.
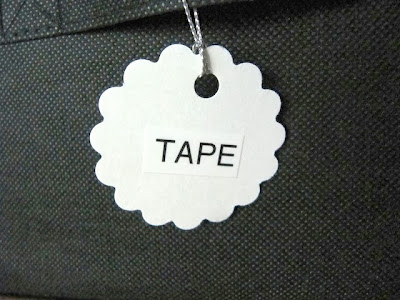
I made little tags with a paper punch.
Keeping things in one place and labeling them makes it easier for everyone to find things.
The one little drawer in this table had a sad drawer pull, so I changed it out with a valve handle.
Click HERE to see the post on this!
Keep the inside of the drawer organized too.
Click HERE for that! This is an old egg tray from my refrigerator.
Underneath my desk, I salvaged our old drawers from our kitchen renovation project to hold all my books and magazines. I painted the drawers black and added cute pulls. On the "to do" list is to add casters to the bottom, so the drawers roll out easier.
Click HERE to see the drawer project post.
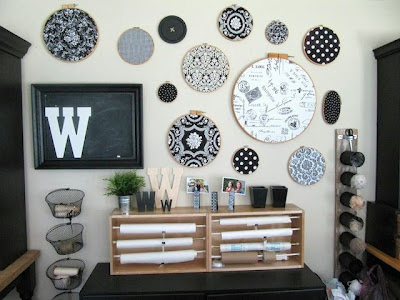
Just down from my desk is a collage wall with lots of goodies!! The black piece of furniture is the bottom of the china cabinet. Tons of storage in there.
A wall of storage and a little pretty too!
These $1.00 wire baskets from The Dollar Tree hold my supply of different types of string. I pulled the end of the string through the wire basket to dispense it. I keep scissors hanging on the basket, so they are always there to cut the string.
Click HERE if you want to see that post.
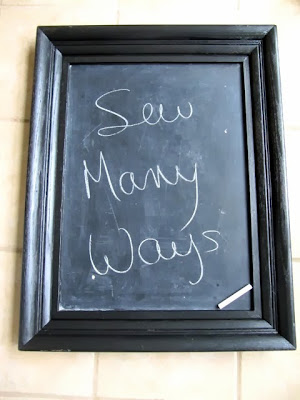
My daughters' old childhood chalkboard is given a little oomph by adding a thrift store frame I painted.
Click HERE to see how.
These boxes are drawers from the kitchen renovation that weren't used. I filled each one with rolls of freezer paper, tracing paper, adhesive paper, Heat & Bond etc...all stored on curtain tension rods.
I also shared an idea for using binder clips to label the rolls of paper...click HERE to see that!!
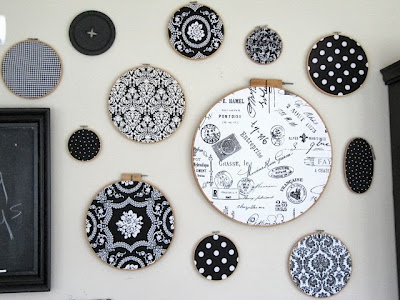
These embroidery hoops don't function as storage. They just add a pop of pretty fabric to the wall. I buy all the hoops in thrift stores or yard sales for $1.00 or less.
Click HERE to see how you can make decorative fabric hoops too.
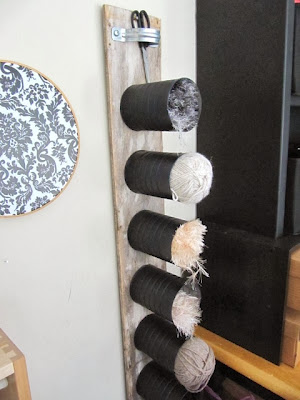
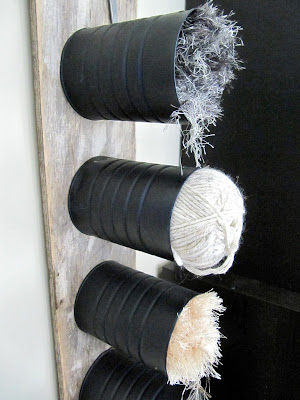
This coffee can storage idea was super popular too. I've painted this from red to black, but I still love using it for so many things. It held all my string before, now it's great for skeins yarn!!
Click HERE to see how to turn an old wood board and coffee cans into a great vertical storage solution. Lots of storage, but doesn't use a lot of wall space.
Yarn now, but this also held my paint cans before!
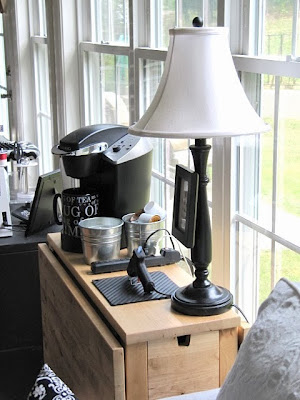
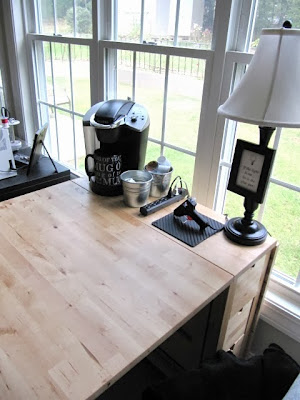
This folding table from Ikea isn't in this spot any more, but I wanted to share it with you . Great table for crafting. This is just on loan. It's my daughter's and I'm storing it until she gets an apartment of her own.
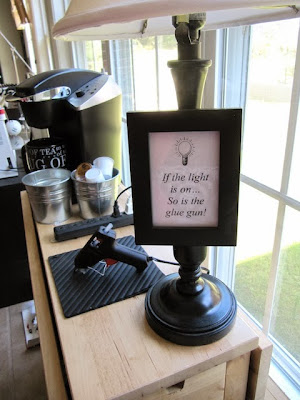
In the picture below, I used it for a glue gun station.
Click HERE for that post. Filled with lots of tips and tricks for your glue gun.
I moved it out of the way under the window. Still my glue gun station though...
but the expanding leaf is a great work area if needed.
One great tip for your hot glue gun or even your iron is to plug them into a surge bar, then plug a lamp into the surge bar.
When you turn the surge bar on to heat up the glue gun, the lamp comes on too. Prevents the glue gun from staying on by accident. I made a sign for the family and it's hanging from the lamp.
"If the light is on...So is the glue gun"
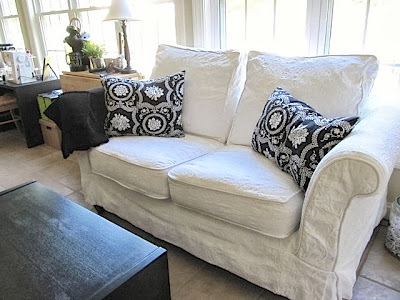
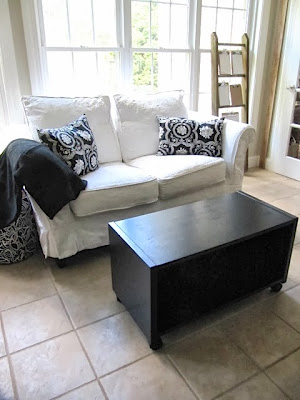
Next to that table is a hand me down couch my sister is giving my daughter. I'm just "holding" it here until she moves out some day.
Shhh...she might not get this one!!
I had a comfy chair in here, but moved it out temporally. If you have the space, always try to add one comfy spot for you to read, hand sew or just relax.
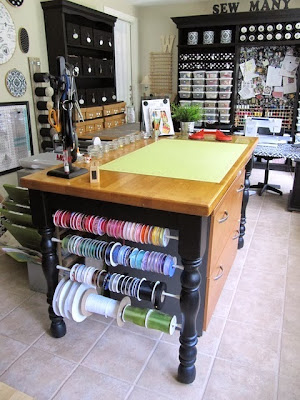
This is my cutting table in the center of the room.
Lots of ideas I'll share below...
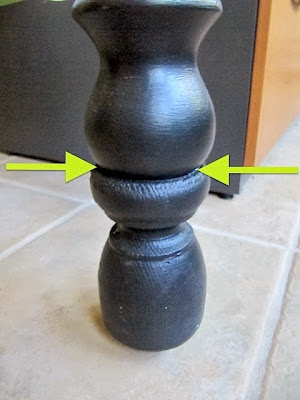
First is the height of this table. Cutting tables should be higher to ease back pain.
Click HERE to see that post.
Tension rods between the legs holds all my spools of ribbon.
Click HERE for other posts on ribbon storage and ideas.
There is one drawer on my cutting table and I removed the knob and used a special spool of my mom's in remembrance of her.
Click HERE to see how to make a spool of thread into a knob and a wall hook too.
I also attached a old fashion towel rack just under the table.
Great to hold ironed fabric as I'm cutting. Keeps it neat, clean and out from underneath that "pile" of fabric.
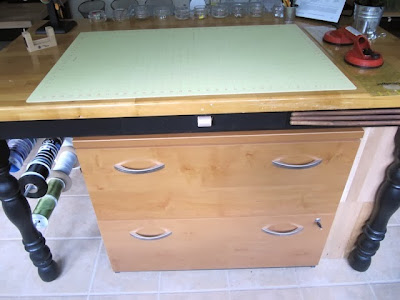
Under my sewing table is a file cabinet that didn't fit in my husband's office anymore.
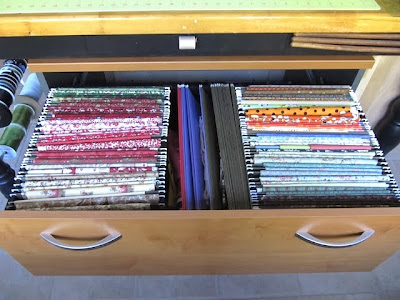
Perfect for filing my fabric though!!
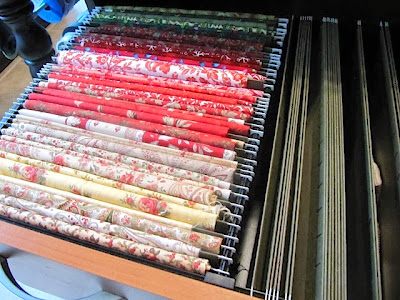
Click HERE to see how to fold your fabric over hanging files.
Keeps fabric organized and out of the sunlight which can fade fabric so easily.
The top of the cutting table has a few tips for you too.
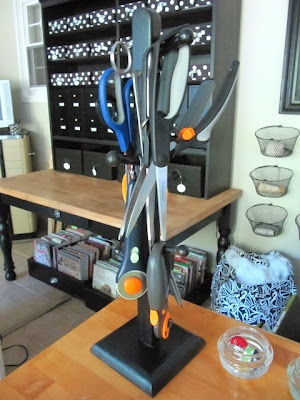
I have been using this old mug tree for my scissors for years.
It normally would hold coffee mugs, but this keeps my scissors and rotary cutters up off my table where they'll get lost under piles of stuff.
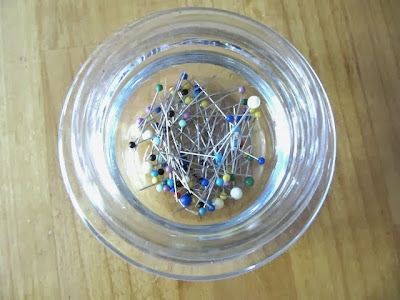
These little glass cups line the back of my cutting table. They hold different kinds and sizes of pins, needles and safety pins.
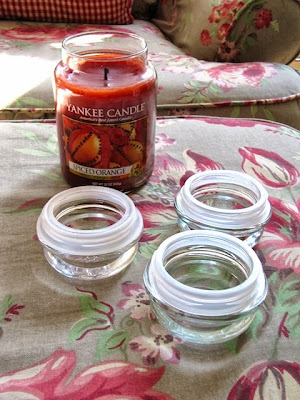
These cups are something we all have around the house.
Click HERE to see how you can recycle the tops to your candle jars and use them for so many things. I even have a post there to make a mini wreath with the plastic rings from the top.
Click HERE to see the whole post.
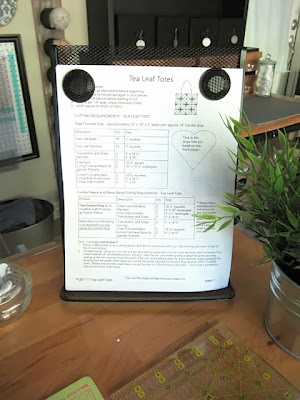
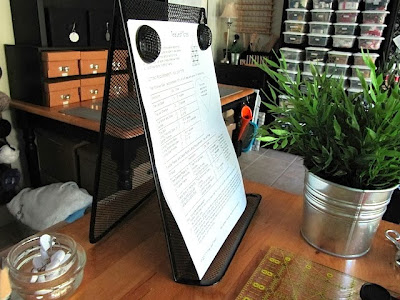
This is a paper holder. It would normally be used to hold a paper up next to the computer when typing.
I use it to hold the pattern I am working on, especially when cutting different sizes of fabric pieces. I usually lose that pattern somewhere on the table. This way, it's up and always visible.
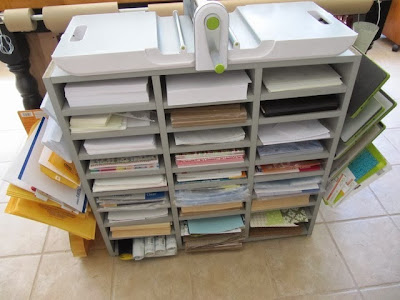
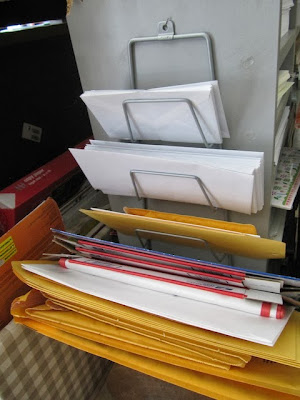
Behind my cutting table is a recycled mail slot holder from an office.
For me it holds computer paper, card stock, stationary, scrapbook paper etc.
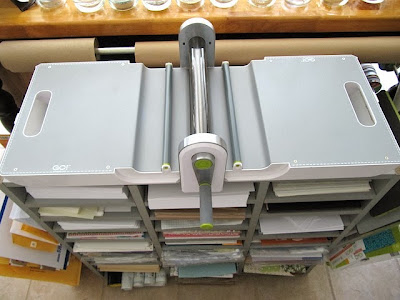
The top is perfect for my Go Accuquilt fabric cutter.
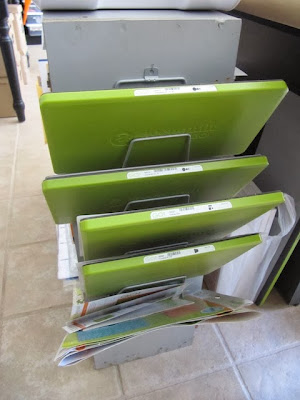
As I mentioned before, I use every available space. On the sides of this cabinet, I screwed in a rack that would hold sauce pan lids.
These are great for my Go Cutter dies and great for quilt rulers too.
The other side holds all my paper supplies for mailing packages.
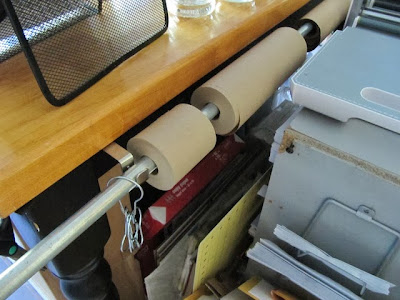
Just behind that and screwed into the table is a curtain rod that holds rolls of brown paper used to cover packages for mailing.
Another work station that has changed over the years is just past my cutting table. It's another old painted kitchen table with a mismatched hutch on top.
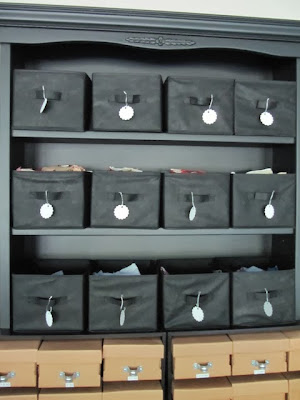
The fabric boxes hold projects I've started or categories of scraps and fabrics...like all my "I Spy" fabric, 1930's fabrics etc.
The hutch was was too short for that wall, so I lifted it up with 2 shoe organizing shelves that you assemble yourself.
The green arrow shows where I stacked the hutch on the 2 shelves.
Not only did the shelves raise up the hutch, they gave me added storage for my scrap fabric.
Old storage boxes labeled with the scrap size in each one and the pipe strap idea used for a handle again.
Under that table is more fabric filing, but in Banker's Boxes. My sewing room is not damp, so storing in cardboard boxes is fine for me.
Click HERE to see how you can turn different boxes inside out for a uniform look
Easy fabric filing if you don't have a filing cabinet.
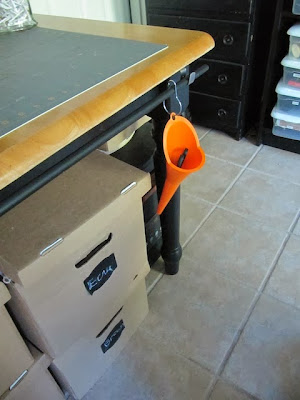
Here's a quick tip to keep scissors in all areas of your sewing room. Maybe not a good idea if you have kids around.
I hang a funnel where I need the scissors...easy and safe container to hold them.
Click HERE to see where to hang them in your space.
The last area is the wall unit and my sewing machine area.
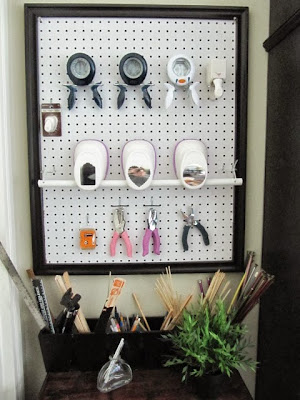
The framed peg board to the left of the wall unit is a new feature for my paper punches.
You can click HERE if you want to see how to make one too.
I like my sewing table to be low...because I'm short! Lol
I made this sewing desk with 2 end tables and a hollow core door.
Click HERE to see that post.
Then click HERE to see how I revamped it when I covered it in vinyl!!
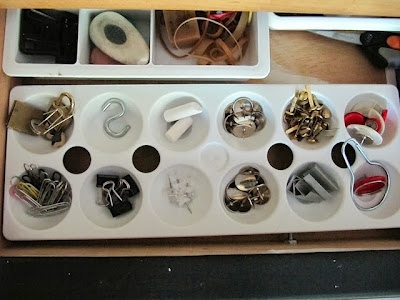
This organizing tiered tray comes from the hardware store to hold nails and things...not for me. Sewing supplies it is!!
Click HERE to see more
Then I found a silicone ice cube tray in a discount store!! Perfect for all the feet for my sewing machine!!
Click HERE for other sewing organizing ideas for this tray.
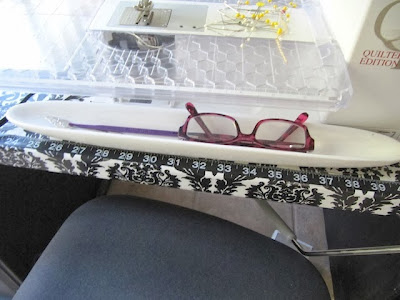
I also keep an olive tray near by too. Holds my glasses, seam ripper etc right under the machine. An olive tray from a thrift store is the perfect fit for that space...long and narrow.
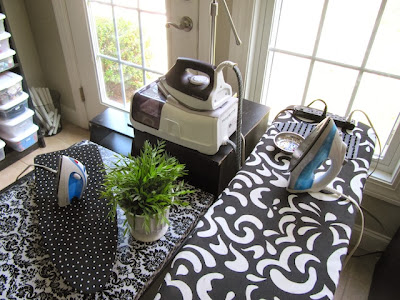
The ironing station is next.
I have a small ironing board next to my machine and my larger one is next to another machine I have when friends come over to sew.
I use the same concept for my iron as I do for my glue gun with a surge bar and lamp.
If the lamp is on...I left the iron on.
Another great item that I found in an automotive store is this magnetic cup.
Super strong magnet to stick to the car when they are repairing it. It holds nuts and screws.
For me, it holds my pins. The magnet really sticks to the metal of the ironing board. Never falls off!
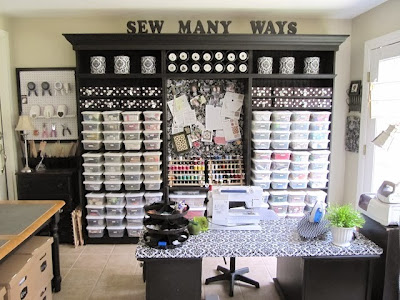
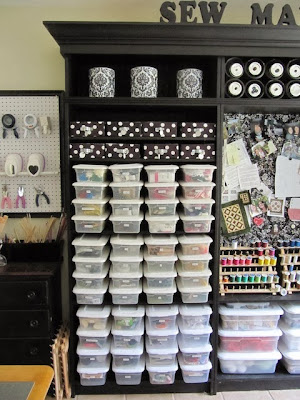
The wall unit is the place that holds all my craft supplies.
I save everything!!
Our house is the place where friends and family go to for supplies. My daughters are 22 and 21 and still use supplies from here. They and their friends just raided it to make costumes for a performance and Halloween costumes too. Saves them money and I love it when they all come by.
Each section is label so they know where to find something.
The top cans are mine though. They hold all the parts and supplies for my Grandmother's Flower Garden quilt or English paper piecing.
The cans are tomato sauce cans I pick up free from a pizza restaurant.
Click HERE to see how I covered them.
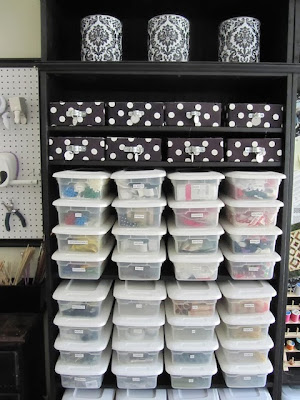
Below the cans are more of the covered cardboard boxes for fabric projects.
All the white boxes are plastic shoe boxes that I have collected over the years. They are about 88 cents - $1.00 in Walmart. I always buy the ones with the white covers so they will always match. I can change the colors in my sewing room and never have to worry about all these boxes not matching.
They hold everything from small paint bottles, ric rac, coin rolls, zip ties, beads, zippers, elastic, pom poms, pipe cleaners etc. Pretty much everything...and as always...labeled!!
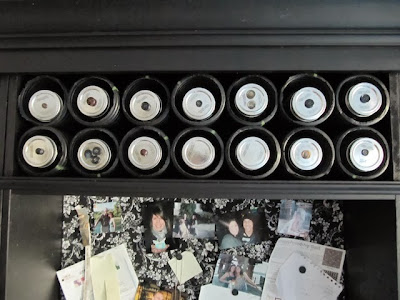
The top middle section has more sections of French Drains.
This time the hold canning jars full of my buttons. Each lid has a button glued on, so I know what kind of button is inside.
Click HERE for that post.
In the middle lower section, I removed 2 of the shelves and replaced the back wall with sections of fabric covered cork boards. Great for photos, inspiration pictures or patterns.
Click HERE for the "how to" to make one for yourself.
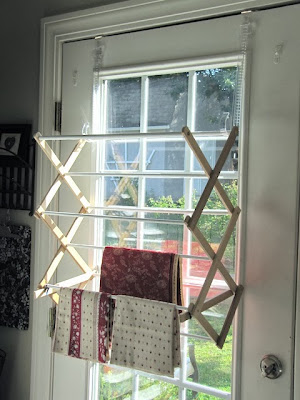
Next is a drying rack idea I use for fabric. I have it hanging on wreath holders over the door, but you can click HERE for the post and other ideas for your sewing room.
Using a drying rack is great to keep ironed fabric neat, but it also frees up space when it hangs on the door.
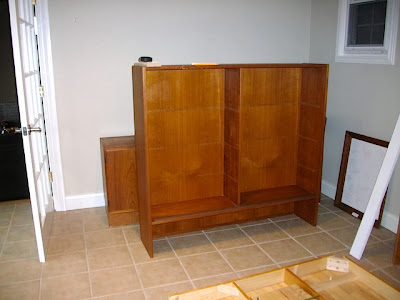
The wall unit itself was made from 3 cheap short bookcases, a top section of wood boxes my dad made to connect the bookcases and some crown molding. My sister was the head of this project.
These were old teak bookcase I had in the basement. When I painted them back then, I had been painting furniture for days and didn't even bother priming it. The paint is still good. Chips here and there, but I'm good with it.
If you are painting laminate or wood furniture and it's in a high traffic area or a place where company might see it, maybe I would prime then paint.
The thin backing was removed and sturdy bead board was added to strengthen the unit.
Crowning molding was added to make it look like one piece of furniture not 3 bookcases.. My sister is the queen of crown molding. I will beg her to do a tutorial on how to cut and add trim molding to old furniture.
Well, I hope you enjoyed another tour of my sewing room and all the new updates. If you want to see other ideas in my older sewing room posts, you can click up at the top of my blog under "Sewing Craft Rooms"
Thanks so much for visiting. Feel free to pin ideas from this post to your Pinterest boards or link to this post here on your blog!
Have a great day,
~Karen~














































Wow, I am in awe of your space! I understand that it's the culmination of years of decorating and perfecting your systems, but I would kill to have my space like that now! So many great tips as well, like the olive tray near your sewing machine. I will have to track one down ASAP.
ReplyDeleteNowadays, I have to sew in my bedroom, so I keep my machine behind the door when it's not in use. When I start a project, I pull out my homemade ironing board (it's huge) and put it on my bed for cutting fabric, etc. Then, I have to pull out a wooden stool to balance my sewing machine atop, and that's my setup. I have to take it down at night, which is time-consuming.
Anyways, I look forward to my own sewing space one day that's half as nice as yours. After all, I noticed that we have the same small blue iron. Maybe it's a sign!
Is this a craft shop or your craft room? It's a wonderful place! I envy you so much....!
ReplyDeleteHow big is the room?
I sew in the living room. My house is not so big! Maybe one day I will have a quarter of this room, i will be so happy... then I will return to your page for some great ideas.
I love that room, Congratulations!!!!
I felt the same way until my fiance gave over an entire room in our house to me that is about half the size of her room.. and now I can't get it looking anything like her room. I'm so good at doing all the things she does; covering boxes with fabric to make then look more professional as well as with good ideas. But now that I actually gave the room to create it, I'm finding myself stuck with hurdles in every corner. Lol. The pressure to make it perfect and little pockets of time inbetween taking care of my two yr old, has proven to be harder than I'd imagined. I'd love to have her standing in my room for 5 mins for some of her fresh eyes! Lol.
DeleteI am speechless! So awesome!
ReplyDeleteohhhhhhh myyyyy .,..... you have given me soooo many good ideas .... I know what I want and that is something like your room eventually ....thanks for giving me a drool fest :) love mouse xxxxxx
ReplyDeleteAnd this is why we love you, Karen, not only are you super talented, you share it and you take the time to help us all. You're a star!
ReplyDeleteReally enjoyed this long and detailed post of your craft and sewing room. So many great ideas! I'm just getting back to sewing and finally purchased a cutting table at age 66! I love it! What took me so long? I have a dedicated area in our finished basement that I'm converting into my craft/sewing room. Also finally treated myself to an upgraded sewing/quilting/embroidery machine this year too. I love your idea of the hanging clothes drying rack for ironed fabric pieces. I've been hanging them over a chair back. LOL! Thanks for sharing Karen! It's been fun.
ReplyDeleteLove Love Love your craft room, my husband made my garage into one the other year and I just love it .
ReplyDeleteBut right now its in a mess with wrapping paper and christmas gifts every where but thats ok , it will be back to normal after Christmas. Thank you for sharing yours is beautiful.
Karen you are SUCH an inspiration. I love how everything has been thrifted and repurposed.
ReplyDeleteI'm definitely going to be sharing this post with my blog followers :-)
Thanks for all your wonderful posts. I don't comment often, but yours is the blog I always look forward to reading!
When can I move in? :oD
ReplyDeleteKaren, I looked at every picture and all I can say is OMG, awesome and I am so jealous. Fantastic!
ReplyDeleteI love your sewing space. I love even more that it has been a gradual process over a few years and all done on a tight budget. I love that it is beautiful as well as functional. I have turned to it on many occasions when looking for inspiration for my own spaces.
ReplyDeleteWe rent and have to move from time to time, that means that I have to rethink my creative spaces as our homes and needs change. I am going through another big change in the creative space and love to see what you are doing in solving the ongoing storage and use challenges. It often sparks ideas for my own solutions.
Awesome Karen. What a wonderful read this Post has been. Just love your space and how you went about putting it all together. You must love working there. Such an awesome space. You are truly blessed.
ReplyDeleteHaving just moved into a new home last Friday, I am sure I am going steal some of your storage tips - love your organised room
ReplyDeleteThanks for the refresher course of all your fantastic ideas!! You have renewed my inspiration to get more organized! Thanks so much for sharing all of your tips!! Love your blog and always look forward to your posts. Please do get on your sister about that crown molding post......!!
ReplyDeleteI am waiting for my son to move out and free up a bedroom. Then I can make my sewing room. Right now I have fabric in my bedroom, supplies in a closet and my cutting table and sewing tables in the living room. It will be nice to have everything in one place like yours.
ReplyDeleteYou have great ideas and are an inspiration to the rest of us.
What a great comprehensive post! I used many of your ideas when I set up my current room. I'm an army wife and move a lot, so there are no permanent things for me. I also work on the cheap! Right now I have a lovely, large room--the bonus room over the garage. Since I may not have such a large room again, anything I put in it needed to be reasonably priced. My favorite thing is the cutting table. I put two identical, cheap dressers back to back. I had to build a box to put them on to get them high enough. Two 4x4s make up the other legs. On top of it all is the best buy! I found a 36" wide counter top (it is harder to find than the standard kitchen counter width) and it is 8 feet long. It was at the Habitat for Humanity Restore (love that place!) for...,., Eight dollars! Some of the laminate was broken off on edge, but that was easily covered. The ends are raw, though, without the laminate. My solution? Two yardsticks (70 cents at lowes)--one for each end. My husband rounded the edges to match the curve of the counter top. I put tension rods between the legs like you did. The whole thing cost less than a hundred dollars! And I love it! You were the inspiration, too, so I love how you plan to use yardsticks to trim some of your tables.
ReplyDeleteSew much inspiration here. I don't sew, but I see all kinds of possibilities for organizing my craft items. TFS!
ReplyDeleteI love some of your storage tips and will be using them as I rework my craft/sewing room. I think your idea of a lamp plugged into a power strip to remind you that the gluegun or lamp is on is great. I have left both on and left the room. I will be doing that right away.
ReplyDeleteLove everything but curious as to why you used black. I know a single color keeps the eye focused but why did you use black as your anchor color.
ReplyDeleteWow, wow, WOW! Not only is your creative space a dream come true, you clearly took so much time and care putting together this blog post - amazing stuff! Thank you for months and months worth of inspiration! I've gotten so many incredible ideas from this one post - can't wait to read the rest of your blog!
ReplyDeleteThank you once more! I'm totally abuzz with ideas for my studio space now!
Kellee
Thank you so much for sharing the updates in your Craft/Sewing room. What a great way to motivate each of us in our own space!
ReplyDeleteI love it and I also use the magnetic pin holders from the tool section as hubby gave me my first one for that. The ruler grip I also found a HF, but hopefully next year we will be building my new space and I do hope to come back here for ideas. Thank you so much for sharing!
ReplyDeletei always read your posts first and i always learn. gamete and gamut are not the same...
ReplyDeleteMany thanks for taking the time to share your INCREDIBLE room, and your many creative tips! I'm not much of a seamstress, but I do enjoy getting inky with my paper crafts, so these clever tips are very adaptable for me. Your room is not only extremely organized, and way beyond being just functional, it is absolutely gorgeous! It's no wonder your fabulous projects exceed the norm!
ReplyDeleteOMGosh!! AMAZING!! Loved every photo!! Enjoy every inch of this wonderful room!! You deserve it!
ReplyDeleteP
I want to live in your sewing/craft room! Love it, and love your ideas. Thanks for sharing.
ReplyDeleteI love your space and have been quietly filing away ideas for my sewing room. When we moved into this house 4 years ago, there was a room in the unfinished part of the basement that screamed SEWING ROOM! That was the plan, and then my boys joined a LEGO robotics competition team and they took over 'my' space for their team meetings. After several years of waiting, I just got the room back! The walls are unfinished but it's dry and cozy. I have an awesome setup now. Kitchen table on risers for a cutting table? Check! Ribbon spools on tension rods? Check! Vinyl-covered hollow core door on filing cabinets for sewing table? Check! Spray paint everything black to match? Checkity check check check! Still to do - hoops boughtfor 50 cents apiece and waiting for fabric to fill them, huge bolt of upholstery fabric bought for 50 cents a yard (I KNOW) and ready for slipcovering a love seat for my space, and more painting. Like your space, everything is thrifted, gifted, bought on clearance or repurposed in some way, and I absolutely love it. Someday we'll finish the walls and floors, but for now, it's perfect and I'm so efficient in my new space. Thanks for the inspiration!
ReplyDeleteOMG! I LOVE THIS!
ReplyDeleteI love your room and you are so generous to share all your ideas with us. I have followed you for awhile and always look forward to each post. Have a great day. Hugs,
ReplyDeleteThank you so much for the inspiration. I am in the process of creating a sewing studio combo office and your ideas are terrific. It is a new room with years worth of collecting to fit in. Since this is my last move ( I hope) I was planning on purging lots of stuff. Now I will rethink that and just to try to organize it and put the overflow in the garage. I just might need that stuff for one of your inspirational projects. lol
ReplyDeleteI think I will go with the black color scheme for furniture/accessories too. It gives the eyes a place to rest. I fear another color might just emphasize the many things and create a feeling of clutter.. I would never have thought of this on my own. Thanks again.(and for Gail's question that made me contemplate the use of black.)
Wonderful room! I have borrowed ideas from you in the past and I'm sure to do so in the future. Thanks for all the inspiration and fun!
ReplyDeleteI've followed your blog for I don't know HOW long and just love the ideas you come up with. It's so nice to see many of your past projects consolidated in a single post. Goodness only knows how many crafters you have inspired over time with your wonderful tips and ideas. I'm pinning this so anyone following me on Pinterest will have easy access to this blog.
ReplyDeleteI love your sewing room. I am about to get my own room for sewing! I used my spare bedroom untill my second child was born. :) for the past 7 years sewing and crafting on the kitchen table.
ReplyDeleteNow I have been given the back room in my dad's old office. The offices for his welding business were housed in a small trailer house behind my parents house. He sold that business about ten years ago.
So.... Now after I clear out years old stored paperwork I will be able to make it mine. The first step will be to rip out the lovely 1972 green shag carpet!
Be sure to watch www.carnergirl-loree.blogspot.com for photos.
It will definately be smaller than yours but I will incorperate some of your great ideas.
opps should be www.garnergirl-loree.blogspot.com
DeleteForgive me if you have already answered--what kind of label maker do you use. Specifics please.
ReplyDeleteThanks again for the sewing room tour.
Always impressive...so many ideas must float in your head! I like the drain pipes as I have been looking for a way to store my embroidery stabilizer tubes. I used wine racks but with about 30 stabilizers, I couldn't buy that many wine racks. I like your idea. I would just need to find a way to label them from the outside so I didn't have to pull a tube out to read the side.
ReplyDeleteGood job on this post! Now let's see some of your craft and sewing project results!!
OK...this post is one that you have to back and back, to reread, more the twice.
ReplyDeleteThis post is LOADED with so much information and ideas. I'm feeling a bit overwhelmed.
How do you do it? Come up with so many clever ideas for storage?
I don't have a craft room but there are "sew" many ideas, even for me, who lives in a 750 sq. ft. cottage.
Amazing! I spent the day in the garage screwing up slat wall sections for storage after I read your post!
ReplyDeleteDeborah
Well, heck, Karen, the room is fabulous! It looks beautiful and is so well organized. Lots and lots of great ideas - hope I can find the time to do just one or two!
ReplyDeleteThanks for sharing all your hard work. It's all interesting and entertaining and inspiring! You'd never know your beautiful sewing room is all bits and pieces of frugalness and not straight from the Pottery Barn!
ReplyDeleteYou are truly unbelievable Karen, The room is great - I have watched most of these posts as they were written and have only managed to implement a few in my own home - you are an inspiration to many - keep up the great work. Mary
ReplyDeleteYour blog is one I follow almost daily. I am never disappointed with your many, many ideas for helping your readers with organizing our spaces for sewing or crafting. Thank you so much for all the work you put into your blog and making it such a helpful one. I wish I had a thimbleful of your talent!
ReplyDeleteHappy Sewing!
Nancy p.s. I use your surge protector idea for my iron. :)
Karen, you are definitely the go-to person for ingenious ideas for a craft-sewing room! Your room is amazing!
ReplyDeleteKaren, I hope I will be you when I grow up. Thanks for sharing all the great ideas. I never dreamed you painted your china hutch. How and where did you spray such a large piece. I would like to do the same thing.
ReplyDeleteLoved the tour. I remember reading a lot of the older posts and even went back and looked at some of them again. Would love to see a tutorial on adding crown molding to furniture!
ReplyDeleteI absolutely adore your sewing room and the ideas you have for making things many of which I have used in my own sewing room but I have to ask you this, how on earth do you manage to keep everything dust and lint free?
ReplyDeleteHoly COW. This is amazing. Just awesome.
ReplyDeleteAmazing. Will be back to refer to this often, I think.
ReplyDeleteThis blog is amazing! I will read it over and over! It's a whole magazine article or book of it's own!
ReplyDeleteHello Karen. So pleased to have found your blog. I'm wanting to re-vamp my craft studio and you have some amazing ideas. Thanks so much for sharing. I will pop back to see what else you've been up to. Karen.x ;) your new follower.
ReplyDeleteahhhhmazing!
ReplyDeleteI find the surge protector and light a great idea - I have my iron, sewing machine etc. plugged into it and when the light is off, so is everything else. I use the olive tray idea to keep my seam ripper, extra bobbins and thread and if I have to use more than one presser foot during a project, the one that's not in use is right where I need it. I've also taken to covering boxes on my shelves and one of my very fav things is my label maker. I bought some little mesh bridal bags and have labelled them - one for each of my presser feet and keep them in a plastic drawer box on the shelf over my sewing center. Being organized has really helped me to sew more efficiently. Just wish I had a bigger space but then I feel lucky just to have an area where I can close the door. Keep the ideas coming Karen. I just love them!
ReplyDeleteReally love your space & noticed it in Where Women Create. I'm working hard to make a studio for myself. I don't have anyone to help. I can't repaint or change the furniture/blinds/walls. That is very limiting for me, as I'm all about color. Luckily, the walls were white (I can live with that) and the blind is a blue I love.
ReplyDeleteThat brings me to the real point of my comment, your opening statement is that your space was born of tragedy. I've had breast cancer twice, my sister has MS. Almost all my relatives/friends have passed. I miss them more than you can ever imagine. Things can be replaced but people can't. What you've experienced in the flooding of your sewing room is unfortunate but no tragedy. You can replace those things.
Love your room and your details of what you have done! Absolutely beautiful!!!
ReplyDeleteThanks for sharing Karen ! Love your space! Cangrats
ReplyDeleteO.C.D. Much??
ReplyDeleteThanks so much for sharing your redesigned craft space! I loved it before, love it more now!. I am also a dental hygienist organizing my craft space...this organization thing must be in our blood as RDH's! I can hardly wait to finish and post my pics. Thanks again for the inspiration.
ReplyDeleteReally loved reading through the tour of your craft room - you have some brilliant ideas - and everything looks so neat ! I have just made myself a pegboard to hang a cotton reel rack and various tools and scissors - so I am very inspired by your ideas for storage. Thanks for sharing !
ReplyDeleteWow, what a great blog post. I will need to book mark this and come back as I work on my sewing room. Thanks so much for sharing all your brilliant ideas.
ReplyDeleteThank you for sharing your ideas. I came looking for confirmation on how to make lined drapes. Your instructions are superb. Picture over-kill is appreciated and well done. I ended up touring your sewing room. Love it. Many ideas. Organization is so important to me (close to a behavioral disorder - LOL) but helps me get things done efficiently, which is where I'm at. I also do lots of different projects, including helping non-profit retreat and women's centers re-do rooms and furniture. You might be interested in how I handle Paint Touch up for rooms and furniture. Just recovering from long term illness and feels so good this spring to be back on projects. Thanks for inspiration to become even more efficient.
ReplyDeleteFirst, congratulations !!! Because you made a wonderful craft place, this is beatiful, smart and complete. Really I enjoyed this tour!!! It´s wonderful and plenty of suggestions for my own craft room. Thankyou very much for share and explain the process... you are a very kind woman, hugs from Colombia, South America,
ReplyDeleteThanks so much for the great ideas. I guess I'll be spending the day in my craft room putting them in place.
ReplyDeleteYou are a genius. So creative. I've been looking for ideas for setting up my art room and am totally inspired. Thank you for sharing.
ReplyDeleteSally from the UK
This room is fabulous! Thank you for sharing your space!
ReplyDeleteJust found this on Pinterest. I am starting from scratch in re-organizing my crafting room, with a very low budget and (fortunately) some existing furniture and storage. I have gotten so many wonderful ideas from your post, thank you so much. I love the scissors everywhere idea - I currently keep them in every room of my house because you always seem to need them. My room is quite a bit smaller, but I think I'm going to try and get my papisan chair in there, which is my favorite to relax in. I am so in awe of your room - if you haven't done so recently, sit back and take it all in, for you are the envy of many =) Thank you so very much for taking the time to write it all out for our benefit!
ReplyDeleteOh I LOVE your craft room.... I have the space to do this...but I'll have to add my floral studio in with it... I'm all excited to redo my whole basement this winter... 2016.. thanks for your inspiration...
ReplyDeleteTruly dazzling.
ReplyDeleteThis is the kind of post that I will revisit 30 times and still find something new and exciting.
Thank you for sharing your hard work and ingenious ideas!
THANK YOU FOR SHARING THIS AMAZING, BEAUTIFULLY ORGANIZED CRAFT ROOM! I am inspired to make mine so much better because of your ideas. Are you for hire? lol
ReplyDeleteTHANK YOU SO MUCH FOR SHARING YOUR BEAUTIFULLY ORGANIZED CRAFT ROOM. I am inspired to make mine as such. Are you for hire? lol Your amazing and did an amazing job.
ReplyDeleteThat was absolutely amazing. Thanks for some great ideas.
ReplyDeleteI Love love love your space and have admired it for a long time!. We are building a house. I plan on including my dream sew/craft room! What are the room dimensions of yours?
ReplyDeleteThanks, Vicki
Hey Karen! You are such an inspiration! I'm sure you get so many comments and complements to sort through as I see your Email is no longer contactable. Lol. I am on my own crafting journey myself. I am working on my crafts room atm... the best I can but am having some troubles along the way. seems I want it to be perfect and we all knows how that goes.. when you want something perfect, that's when it seems to never come out right! Haha. I'd love your opinion on what I've done so far and some fresh eyes! I'm at a stand still with it and can't seem to get past some hurdles. Let me know if you have sometime to have some pics sent to you and maybe you can give me some much needed advice! Your ideas r AMAZING! I'm so great at crafts and doing things I love like household decor.. but for some reason I just can't get my own room right! Ugh. Here's my email if you get some time for the pics. Envy.stacy26@gmail.com. Eitherway, thanx for your wonderful ideas and inspiration!
ReplyDeleteI love your studio and this wonderful tour. Thank you so much for sharing. I'm in the middle of planning my studio and yours is one of my favorite inspirations. I feel we are already kindred spirits because 1- we are both Karen's :) 2- we both love W's ;) 3- we both love to create :)
ReplyDeleteAbsolutely amazing! So inspiring! Thank you for sharing. I have bookmarke your blog foro future reference and for when I need an inspiration 'kick-start'!
ReplyDelete