Showing posts with label sewing kits. Show all posts

Saturday, February 28, 2015

How to Turn a Potholder into a Sewing Kit...

Hi everyone! I came across a set of cute little potholders and, "thinking outside the box", I immediately thought of a sewing kit. Depending on the potholder you find, there will be little to no sewing to make a kit for yourself.

Here is the before potholders...

potholder sewing kit

They are called Claw Mitts.

potholder sewing kit

The smaller type of potholder that your thumb goes in one side and your four fingers in the other side.

potholder sewing kit

So let me show you how easy it is to make a sewing kit for yourself!!

This particular potholder already came with the left hand pocket sewn into individual slots. You can add that to yours with 2 lines of sewing if it doesn't come with it.

potholder sewing kit

This is the finished folded kit.

potholder sewing kit

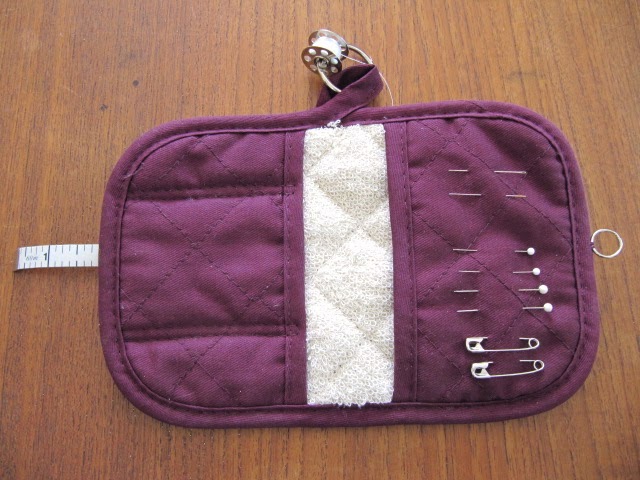
and all opened up, filled and ready to go!!!

potholder sewing kit

The individual pockets hold a seam ripper (my best friend lately), small scissors and a leather thimble.

potholder sewing kit

You can always add your favorite tools and thread.
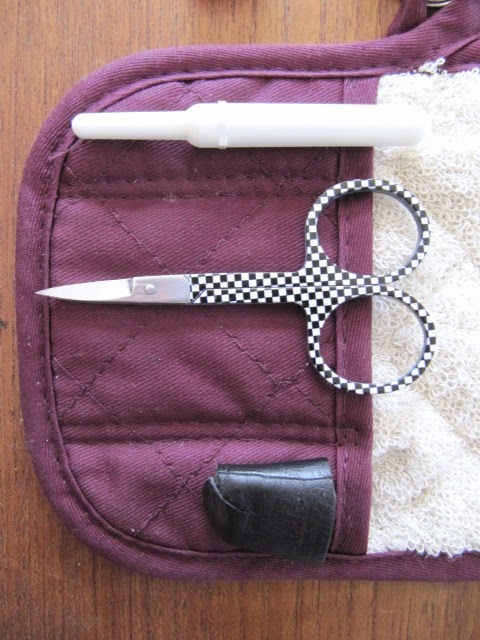
potholder sewing kit


The right pocket holds my English Paper Piecing projects (hand sewn hexagons). The fabric of the pocket is for pins, needles and safety pins.
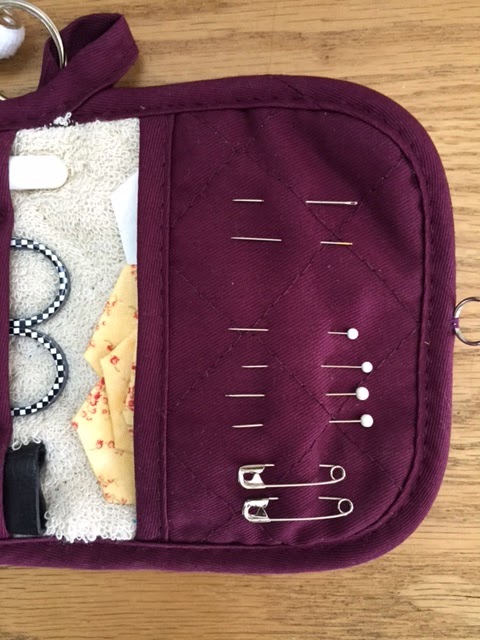
potholder sewing kit

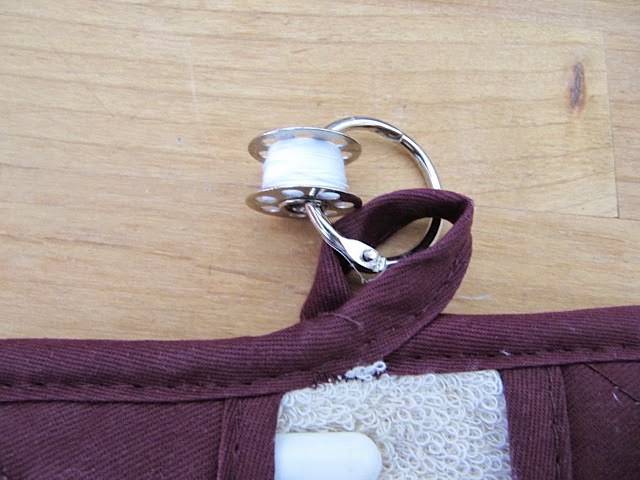
 The potholder comes with a loop so you can hang it up. I'm using the loop for a thread dispenser.

potholder sewing kit

I used a hinged key ring and looped a bobbin of thread on it. I also use a tiny hair elastic to cover the bobbin when I'm traveling with it, so the thread doesn't unwind.

potholder sewing kit

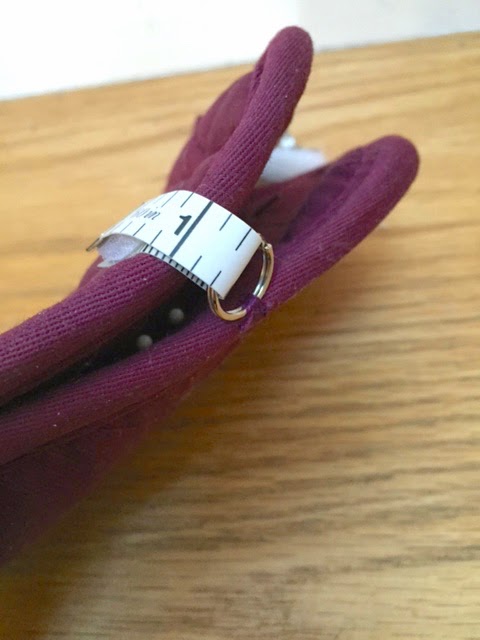
I came up with a super easy closure. I used a jewelry jump ring, piece of tape measure and some velcro.
potholder sewing kit

Sew the jump ring to the right side of the potholder.

potholder sewing kit

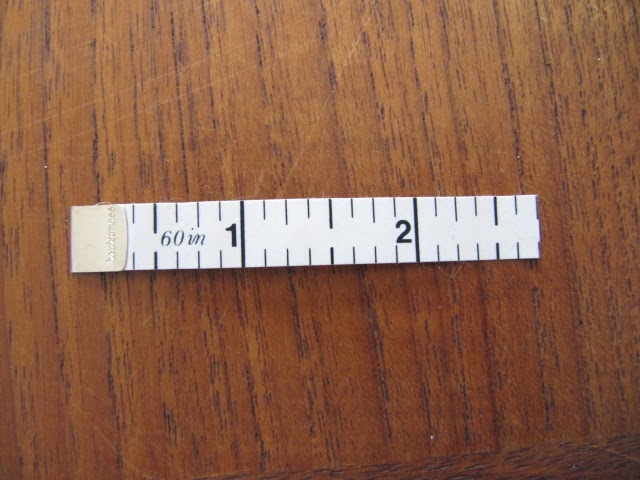
Cut your tape measure or piece of ribbon.
potholder sewing kit

You can sew the ribbon to the left side. I hot glued the plastic tape measure on.
potholder sewing kit

This is where you'll attach it.

potholder sewing kit

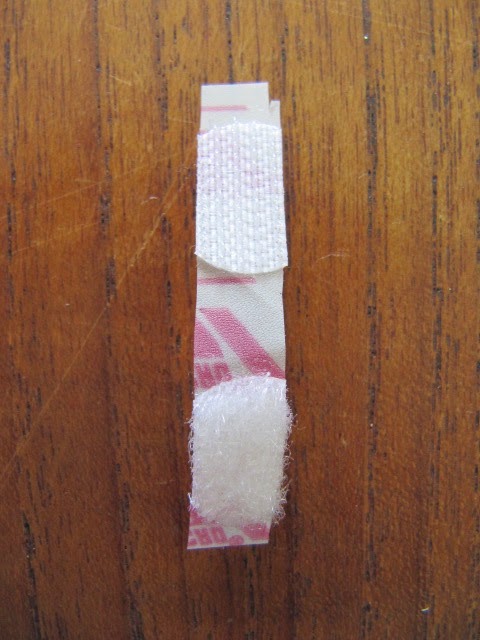
I cut little adhesive dots of velcro to fit the width of the tape measure.
potholder sewing kit

Then just stuck it on each end.

potholder sewing kit

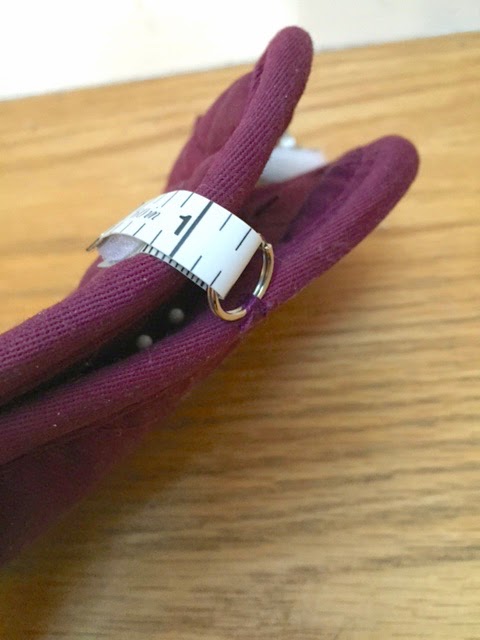
Loop it through the ring and fold it over to the front.
potholder sewing kit

All closed up and a little snippet of a ruler for you to use too!!

potholder sewing kit

Potholder for a Sewing Kit vs Potholder for Cooking...hmmm. Sewing, but if there is a sheet of hot cookies coming out of the oven? Oh, wait these potholders came in a set of 2.

Sewing hexies and eating hot chocolate chip cookies right out of the oven. Perfection!

potholder sewing kit

If you've ever wanted to sew hexagons with the English Paper Piecing method, I did a post 6 years ago if you'd like to take a look. There are other post on my side bar too!! Click HERE for the original post.

Thanks for stopping by,
~Karen~

Pin It

Tuesday, February 25, 2014

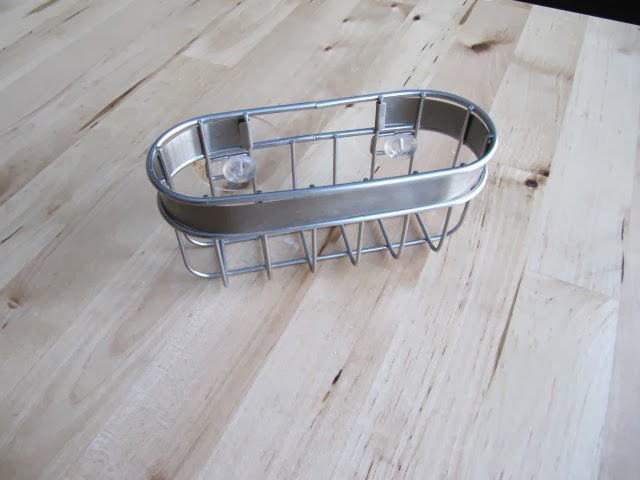
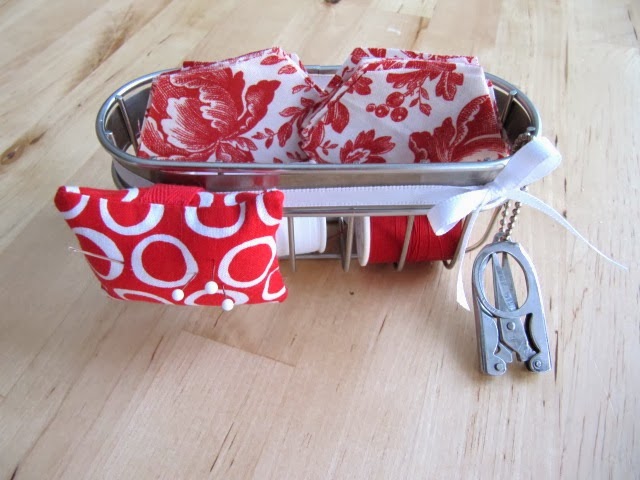
Suction Cup Sponge Holder…to Car Sewing Caddy

Hi everyone! You know I just love taking the most mundane things and turning them into something fun and useful. This suction cup sponge holder is the perfect example.

I found this in a thrift store in the bottom of a junk basket in the kitchen section for one dollar!

From this...

suction cup sewing caddy

To this!!!

suction cup sewing caddy

Come and see the easy transformation…

Tuesday, November 5, 2013

Sugar Dispenser Turned…Sewing Kit or String Dispenser

Welcome to another Tool Time Tuesday. Today, I'm are up cycling an old sugar dispenser that I don't use any more. If you don't use something any more, before you store it away or get rid of it, see if you can turn it into something else!!

Here is the sugar dispenser…

sugar dispenser sewing kit

Cute, but I haven't used it in a while, so I wanted to switch it up.

sugar dispenser sewing kit

So, I transformed it into a thread dispenser and sewing kit!!

sugar dispenser sewing kit

Come on in for an easy tutorial for the elastic pincushion. You can also use it for your wrist!

Thursday, August 22, 2013

Fabric Pouch With Blanket Stitch Tutorial...

Hi everyone!  I've been tossing around a few ideas for a handmade favor for my annual Christmas party. Over the years, I have made scarves, fabric tissue pouches, key chains etc, but the last 2 years time caught up with me with decorating and cooking and I never finished the projects I started.

This year I'm trying to start early. Not to scare anyone, but Christmas is 4 months from this Sunday. If you are thinking about making gifts for Christmas, I'd start now or you'll be like me...stitching on Christmas Eve!

This year I was thinking about a fabric pouch that can hold lots of different things in your purse. I usually invite 50-60 ladies to the party, so the project has to be assembly-line style.

This is my first attempt at the pouch. I'll be playing with different ribbons and trims and different stitches for the edge or no stitching at all.

fabric pouch and blanket stitch tutorial

This is a quick SEW or NO SEW project and would make great little gifts for any occasion.

Thursday, July 18, 2013

Thrifty Thursday...Organize With Chocolate

I knew that title would get you!! I think chocolate should be in every title.

Chocolates, candies and truffles come in so many different boxes, but some boxes are just perfect for organizing.

These delicious truffles were a gift to my husband from a student at the end of the school year. I benefited from the chocolate and from the empty box.

chocolate box organizer

Thursday, April 11, 2013

Thrifty Thursday...Divided Food Containers To Organize More Than Food

Today's thrifty tip is to use all those plastic food containers that we have stored in the basement or waaayyy in the back of the kitchen cabinet. You know those divided plastic Tupperware containers that we only use for picnics and parties. Well, get them out!!

If you don't have any of these food organizers at home, I've seen them at thrift stores or yard sales cheap, cheap!!

I think people get rid of them, because they only use them once or twice a year.

food tray organizer

Let's use them all year long in the kitchen and out!!

These food organizers are great for condiments (ketchup, mustard, relish, onions) for picnics, or ice cream party toppings, baked potato toppings, all the ingredients to make tacos etc.

food tray organizer

Thursday, February 14, 2013

Thrifty Thursday...Recycled Make-Up Compact Sewing Kit

Happy Thrifty Thursday everyone...time to recycle something!

I was cleaning out the drawers of my daughters' bathroom recently. When they are away at school, I pretty much know that what's in those drawers are not important...or they would have taken it. What did I find...empty toothpaste tubes, empty make-up bottles, etc.

I also found this...a make up compact with lip stick missing on the right, empty blush and half empty eye shadow.

I made the executive decision to throw this, but I really kept it!!


Look what I turned it into...a sewing kit!!!


Tuesday, February 5, 2013

Tool Time Tuesday...Sandwich Box Sewing Kit

Happy Tuesday everyone! In today's post, we'll be using sandwich boxes or snack boxes that are used for school or work. You know those cute little compartmentalized boxes that keep your food organized!! Right up my organizational alley.

I've seen these boxes in just about every store. Cheap, cheap. I bought one in a consignment kitchen shop and the second design (further down in the post) in a discount store.

From Sandwich to Sewing!!


Saturday, August 25, 2012

Sew, Sew Saturday...Thrift Store Sewing Kit

You know I love going to thrift stores for just about anything that's a "deal".  It is all about the deal, right?

Well, here is my most recent find...steamed pudding molds. Do I use or make steamed pudding? Not yet, but these were just too cute to pass up and they were only $2.00 each


This one is just a mold and I was thinking about using it for my desk to hold office "do dads".


Cute flower shape.


These two are the steamed pudding molds.


I just love the old worn metal look.


They have little clasps to lock them.


Here's the inside.


Tiny at only 6 inches across.


So why am I showing you this steamed pudding mold?

I'm using it for a sewing kit...holds my hexies for grandmother's flower garden, my new sewing kit from Susan, thread, glasses etc.


Lock it up and you can take it any where!!


Great for taking it room to room in your house or it's perfect for the car. I'm not sure about taking it to doctor's office to sew in the waiting room...might look funny carrying a steamed pudding pan around!! Lol

Click HERE for another post I did in the past about different sewing kits.

Remember to always look at something twice. It may have a different use you hadn't thought of before!

Happy Sewing,
~Karen~

Pin It

Tuesday, March 8, 2011

Tool Time Tuesday...Sewing/Craft Kit To Go

Happy Tuesday all! I was away for most of the weekend at my first quilting retreat. I can't thank Tina enough for inviting me. I had a great time and met so many wonderful people. I'll share a few pictures later this week.

What I do want to share for this week's Tool Time is what I carried all my sewing goodies in to the retreat. I borrowed my daughter Kelsie's travel hanging toiletry organizer. Travel bags come in many different styles, so anything would work great.

Hanging toiletry bags are great for storing all your crafting and sewing needs when you are taking a class, going to a retreat or even just going to a friend's house for a day of sewing, crafting or scrap booking.

The bag just rolls up and is easy to carry.


Once you unroll them, it shows all the pockets and storage places.


The top pocket is wide and deep, so I stored all my thread and the pill box that carries all my small goodies.


Bobbins, needles, tape measure, safety pins and pins.


The next pocket held all my rotary cutting needs and finger pincushion. Click here for pincushion ring tutorial


The next big pocket held all my scissors. I stored them in eye glass cases, so the point wouldn't go through the plastic.


The last big pocket held a lot...extension cords, surge bar and some extra projects.


The best part about using a travel cosmetic/toiletry bag is that they usually have a built in hanger. The hook is for hanging the bag in the bathroom of your hotel, but not for us. This bag hangs perfectly on the back of the chair in your class or retreat.

Always handy, but out of the way to keep your work surface clear.


When you're done, just roll it up, tie it closed and you're ready to go...or should I say ready to "sew"!


It's a great place to store all your things and easy to carry too.


Since I've been gone since Friday, I'll catch up on my emails and comments on Tuesday and Wednesday. I read them all...just takes time to respond to each one!
space
Thank you for all your kind words and thanks for always being here,
~Karen~

Thanks Kelsie for letting me use this...it's all emptied and back where I stole it. I mean borrowed it! LOL
Related Posts Plugin for WordPress, Blogger...

LinkWithin

Related Posts with Thumbnails