
Thought I would do a post on how to cut fabric squares with a rotary cutter and cutting mat.
Cotton fabric is usually 42"-45" inches wide. When you are ready to cut your fabric, fold it in half and match the edges of the selvedge. You would hold the fabric up to match the edges, but I pinned mine to the ironing board to take the picture.
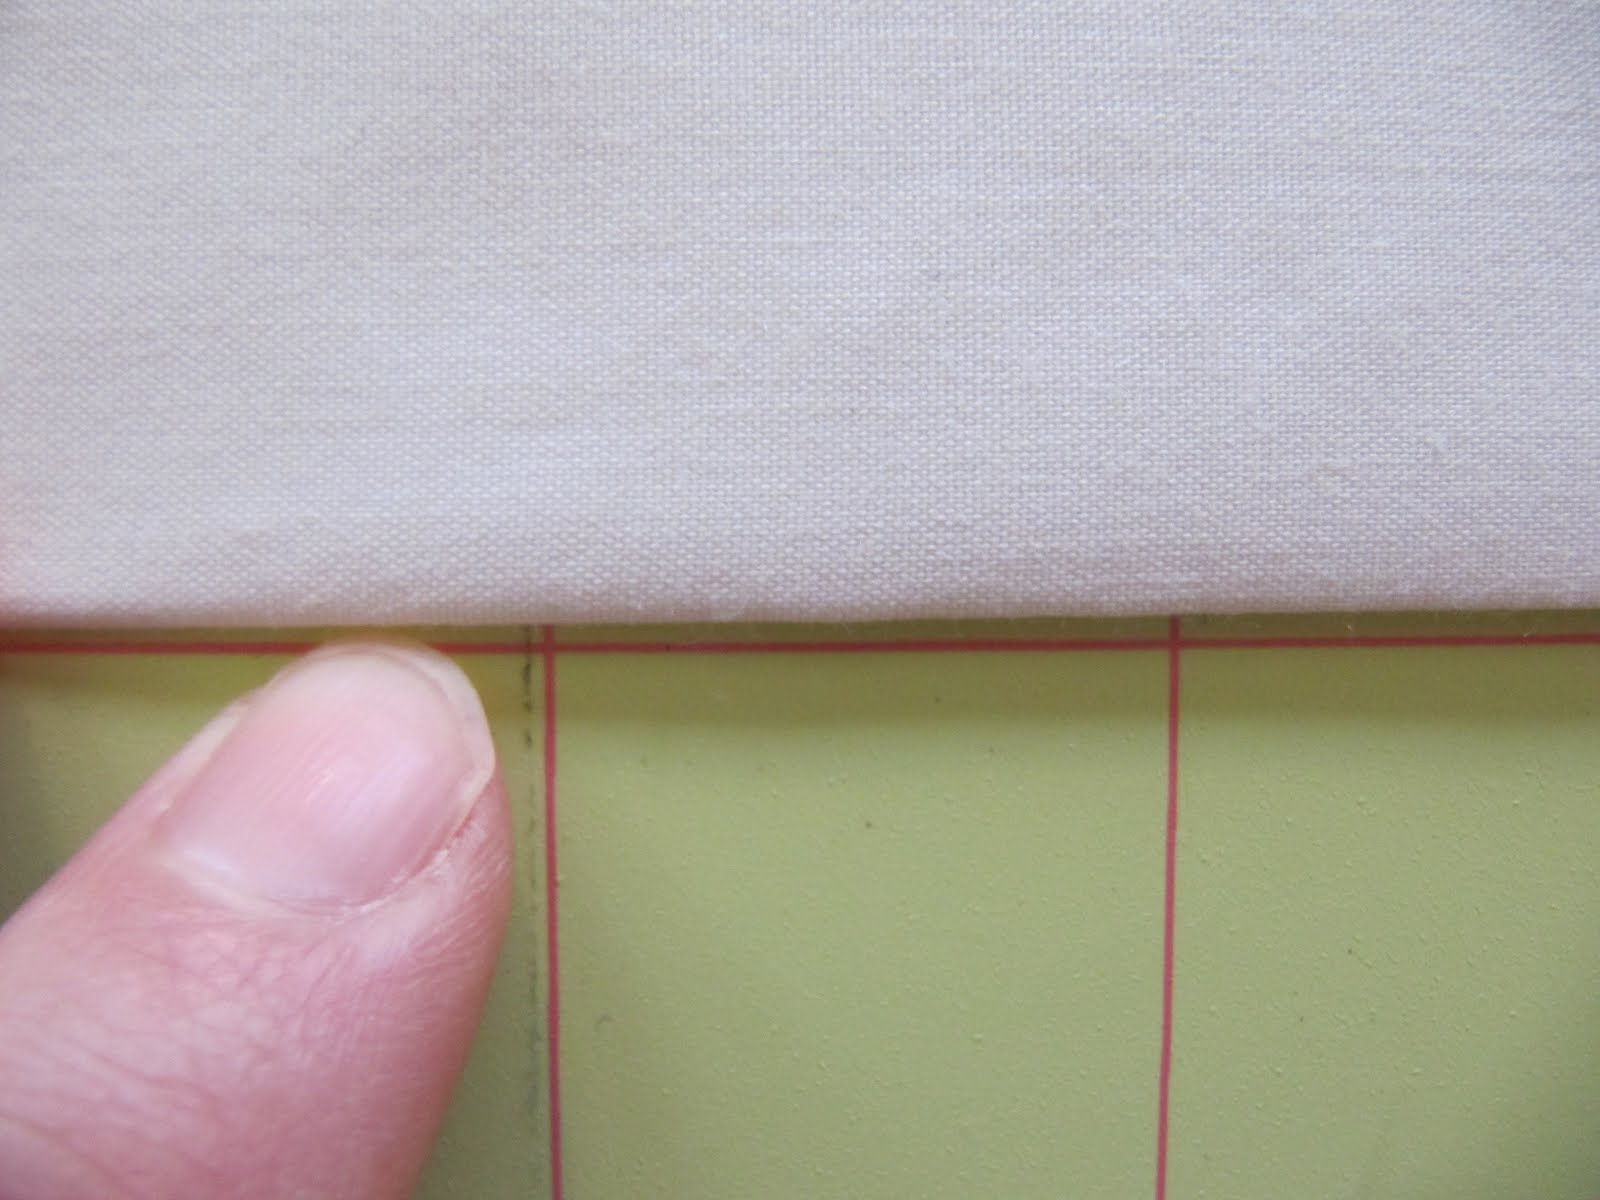
See how flat the fabric is?

If your fabric has a little bow to it or a swag to one side, like in the picture below, that causes your fabric strips to have that wonky center. Just slide your fingers until the fabric straightens up.

Fold the fabric in half again...making sure you don't have that same swag in the fabric like below.

Once the fabric is folded and flat...iron the folds.

Now place on your cutting mat...

Line up the bottom, folded edge with a horizontal line on the mat.
Make sure the raw cut edges of the left side are past a line on the mat.

Make sure all four layers are past the line.

Top layers too.

To square up the edge, place your ruler on the line of the cutting mat.

Line up the ruler on the line of the mat below the fold.

and the top too.

Sometimes if there is enough fabric, I will match a horizontal line on the ruler with the line of the fabric too.

Hold your ruler in place and cut with your rotary cutter.

Peel away raw edges.

Keep fabric in place.

To cut the squares, place your quilt ruler at the fabric. I will be cutting 5 inch squares.

Match the vertical line on the clean cut edge of your first cut.

See the fabric in between the black lines...lined up with the black 5 inch line.

To keep the fabric square, line up the bottom line of the ruler with the folded edge of the fabric.

The fold is between the horizontal lines.

Hold your ruler in place and cut with rotary cutter. (My left hand would be holding the ruler, but I'm taking the picture)

Now you have one 5 inch strip of the folded fabric.

Take that 5 inch strip and turn it horizontal. Make sure both the raw edges and the folded edge are past a line on the mat. To make the most of your fabric, you can get 2 sets of 5 inch squares out of this strip, so you need 10 inches of fabric plus the little extra over the lines

Small amount of fabric past the line on the left...

Make sure all edges are over the line.

The folded edge is past the line on the left.

Now take your ruler and line it up with the line on the mat, just like your first cut that you made.


Cut the raw edge away.


To make the first set of 5 inch squares, take the ruler and line up the vertical line of the ruler and the horizontal line on the 5 inch mark. See my 2 fingers?

Cut with rotary cutter.

Tah Dah...but we're not done yet.

Slide the ruler over and cut your second set.

and trim off that little extra fabric of the folded edge.

Now you are officially done....8 squares at 5 inches each.

If you are careful with your folding and raw edges, you can get 8 five inch squares out of each strip of fabric. Make sure every once in a while, as you are cutting down the length of your folded fabric, that your square it up with a clean edge again
One yard of fabric should yield 56 five inch squares.
Hope this helps,
~Karen~

Unfortunately , these squares will be off grain. the only way to get them on grain is to pull a thread.
ReplyDeleteChris
Thanks for this tutorial, I'm such a beginner, I needed that. (Now to figure out the off grain remark). I sew clothing and begin to understand quilting is a whole new world phew!
ReplyDeleteNice tutorial, Karen!
ReplyDeleteGood tutorial and I'm glad to see you use a ruler to do your measuring and not the mat. (Some mats just aren't super-accurate, I've been told, so I learned to cut with the ruler early on in my quilting "career").
ReplyDeleteThanks for sharing. What kind of ruler are you using? It is so clear.
ReplyDeleteThis is the same way I cut mine. The only thing I do a bit different is that I tear the one side to help true things up before trimming with the rotary cutter. Effective & much easier than thread pulling :)
ReplyDeletegreat tutorial!
ReplyDeleteas i still have to get a mat,ruler and a cutter this was a great tutorial for me,what size is your ruler !!! as i just started this year i need all the help i can get !!
ReplyDeleteThank you for posting this tutorial!
ReplyDeleteThanks Karen, this takes away the tedium.
ReplyDeleteMy, how we all do things differently! I'm appreciating that, not being critical. I teach beginner quiltmaking lessons (Stitchin' Mission program) and have differing views about folding, trimming and cutting compared to yours. Aren't we glad the methods we follow work for each of us?
ReplyDeleteI appreciate the time you take to get this information out to us. This is very helpful!
ReplyDeleteThanks for posting. I always like to see if I'm doing things like other quilters/sewing folk.
ReplyDeleteI remember the home eco. class that said we should pull a thread like Chris was commented but I Don't always practice that rule. What's your thought for cutting blocks off grain?
You are full of AWESOMENESS!!!!! Thanks so much for all your great help!
ReplyDeleteGreat tutorial with wonderful pictures. I like to cut my fabric this way also.
ReplyDeleteawesome tutorial:) love this
ReplyDeleteOh, that is close to the way I was taught to cut squares 30 years ago. I was never happy that any of the squares remotely turned out on grain. Now, I do it differently, because it is important to me to have things perfect. Yes, I have given up mass production for accuracy. I cut 2.5 inch squares individually. I never cut layers of fabric anymore because I prefer to be as accurate as possible, and on grain. Whatever works for each quilter I think it's great that you are encouraging new quilters.
ReplyDeleteThis is great. Thank you for giving this tutorial. I have always been a bit scared to use the rotary cutter.
ReplyDeleteGreat directions.
Thank you for the great tutorial! I have a mat and rotary cutter but still needing a good ruler. The yard stick just doesn't make it!
ReplyDeleteDebbie K
Thanks so much for taking the time to post this tutorial. Maybe next time I do a quilt it will be a bit straighter!
ReplyDeleteI have a friend that is fairly new to quilting and she really gets hung up with cutting squares. I can't wait to show her your tutorial. The only thing that I do a little different than you is to use my 12-1/2" square up ruler. For me, I'm much more accurate with that than the long ruler.
ReplyDeleteThanks for such a great tutorial and all of the photos.
I was thinking that I generally cut my squares the same way. More often than I not, I still end up close to the grain. I have seen that a lot of patterns these days do not seem to be following the grain so I sometimes cut to make a pattern straight or fussy cut area like a nice flower or whatnot. Thanks for the tutorial!
ReplyDeletei'm glad i found this post before I cut all 15 yards for my current quilt - 9", 6", and 3" squares. Thanks for the help.
ReplyDeleteGreat tutorial! What brand cutting mat and ruler do you use??
ReplyDeleteI'm new to this and I'm wondering where I can find the items that you used. Thanks!
ReplyDeleteExcellent thank you so much! I am about to start my very first quilt and this tutorial is exactly what I needed to begin. I will be blogging my efforts and will link back to you :)
ReplyDeleteThank you for your tutorial! it is very helpful indeed...!!
ReplyDeleteRotary cutter make my life of cutting fabric so much easier!! Only thing is you need to change the blades quite often and i actually found is it better to separate the one you cut fine fabric such as silk and cotton/ denim. AND concentrate!! Once I was talking and cutting at the same time, i had my finger in front didn't realize till it had a deep cut.It cut very fast but injury happens very fast too. So heath and safety ladies and gentlemen!!
Thank you for this tutorial...i first learned to cut quilts using the 'mat' for measuring...this to me seems like I wouldn't have to move the fabric around as much on the mat to start at 0 again for measuring...using this method, i'll be able to just move the ruler everytime across the fabric until i'm done cutting. Thanks for the tip
ReplyDeleteExcellent post I was checking continuously this blog and I'm impressed! Extremely useful information particularly the last part I care for such information a lot.
ReplyDeleteThank you so much for the tutorial. I am just learning to sew and it's good to see I had it mostly right. I need to get a better ruler though.
ReplyDelete