
What are Labels you ask? Maybe you didn't ask, but I'll tell you any way! Labels are categories where each of your posts can be listed so visitors to your blog can find a particular post fast and easy.
Labels are VERY important to a blog. Here's a scenario.
- you did a post on say...a tutorial for sewing a purse or making a yummy chocolate cake
- a visitor of your blog saw that post a while ago, knows it's on your blog, but not sure WHEN you posted it
- a visitor to your blog doesn't have the time to search through every single one of your posts to find that tutorial or recipe.
- where do they go? Well, to your LABELS section on your side bar
- they just click on a category, such as sewing tutorials or recipes, and poof there are all your posts that you Labeled SEWING TUTORIALS or RECIPES!!
- yay!! super fast.
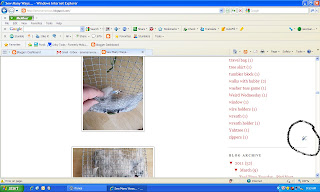
This first picture is of what the LABELS section looks like on the right side bar of my blog.

The black circled section is what it looks like under each of your posts. It tells which label you've chosen for a post.

Here is how you add LABELS to your blog...
Go to your Dashboard of your blog and click on DESIGN (circled in black)

This brings you to the ADD and ARRANGE PAGE ELEMENTS. Click on the ADD GADGET button (circled in black) on the right side bar.

This screen pops up. Scroll down until you find LABELS (circled in black). Click on the name or the PLUS sign to add it.

The Configure Labels window pops up. Choose how you want it designed and click SAVE. When it's added to your blog, the Labels will be on the top of the side bar. Just click and drag your new Labels section up or down to where you want it. Click SAVE again.

Now here are the steps for labeling your posts...you can do this when writing a new post or go back in and edit an old post to add a Label. When editing a post, go to the edit page, change what you need to on a post and click Publish again. It won't publish again on the day you are editing, it just makes the change and keeps it on the original date you published it.
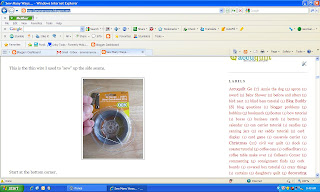
Here is a sample of a post in progress. When you're done writing, go down to the bottom box (circled in black) and type in your label name or category. When you start typing, the labels that start with the same name will pop for you to choose from.

Or there is a button on the right side of the box that you type in that says SHOW ALL (circled in black)

Click on that and all the labels that you have ever used in the past will pop up. Just click on the one you want to use and it will show up in that box.
space
Once you decide on a label and your post is published, that particular post will end up under that category in the LABELS section on your side bar.

For a quick edit of your labels, you can be on your main blog page and scroll down and see little Tools next to each gadget you have. Only you can see these icons on your blog page.
Click on the tools and that Configure window pops up. You can change the way your lists are shown on your blog...
The choices are LIST style (one label after another) shown below....

or CLOUD style, which is all the labels shown together and the font size changes on its own by how many posts are in the particular label. I chose to have my labels in a cloud style with the number of post in each category after the name.
If you ever want to remove a label from your list, you need to go to the edit page of all the posts that have that Label and remove the label name from that little space under each post.

The choices are LIST style (one label after another) shown below....

or CLOUD style, which is all the labels shown together and the font size changes on its own by how many posts are in the particular label. I chose to have my labels in a cloud style with the number of post in each category after the name.

If you ever want to remove a label from your list, you need to go to the edit page of all the posts that have that Label and remove the label name from that little space under each post.
space
I hope this helps. If you have any questions, please feel to email me. I don't know every thing, but I'll try to help. CLICK HERE for more Blog Buddy posts
space
Take care,
~Karen~

You can also add them after you've hit the publish post. Go to your dashboard,then edit posts, above the Edit/View for the posts is a box "Label Actions". After you've placed a check in the appropriate post's box (in front of the Edit), go to the label actions arrow and it will bring down a list of labels already used. You can click on each label you want to use (one at a time, going back for each label) or you can put in a "New Label" at the bottom of the list. This way you don't have to edit the whole post to add your labels.
ReplyDeleteWanda
http://wandas-quilts-crafts.blogspot.com/
Great tutorial.
ReplyDeleteYou can also just type the word in the search box (blogspot) (upper left corner).
Thanks, I was just wondering about this and then your blog was next on my reading list, serendipity!
ReplyDeleteWow Karen, I didn't know about this and now I do. I just added labels to my blog! Thanks for the information. You are a great mentor!
ReplyDeleteSusan
Labels aren't just a great help to someone else reading your blog, they help you find something on your own blog too! Also you can learn something on a blog that you weren't even reading about if you go through the labels, and click something of interest to take you to an older blog, maybe even before you were a blogger.
ReplyDeleteKaren, THANK YOU! I love your Blog Buddy posts, you have helped me and my blog SO much. Can you explain some time how to put tabs at the top of your blog. I see so many with "Home" "recipes" "Tutorials" I've tried but I can only get one tab at a time. I know there is a trick but I can't discover it.
ReplyDeleteThanks again for your generosity.
Thanks. That worked nicely. Now I will have to label my posts, lol. Wonder how to get some of the things on the left side instead of the right...
ReplyDeleteYou must have been reading my mind. I have added labels to the posts, but I didn't know how to show them on the sidebar! Yes, I'm a simpleton. Thanks so much.
ReplyDeleteThank you! I like your Blog Buddy posts,they are easy to follow and so instructive!
ReplyDeleteThank you for inspring me to do this! I had created pages but they were by no means up-to-date and it was lengthy to update them. Your tutorial was so simple to use. Thanks for the photo instructions too (visual learner, here!).
ReplyDeleteThanks, I'm going to try this!
ReplyDeleteWhile I know about and use labels all the time, I love reading your Blog Buddy's because you're such a good teacher, Karen! Great job. I just wish there was a way in the Show All part of the composing post to organize them to make it easier to pick them out. I guess I could suggest it to blogger, eh?
ReplyDeleteI hated the word "Labels" so I renamed mine "Categories" on my prim crafting blog. Just makes it seem more logical when I'm tagging posts, and for when folks are looking for certain types of projects on my blog itself. :)
ReplyDeleteoh Karen I am so happy I found your blog! Can hardly wait to see all your posts on blogging. Thank you so much for sharing. Kay
ReplyDeletemy dashboard looks nothing like in your pictures. I am so lost! I can't figure any of this blogging thing out :( Help!!
ReplyDeleteyour blog has been a real lifesaver with me starting my own blog!
ReplyDeletethank you so much!