I did a post the other day on a waiting room remodel I did at my work. Click HERE if you missed that post. There were 2 windows that just needed something simple.
An easy simple box valance.
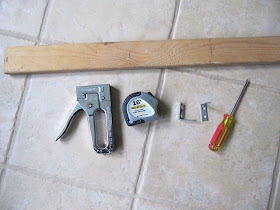
Here's what you'll need...
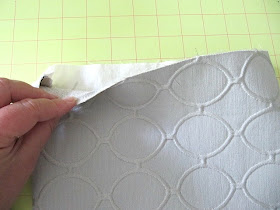
- fabric
- lining fabric...I just used muslin
- 1" x 3" cheap board...have them cut at the hardware store if you want
- 2 "L" brackets per window plus the screws to attach
- staple gun
- tape measure
Using a 1" x 3" furring strip is cheaper than expensive curtain rods. I bought an 8 foot piece for $1.32.
How To Measure Window...
This is more of a method than actual measurements, because your window will be different. These will be sample numbers only.
First...
Measure across the width of the window, edge to edge of the molding. (see the red arrow?)
Write it down...for EXAMPLE, my window is 36 inches across.
Sample measurement is 12 inches.
Measure the width of the wood window casing...
Sample measurement is 1/2 inch.
Now measure the width of your wood piece. Remember, hardware stores measure crazy. A 1" x 3" board is really 2 1/2 inches wide, so make sure you measure first.
The width of the wood plus the width of the window casing is what we're looking for. 2 1/2" + 1/2" =3
Here's the measurement breakdown for cutting fabric...SAMPLE NUMBERS ONLY
CUTTING WIDTH OF FABRIC (see blue arrow in picture) = width of hardware store wood + width of window casing X 2 (2 sides of the window).
Then add that number to the width of widow + seam allowance.
My sample measurements= 2 1/2" (wood) + 1/2" (casing) for one side of the window which = 3". Now multiply by 2 (for 2 sides), which equals 6. Now take that measurement and add it to the width of window and add 1 inch for seam allowance.
6" + 36" + 1" = width for cutting fabric.
CUTTING HEIGHT OF FABRIC = length of desire valance + width of wood + seam allowance
12" + 2 1/2" + 1/2" (there's only one seam on this side)
Please don't hate me for that!! LOL Just take it slow and really process the numbers before you cut.
Valance Tutorial with a Tiny Sample
I forgot to take pictures of the real valance, so this is a small versionCut fabric and lining with your measurements.
Place them right side together.
Sew, with 1/2" seam allowance, down one side, across the bottom and up the other side. Leave the whole top open.
I used blue thread so you can see. Use matching thread for your fabric.
Trim corners.
Turn right side out.
I used a chop stick to poke out the corners.
Iron seams.
DONE!!
The top is open but it doesn't matter. You can zig zag the raw edge, but you will be stapling this on top and you won't see it.
This is a tiny sample of the wood for the window. Have equal parts of fabric hanging over on each side.
Now lay the valance on the wood matching the wood edge.
Staple across the top of the wood.
Now for each side...
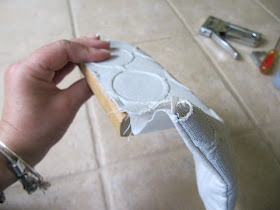
Fold down the top edge and tack with staple.
Take front fabric and fold over to the side.
Here's my goof with this sample. I didn't add in the small wood casing measurement of 1/2". Oops, it should hang over extra to cover the whole window. However, if you are mounting this high above the window on the wall, not the wood casing, it will look like this.
Any who...bring fabric over, even with the top. Place your thumb there and press.
Flip back fabric and staple towards the top.
Staples in place.
Drop fabric back down in place. You can also hot glue this side.
Here's a little peek if you want to see where the staple is again.
Mini sample valance.
Top view with staple on top and sides folded over.
Back...which will be up against the window.
Now add your "L" brackets, flush with the wood.
Back view again.
This is a shot of it mounted to the wall above window casing. You can screw it to the wood casing, but I wanted it a little higher.
If you're adventurous, you could always scallop the bottom edge or add piping.
This really is fast and easy...just seems like a long process.
Hope you get a chance to try it.
Happy Tuesday,
~Karen~


This is really, really clever Karen. We just came out of winter here in Australia - southern states still suffering but in northern Oz it's gorgeous. We made a totally timber pelmet/valance in the middle of our winter and afterwards were able to sleep with a sheet only - no quilt. Because they help build a layer of insulation between curtain and window glass. It saved us money in heating costs. Plan is to rest of the house now.
ReplyDeleteGracias, es un tutorial claro y práctico.
ReplyDeletesaludos
It looks great! You make the project look easy. Thanks for the instructions!
ReplyDeleteThat looks great! This looks like a project that I must try!
ReplyDeleteWhoa whoa whoa! How did I miss last week's post? I wish you had a photo of the old furniture. You were kind to describe it as "tired." It was hideous! Kudos to you for the remodel and to your boss for the budget. Are all the patients wondering if they walked into the wrong office?
ReplyDeleteThis comment has been removed by the author.
ReplyDeleteI meant 'muslin'! Wish blogger had spell check!
DeleteThe valances turned out beautifully! I made some for my guest room a couple of years ago, but I did not line them with anything! So they don't hang very nicely. They are attached to the board with velcro, so I will take them down and line them! Thanks for the tutorial!
ReplyDeleteIf I was your boss, I'd be afraid you would leave me, and start your own designing business! This is so easy, and yet looks so formal and professional. The whole room looks amazing, but still inviting! Wonderful job! Now, can you come to my house and do that for me!?! :o)
ReplyDeleteLove how this looks! We are trying to sell our house right now but will try this in our new home. Pinned it! Thanks :) Kathi
ReplyDeleteLove how your bracelet (on right wrist) matches the pattern in the fabric!
ReplyDeleteWow...maybe even I could do this?
ReplyDeleteI wish I could sew but I just don't have the patients and you make it look so easy.
ReplyDeleteLove it, very stylish
ReplyDelete1
Love it! :)
ReplyDeleteDo you have any ideas on covering those leather chairs? I have them and wanted to make slipcovers for them for the holidays!
ReplyDelete