As with any project, there are many ways of doing something. The ideas I'm posting here are just a few of the different methods I've used over the years for cutting the freezer paper and the fabric. Technology has made things a little easier with hand held paper punches and electric die cutters, but I'll also show you a simple way to cut the hexies with a cardboard template.
Cutting the Paper Hexagons...
Types of paper
- freezer paper (my favorite)
- card stock
- recycled envelopes
- and those annoying magazine inserts finally have a purpose
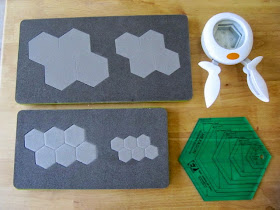
Types of cutters
- accuquilt die cutter
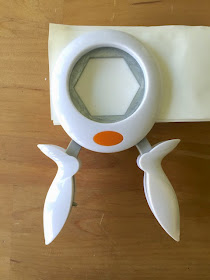
- Fiskars hand held paper punches (found in the scrapbooking section of any craft store or online)
- store bought plastic template for rotary cutter
- print template from free online source and make one from cardboard to plastic template
Here are the types that I have used.
Come inside for lots of pictures and steps for each method.
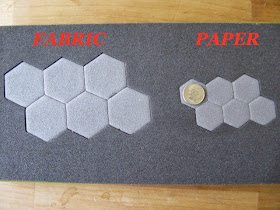
The new accuquilt die cutters are specifically made for English Paper Piecing.
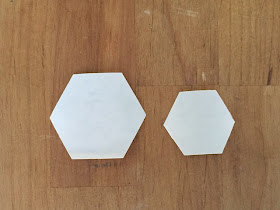
I've labeled the pictures below to show you that the smaller hexagon on the right is where you would place the paper and the larger hexie on the left is for the fabric. That a quarter to show you the size of the finished hexagon.
This is the smaller hexagon and that's a dime for a size comparison.
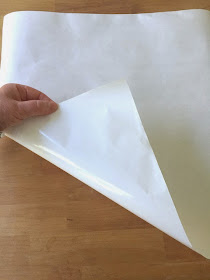
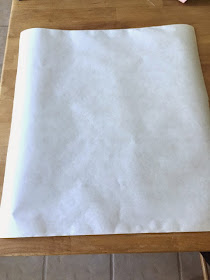
As I've mentioned, freezer paper is my favorite for paper piecing. It has a shiny side to the paper that will adhere to fabric when ironed. It stays in place until you peel it away. You can also reuse it over and over. When used a few times, you might have to place a pin in the center to keep it in place.
The paper has a dull side and a shiny side. The shiny side must be towards the wrong side of the fabric when ironing or it will stick to your iron. Yuk!
Here's how to cut your hexagons with freezer paper. You can also use this method for any type of paper.
Cut a long piece of freezer paper.
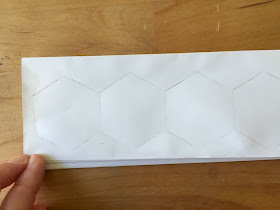
Start to fan fold the paper. Make sure the width of the first fan is as wide as you need for your hexagon template.
Fan fold to the end.
Make a cardboard template. You can find and print so many sizes from free online sources.
Trace the template.
To save paper and cutting time, butt the sides of the hexagons next to each other. That way you are only cutting one side of 2 hexies.
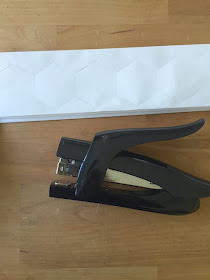
Before I cut the hexagons, I always staple the paper together first.
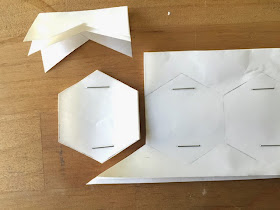
Stapling them together, inside the hexagon, to keep the paper from shifting when cutting.
Now you can cut.
Remove the staples and your done.
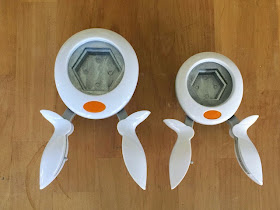
The Fiskars paper punches are great.
You can still use the fan folded paper method, but I'm not sure how many layers you can cut through with regular paper. Freezer paper might be 3-4 layers.
Fast and easy.
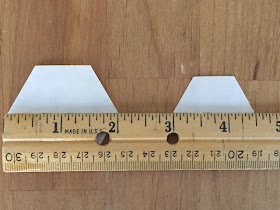
There are different ways to measure the size of a hexagon.
Some measure point to point, going east to west. The Fiskars punches are 2 inches for the large and 1 1/2 inches for the small.
If you measure the ends, the large is 1" and the small is 3/4".
Cutting the Fabric...
As I mentioned with the paper, there's more than one way to cut the fabric, but here are a few ways I've done over the years.
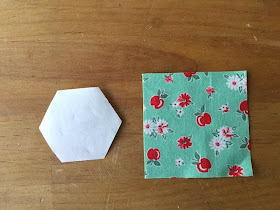
Square of fabric.
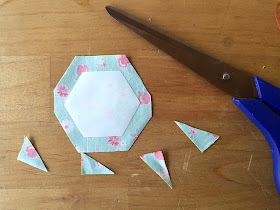
Use fabric that is already cut in squares...maybe left over from different projects or even scrap of any shape.
The mini charm squares are perfect at 2 1/2 inches.
Iron on the freezer paper hexie.
Hand cut the fabric to roughly make a hexagon 1/4 inch larger than the paper.
The shape of the fabric doesn't matter. It's the shape of the paper that makes it accurate.
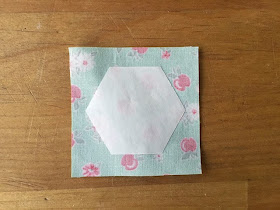
The other method is to just leave it as a square, because, again, it's the paper not the fabric.
I showed you how to sew the hexagon in the last post, but I'll show again just to make this post one cohesive tutorial.
I always sew my basting stitches on the wrong side of the hexie. I never sew through to the front as in some methods. It is way too much work to sew through the paper and have the stitches on the front, because you have to pull all those threads out when you're are finished.
This method has basting stitches only on the wrong side. They stay there and are never removed.
Basting the Hexagons
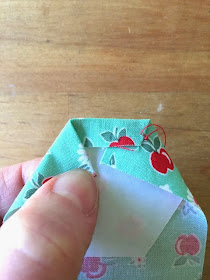
Fold over first edge of fabric up against the paper template.
While holding down the first side, fold over the next section.
With needle and knotted thread, take a little whip stitch at the mitered folded corner to secure.
Fold down next side...
and take another whip stitch.
See the basting stitch is running on the wrong side, not the front?
Do that all the way around until the mitered corners are secure.
I don't even go that last stretch of thread to the first corner I stitched, because all folded corners are secure. When you're making hundreds of these, it matters! lol
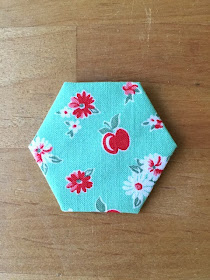
Here is the finished front. See? no thread on the front to remove! Woo Hoo!!
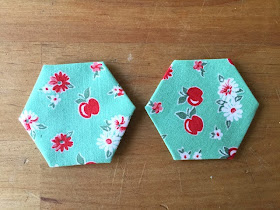
Here is the back of the square fabric and the back of the hexagon shaped fabric. Either one is great...your preference.
There is excess fabric with the square shape and that might matter to someone who is hand quilting this in the end...not sure though. I've never gotten to the hand quilting part of a finished hexagon project. Lol
Both look the same from the front.
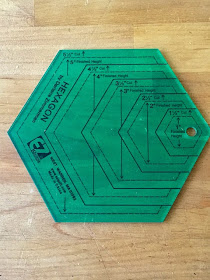
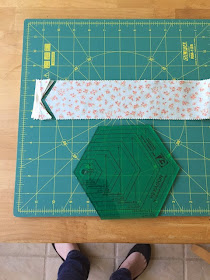
I also wanted to show you this ruler I have that cuts fabric hexagons. It cuts them from 1 1/2 inches to 5 1/2 inches.
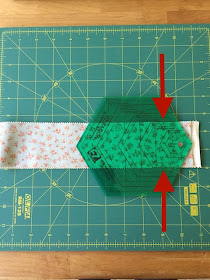
I'm using a jelly roll strip that is 2 1/2 inches wide to show you.
Place ruler on fabric.
Line up the edge of the fabric with the 2 1/2" lines on the ruler shown with the arrows.
Trim fabric with a rotary cutter.
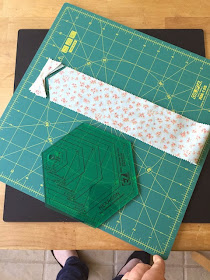
You can just turn the fabric around, but I have this Olfa rotating mat that is great for this.
You turn the mat, so you don't disturb the fabric.
It spins on that black background mat.
Spins until the fabric is turned toward the left.
Now match the cut end to the ruler shape and trim again.
Easy peasy.
Nice and neat.
I just found this out today playing with all these things...The paper that is cut with the larger Fiskars punch fits perfectly with the 2 1/2 inch fabric hexagon that I cut with the E-Z hexagon template.
Here's one more tip. Use a hole punch in the center of your hexagons for easy paper removal.
Once all your hexagons are sewn to another hexagon, you can remove the paper and use it again. The hole helps to pop out the paper.
I use a skewer or chop stick.
Just stick it in and pop it out.
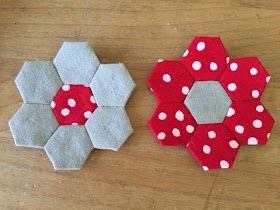
Here are my little hexie flowers that I've been making lately.
Here is my Grandmother's Flower Garden quilt I started 15 years ago.
I just pulled this out of the depths of my unfinished projects to re-start my mojo on this.
I am making this for my husband. I told him when I started, that it will be for our 50th wedding anniversary. We'll be married 28 years this summer. I didn't put any pressure on myself for this one!!! Lol
It is hopefully going to be a bed sized quilt, but at this rate it might be a bed runner at the end of the bed or matching place mats or maybe a shawl.
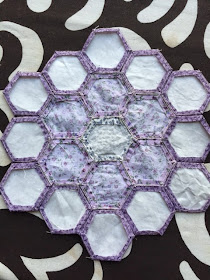
Here's the back of one of the flowers. See how I left in the papers on the border until I sew it to another hexagon. I can re-use the papers for other hexies.
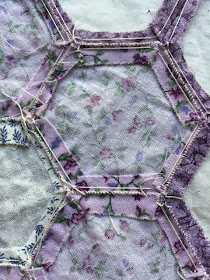
This is a close-up of the tiny stitches I take to connect the hexagons. I like to make them tight, so you can't see the stitches on the front.
I really hope this helps and relieves the fear that some of you have with English Paper Piecing. It really is a wonderful hobby to start. It's relaxing, portable and you can be so creative with fabrics and arrangement of the hexagons. Do a Google image search for English Paper Piecing or sewing hexagons or Grandmother's Flower Garden just for inspiration. You'll be amazed!!
Happy sewing!
Thanks so much for stopping by,
~Karen~
























As always, thank you for the step-by-step pictures. You make it look so easy!
ReplyDeleteThank you for this complete tutorial!
ReplyDeleteEsther
esthersipatchandquilt at yahoo dot com
What a great post! Thank U verry mutch.
ReplyDeleteYou have made my quiltinglive a lot easier!
ReplyDeleteIn all probability I will never work with hexies but you make it look easy. I've passed them on to my DD who has expressed an interest in all things handmade
ReplyDeleteas always, you are amazing !
ReplyDeleteFantastic tutorial. So detailed. Thank you.
ReplyDeleteThanks for the tips, I love hexi flowers but hated making them I'm going to try the freezer paper and see if that helps me.
ReplyDeleteRobin in Washington State
Great tutorial. Thanks for taking the time to do this.
ReplyDeleteAnother great explanation. I really want to start some...
ReplyDeleteYou're really spending a lot of time that you could be working on your hexies by making your own. I get mine at paperpieces.com. They have every size and shape that you can imagine, and they have the templates too if you want to do some fussy cutting. Save your energy -- buy your papers. (they can be used multiple times even for people like me -- I pierce through them with my needle)
ReplyDeleteThank you so much for all the details, I use the fiskars tool and freezer paper. For me this is so relaxing and I have a basket of scraps that is so full. I just finished 24 flower sets so I will make a quilt alternating with a 10 1/2 inch square.
ReplyDeleteThis is an amazing and detailed tutorial! I've never tried this before but would love to give it a try. I would love for you to link up to the Stitch It, Blog It, Share It Link Party going on now at BehindtheSeamsSewing.com.
ReplyDelete~Bonnie
Thank you for all this great info.I really going to save this info for reference..
ReplyDelete