I thought I would share a quick tutorial on how to make HSTs if you didn't have the bonus squares or if you would just like to know how to make them on your own.
In this Half Square Triangle tutorial, you will use 2 squares of fabric which will give you 2 half square triangle blocks.
There are many different ways to make half square triangles, but this is the way I've been making them for years. It ensures that the final HST is accurate and squared due to the trimming at the end and not dependent on my sewing.
Start with 2 squares of fabric...
- one light
- one dark
The measuring...
- add 1/2 inch to the UNFINISHED measurement of your half square triangle block size.
- In other words, if your desired unfinished HST block size is 4 1/2 inches, you will cut your squares at 5 inches.
- another way is to add 1 inch to the FINISHED measurement of your half square triangle block size. My finished HST block will be 4 inches, so add 1 inch to the starter fabric...so cut your squares at 5 inches.
Here's my example. I need 4 1/2 inch (unfinished size) HST, so I cut my squares at 5 inches.
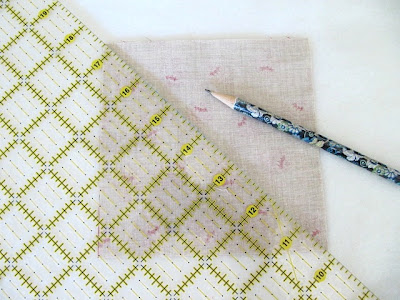
Place squares right sides together.
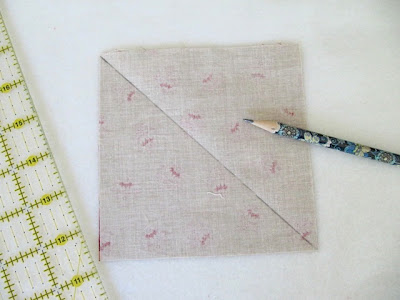
With a ruler and pencil, draw a diagonal line from corner to corner.
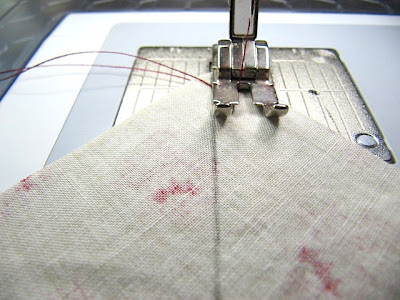
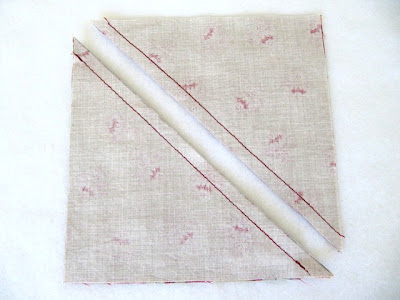
Using a 1/4 inch presser foot, sew 1/4 inch away from that center line.
Turn around and sew 1/4 inch away from the center line on the other side.
If you don't have a 1/4 inch presser foot, can use your quilting ruler and draw the sewing line 1/4 inch away from the center line and then just sew on that pencil line.
Cut down the center diagonal line.
Stitching the lines first before cutting this center line is so much easier than trying to sew on the bias edge of cut triangles. Bias edges are VERY stretchy and a nightmare to work with, so this way is much better!
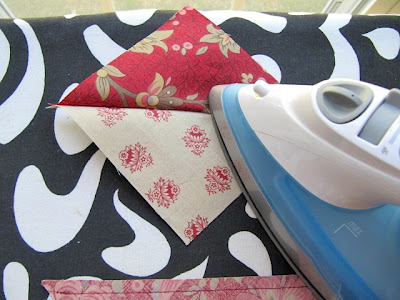
Press on the dark side of fabric.
Lift the dark triangle and press seam allowance to the dark fabric.
You now have 2 half square triangles, but they need to be "squared up".
I use a bias square ruler. I have a few sizes, but the 8 inch is my favorite.
Place the diagonal line of the ruler on the diagonal line of the HST.
Make sure the left side and the bottom edge are lined up with the desired measurement you need for your UNFINISHED block size. I need 4 1/2 inches.
So the left edge and the bottom edge will remain and the top edge and the right edge will be trimmed away with rotary cutter.
Trimmed.
Cut that little bottom left piece to have a clean edge.
A perfect half square triangle!!
There are several other methods for making these half square triangles...one other way is to add 7/8 inch to the desired FINISHED measurement. When you are done sewing them, you don't need to trim at the end.
Another great method is a tutorial from my friend Karen's blog...Laugh Yourself Into Stitches. She has a quick way to make 8 HST from 2 squares of fabric. Click HERE to see her fabulous tutorial.
Hope this was helpful,
~Karen~







Very helpful tutorial! Clear photos and explainations. Easier to sew on solid edges than stretchy bias. Thanks!
ReplyDeletei am new to quilting, and this was so helpful.....and fun!
ReplyDeleteI love this tutorial, I need to finish my charity quilts and start working on some quilts for family.
ReplyDeleteI'm new to this and this tutorial was very helpful! I think I NEED one of those square rulers!
ReplyDeletei forgot how easy this is...thanks for the reminder! (I usually hate triangles...lol) ALso a good way to use up to charm packs.
ReplyDeleteval from myplvl.blogspot.com
I agree--I always go for the square-up method--seems like nothing else gets an accurate HST no matter how carefully I cut and sew!
ReplyDeleteThanks for showing how to square them up. Now maybe my points will match. HA!
ReplyDeleteI like to trim a little bit on all four sides - just in case of wonky-ness everywhere!
ReplyDeleteGood tutorial. Thanks.
ReplyDeleteGreat tutorial, thank you! :)
ReplyDeleteThanks so much!! Big help for brain crash :).
ReplyDeleteGuess I must be stupid because I followed exactly still came out weird. The squares matched up all around prior to sewing the 1/4" seams
ReplyDelete