If you are not familiar with the Accuquilt Go! Fabric Cutting system, it is a portable unit with rollers and manual handle. The dies are shapes set in foam with the blades or cutters hidden in the foam. You place the fabric on top of the die, cover with a cutting mat and send it throughout the rollers. In a matter of seconds, your fabric shapes, strips or patterns are cut for you. Fast and easy.
Well, a few months ago Ellen, from Accuquilt, contacted me again to try their new set of dies. They are amazing...so many new shapes and sets that every quilter will love. They are familiar, traditional shapes and patterns that would normally take so much time to cut, even with a rotary cutter. At the time I received all the dies, my schedule was crazy and then the holidays came in full force, so I haven't had the time until now to play with them. I'd love to share them with you today!
Here are all fabulous new dies…
- Half Hexagon- 4 1/2 inch sides
- English Paper Piecing- 1 inch finished sides
- Bowties- 4 inches finished
- English Paper Piecing- 1/2 inch finished sides
- Clamshell- 8 inches finished
- Snowball- 6 inches finished
- Clamshell- 4 inches finished
- Hexagon- 4 1/2 inch sides
- Equilateral Triangle- 4 1/2 inch sides
- Hunter Star- 6 inches finished
- Wedge- 9 inches finished
The half hexagon, hexagon and the equilateral triangle all have 4 1/2 inch on the sides, so they will all coordinated and go together to form more patterns and quilt designs!
Come on in to see all the dies and today's tutorial for the English Paper Piecing...
You know I love hexagons and English Paper Piecing is my favorite. I actually have the hexagon flower as my logo for my blog!! Before I begin the tutorial, here are some of the new dies for you to see!!
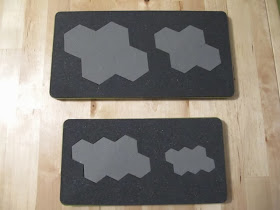
The dies have light and dark foam, so you can easily see where to place the fabric.
These are the 2 different sizes for the English Paper Piecing Hexagons...1/2 inch and 1 inch.
English Paper Piecing is a method of quilting all done by hand. It is the perfect project when you are on the go. You can tuck it into your purse and hand sew a few flowers when your waiting at the doctor's office, on long car trips etc. The "paper" part of it is used as a stabilizer for accuracy when sewing the pieces together. Normally, you would cut the fabric hexagons, then cut your paper hexagons 1/4 inch small (on all sides) yourself, but not now.
Now, you will cut the fabric and the paper at the SAME time with The GO cutter!!
I will be working with the 1/2 inch die today.
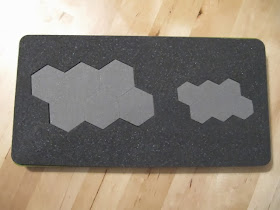
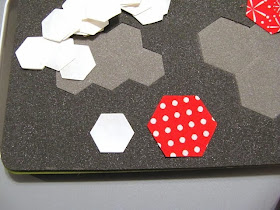
The 6 hexagons on the left are for your fabric and the smaller hexagons on the right are for the paper! Yes, this cuts the paper too. Outstanding!!
Two toned foam, so you can see where to place the fabric.
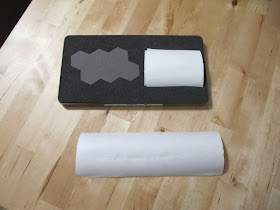
You can use any sturdy paper or card stock, but my ALL time favorite paper to use is Freezer Paper.
I have used freezer paper for over 15 years now and will never use anything else. You actually buy it in the aluminum foil aisle at the grocery store. $2-$3 a roll.
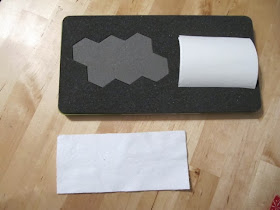
Just cut the pieces to fit over the template.
The benefit of the freezer paper is the shiny side of the paper. When you place the shiny side DOWN on the wrong side of the fabric, you can iron it on and it will stay in place until you peel it off. You can use it over and over again too.
The most important tip is…you must absolutely iron the shiny side DOWN on the wrong side of the fabric. If you don't, it will stick to your iron and you will hate yourself when you do.
Next up is the fabric. You can cut up to 6 layers of fabric. The best part is you can use up all your scrap size pieces of fabric!!
I used different reds for the petals to make several flowers at once and white for the center of the flowers.
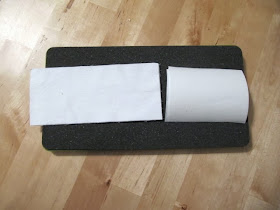
Just place the scraps over the hexagon die.
Fabric on the left, paper on the right.
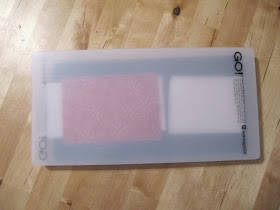
Place cutting mat on top.
Place die with mat on either side of the cutter.
Hand roll it through.
Until it gets to the other side.
Within seconds, you have all you fabric hexagons cut and the paper to go with them.
Perfect cuts every time!
The paper is exactly 1/4 inch smaller than the fabric.
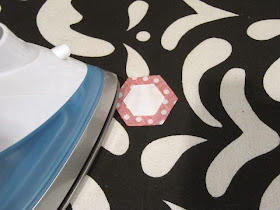
If you cut regular paper, you will just hold the paper on the hexagon or pin in place as you're sewing, but for freezer paper you will iron the paper on…shiny side DOWN.
See? It sticks and stays on until you peel it off.
Paper Piecing Tutorial…
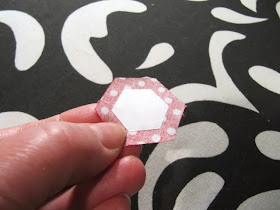
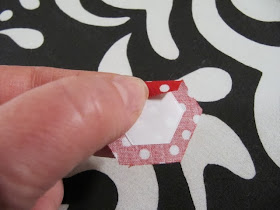
To begin, fold over your first edge of fabric over the edge of the paper.Then fold over the next edge, holding them in place.
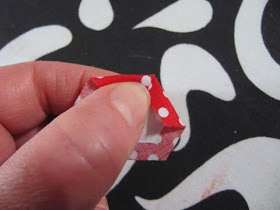
Thread your needle and knot the end. Take a small stitch and back stitch again to anchor the corner where the 2 edges overlap…at that mitered corner.
One corner done.
Fold over the next flap of fabric and stitch again.
With each corner that you stitch, you are keeping the thread on the wrong side of the fabric. DO NOT stitch through to the front.
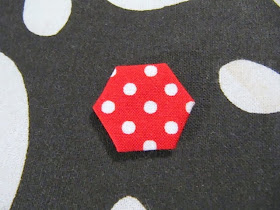
When you are done, each overlapping corner will be stitched down and the thread will be across the fabric on the wrong side.
The old way of doing this was to stitch through the paper, to the front to anchor the seams down. However, when you were finished sewing all the hexagons and then sewing them together into a quilt, you had to pull out all the basting stitches that were showing on the front. Not fun.
This way the stitches all stay on the back and you DO NOT have to pull anything out!!
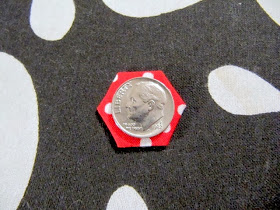
Isn't it so tiny?
and so cute!!
Now gather up all your hexagon petals and papers.
Iron on the paper.
Baste all the seams down. You will keep the papers on until you have sewn all the petals together.
To sew the petals together, place them right sides together and take tiny whip stitches across, just taking up a little fabric without going through the paper.
Stitch all the way across.
Open it up.
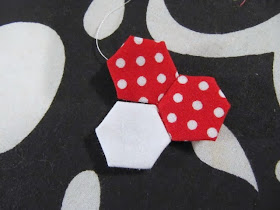
Add another hexagon petal to the flower.
Fold it over, so right sides are together.
and stitch again. You will be stitching over towards the left and up the petal each time.
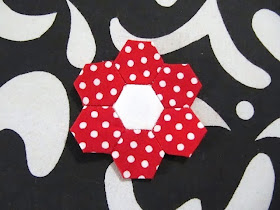
Keep adding hexagons until you have added all 6.
One hexagon flower is done!!
You can cut another coordinating fabric and sew another row of 12 hexagons on to this flower to make this little flower bigger.
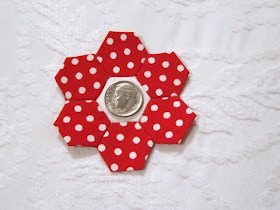
These petit flowers are great not only for making a quilt, but the tiny ones can be made into pincushions, name tags, magnets etc.
Perfect little size!
The Accuquilt site has so many great dies and patterns, I hope you can pop over for a visit. Click HERE for their site, HERE for the pattern section, HERE for their dies and HERE for their free patterns. They have great patterns for the new dies too!
Thanks so much for stopping by and stay tuned for more tutorial for these great new dies.
~Karen~



















Thanks for a great tutorial. I received an Accuquilt Go for Xmas. I have a few dies....hearts, dog, cat. The hexagon die is now on my list now I've read your tutorial. So time saving. Maggie xx
ReplyDeleteI love this great tutorial Karen.
ReplyDeleteI love the small hexi projects. But, have never done anything like this.
I am wondering do people ever let the paper in ??
Exactly, how do you take the paper out ?
Very curious to know.
Rose
When I first read the title I thought your machine had died. ;) Now I know what you were saying. I love seeing how the machine actually works.
ReplyDeleteMuy interesante.
ReplyDeletesaludos ane
This is the only time I have seen the Go cutter actually in action - great tutorial Karen Thanks!
ReplyDeletethanks for the tut....I actually have the Go Baby that I won on a blog and I did order the hexi dies; however, mine does not cut the paper less 1/4" so I have to do that myself...love the concept of this
ReplyDeletedie that they gave you the template for the paper....such a time savings....
How nice to be given one! I tried and tried to win one and never did. They're expensive!
ReplyDeleteI love the way that accuquilt have improved their dies. Two coloured foam, cutting more at once...great. Thanks for the review.
ReplyDeleteSo happy to hear they have a half hexagon die. I purchased a half hexagon ruler and love it for making quilts. Now I can use the "go" and have them done in no time flat and get to sewing.
ReplyDeleteHow and when do you take out the freezer paper? Thanks
ReplyDeleteI haven't been brave enough to try hexies but I have just used the 6" tumbler die cut and having fun with it.
ReplyDeleteI hope to create many quilts using the Accuquilt die cuts.
Thanks for sharing the tutorial
You've just reminded me how much I want those hexagons! I suppose I should finish a couple of projects with my other new dies before I think about ordering more, though. :-)
ReplyDeleteI have been eyeing this machine for a long time - I have a Sizzix machine and have heard that it's possible to use the Accuquilt dies in them, but haven't been brave enough to try yet.
ReplyDeleteI have wondered why the designs on the dies seem to be slightly slanted? Forgive me if that's a stupid question, lol.
Love those hexies!
Patty
Thanks for this tutorial! Gonna by this one!
ReplyDeleteGreat tutorial. I've just started English Paper Piecing to have a project that I can take with me. I had no idea that my GO could be such an asset. Thanks!
ReplyDelete