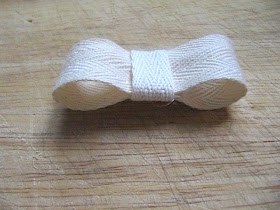
Here's the bow from the box...quick and easy!!
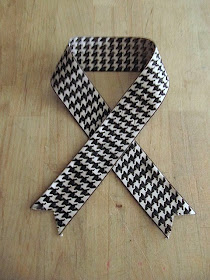
Here is the second bow I will be demonstrating...
For the first bow, you will need a length of ribbon for your desired size bow and a smaller strip (about half the width of your main ribbon) for the center.
If you do not have a smaller width ribbon to match your main ribbon, you can cut a piece length wise. However, you will need to put Fray Check on the cut edge so it won't unravel.
Place ribbon horizontal on flat surface. Take the left side of the ribbon end and fold over just past the half way mark.
Glue with a dab of hot glue, fabric glue or tack with thread.
Now fold over the right side just over the middle and secure with a dot of hot glue.
Turn the ribbon over.
Place your narrow center ribbon over the middle.
Turn over and glue down both raw edges.
All done!!
Poof up the loops on both end or you can leave them flat for a more tailored look.
I hot glued it to the front of the box.
Bow #2...
This is always my "Go To" way to make a bow.
Take a length of ribbon...
Cross over the 2 tails, making sure both ends are rights sides up if your ribbon has a wrong side and a right side.
Now take the top section and bring it down behind the center crossed area.
Bringing this center section down will form the 2 loops of the bow.
This is the point where you will need to adjust the length of your tails and the size of your bow loops that you want.
Once you make a lot of bows, you will be able to "eye" the size of things.
Now pinch and gather the top part you just brought down and the crossed areas of the center.
To secure the bow, you can use a thin matching ribbon, sturdy string or floral wire.
For wreaths I use wire. For gift packages, gift bags or decorative accents, I use thin ribbon.
Tie the ribbon tightly around the center cinching up all the ribbon.
Don't forget to trim the tail edges...either "V" shaped notch, slanted on the diagonal or straight across with pinking sheers.
Quick and easy bow without having to tie it like your tying your shoes, because those bows never turn out even for me.
Now you can add your cute bow to anything...
Have fun making your own bows!!
~Karen~


Thanks so much!! Great tutorial!!! I just recently had problems with a bow I tried to make for a wedding ring pillow. I'll especially try to make the Second One very soon!!
ReplyDeleteKatrin
Thanks a bunch for both tutorials!! I love how simple yet awesome looking they both are!
ReplyDeleteThank you for taking the time to show us the tutorial!
ReplyDeleteNonny
www.notionsfromnonny.blogspot.com
The bows look so easy to make. I'm sure mine will look just as good with a little practice. Thank you! :)
ReplyDeleteI had no idea that is how you make the second bow !
ReplyDeleteI always thought it was tied like a shoelace and I could never get it to look nice !
Thanks for sharing !
Rose
Thanks so much for sharing that!
ReplyDeleteI made a perfect bow from here! May I use your blog address so my readers can visit here if they want to make one too?
ReplyDeleteFor the first bow is there a certain kind of ribbon you need?
ReplyDelete