
Happy Tuesday!! I've seen lots of frosted glass projects on the Internet, but they all use the acid etch cream. You know me...I need something quick and easy and of course from the hardware store.
Here's a quick look at two projects I made before I left for work Monday morning.
This is the magical spray I used to make them.

I found this in the paint section in Walmart and Home Depot.

semi transparent for privacy and decoration...the back of the can has full directions, but it's so easy.
- clean surface with soap and water...dry
- add stencils or stickers if using for decor
- spray a few thin wet coats a minute or 2 apart
- let dry 10 minutes
- done, dry in 10 minutes!!!
- stinks a little when wet, so spray in the garage or outside

use any glass...

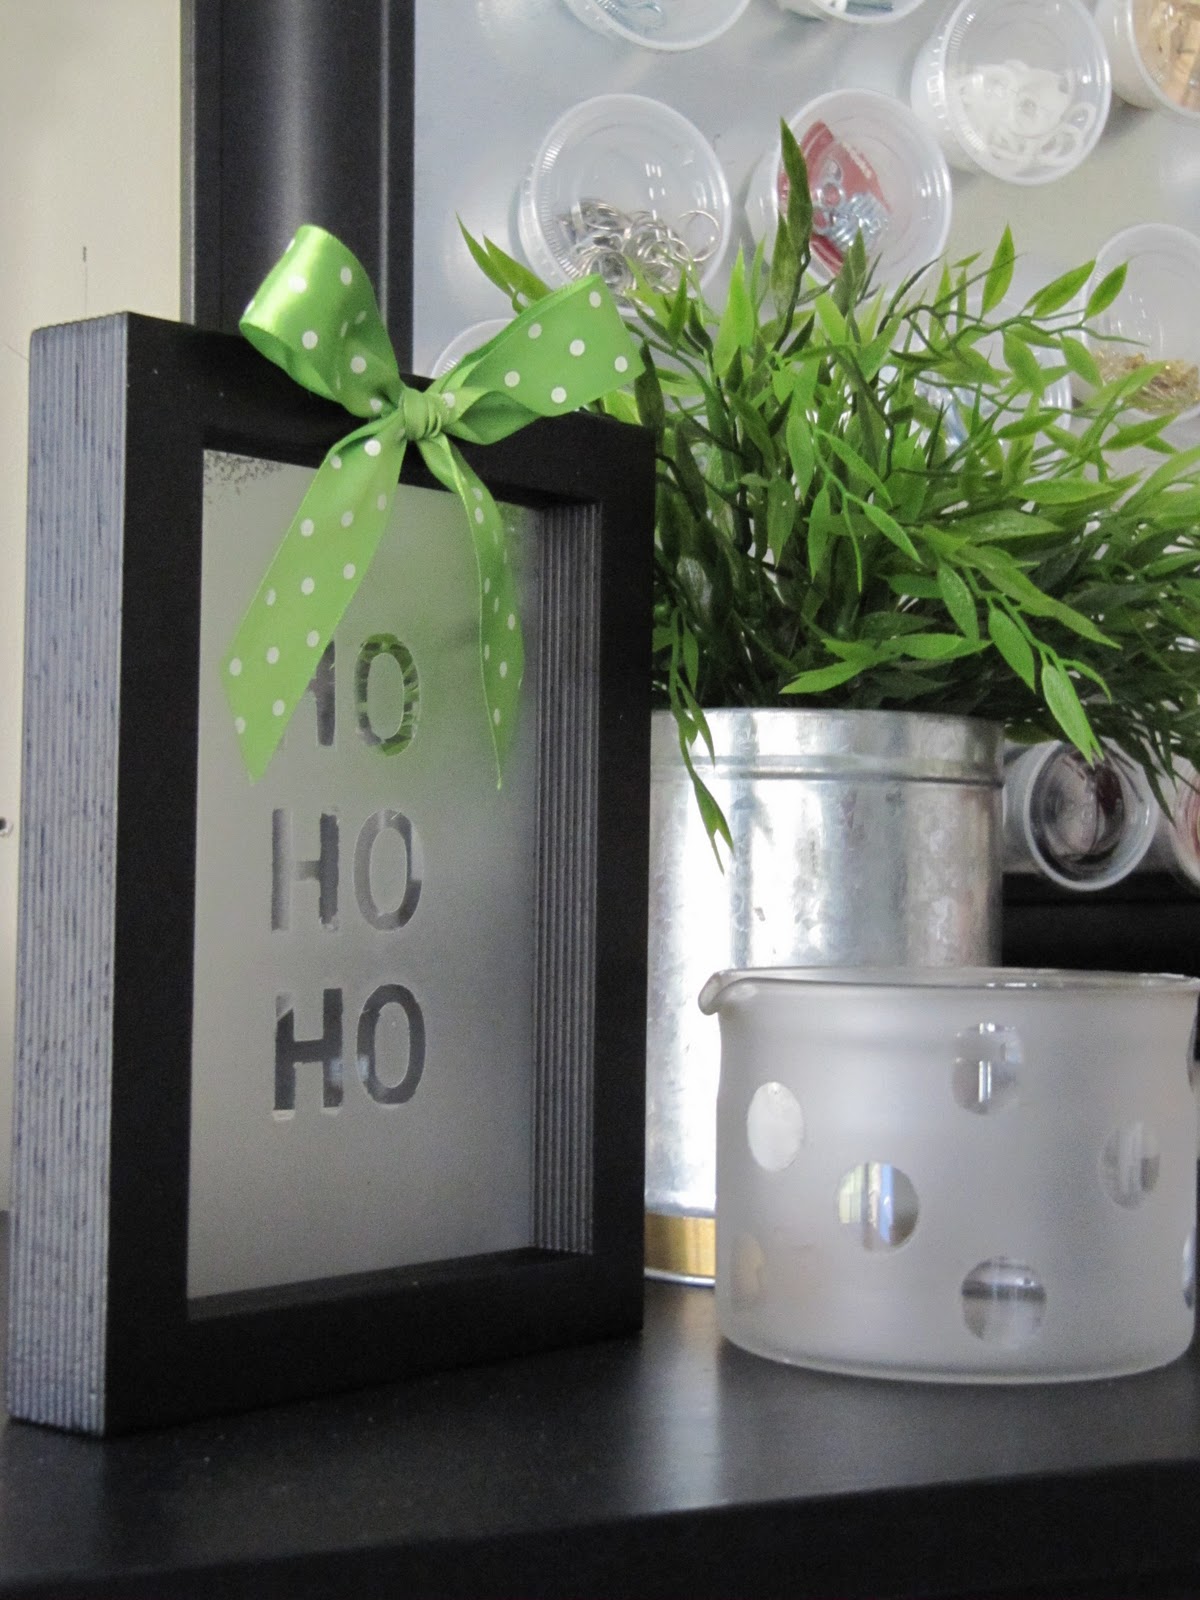
use sticker stencils to create the look where the sticker is going to be clear and the object will be frosted. Use a hollow stencil where that will be frosted and the object stays clear glass. You need to block out the rest of the object with something if you just want the stencil to be frosted

I centered the stickers on the glass of an old frame


and used office dots to stick to a glass dish.

really press down the edges, so the spray won't go underneath the paper stickers.

10-15 minutes later the frosted appearance shows up.

peel away the stickers.

The top corners of this frame had some residue on there because I didn't wash it first. The frosting didn't fully take there, but still looks like a decoration.


difficult to capture the clear and frosted parts in a picture.

but super cute in person.


add a bow to the frame and it's a quick gift.

add a votive candle and the glow is very pretty through the frosted and clear circles.


here are a few suggestions and tips...
- glass squares sprayed with a single monogram letter for coasters
- personalized vase
- use old jars and frost the names for sugar, flour, coffee and tea for a canister set
- frost a big jar for pet treats
- frost decorations on mirrors, windows, outside of shower stalls etc
- can't be used on things that will be heated over 200 degrees
- can't be used on things with constant water contact, but can be hand washed
- you can remove it from glass with acetone or lacquer thinner
Have a great Tuesday,
~Karen~
Love it. Much easier!
ReplyDeleteHere is a cool one: you can do this on a window and remove it easily - no nasty solvents (say for holidays - heart for valentines, etc). Put clear contact on the window. Cover the whole pane, spray as you would with the temporary "snow". Allow to dry. Keep up for the entire season and then peel off when done. Now if you want to reuse this cool window treatment - save the backing and put it back on when you are done.
ReplyDeleteI used this with regular spray paint many years ago when I taught daycare. It was "de bomb".
Wanda
http://wandas-quilts-crafts.blogspot.com/
That is really cute. I never knew such paint existed. It's so easy , even I can do it!!
ReplyDeletehey! looks like fun - thanks for sharing :)
ReplyDeleteLove It!
ReplyDeleteGreat idea and so quick! Thanks for sharing, Karen. Merry Christmas.
ReplyDeleteFun Fun and will have to try this out. Thanks for a great idea again!!
ReplyDeleteAmazing as always. Can't wait to try this!
ReplyDeleteWhat a great and easy way to do this.
ReplyDeleteThanks Karen, I'll see if we can get it here..
I don't know if we have a product like that here but I'm going to check it out. The projects look wonderful. I'd like some personalised glasses.
ReplyDeleteThis looks so much easier than etching glass!
ReplyDeleteAnother awesome idea! Two days ago I got the brick clips and for the first time ever, have a wreath in our kitchen that has one brick wall. Now I get to go back to the hardware store and get this great spray! So much easier than acid etching. Thanks and keep the ideas coming.
ReplyDeleteTHAT is too cute! Love the HO HO HO! Another good project!
ReplyDeleteHello Karen, I love your etched glass creations. I live in Australia so I hope I can find a similar product here because I can't wait to give it a go! Thanks for sharing! :)
ReplyDeleteThat's a neat idea. I'm gonna have to quit reading blogs my project lists are getting longer and longer.
ReplyDeleteThanks for Sharing
I used the idea with the stickers but when I went to take them off, some of the paint peeled off with it! What did I do wrong!? :(
ReplyDelete